
3-Ingredient Chocolate Coconut Balls

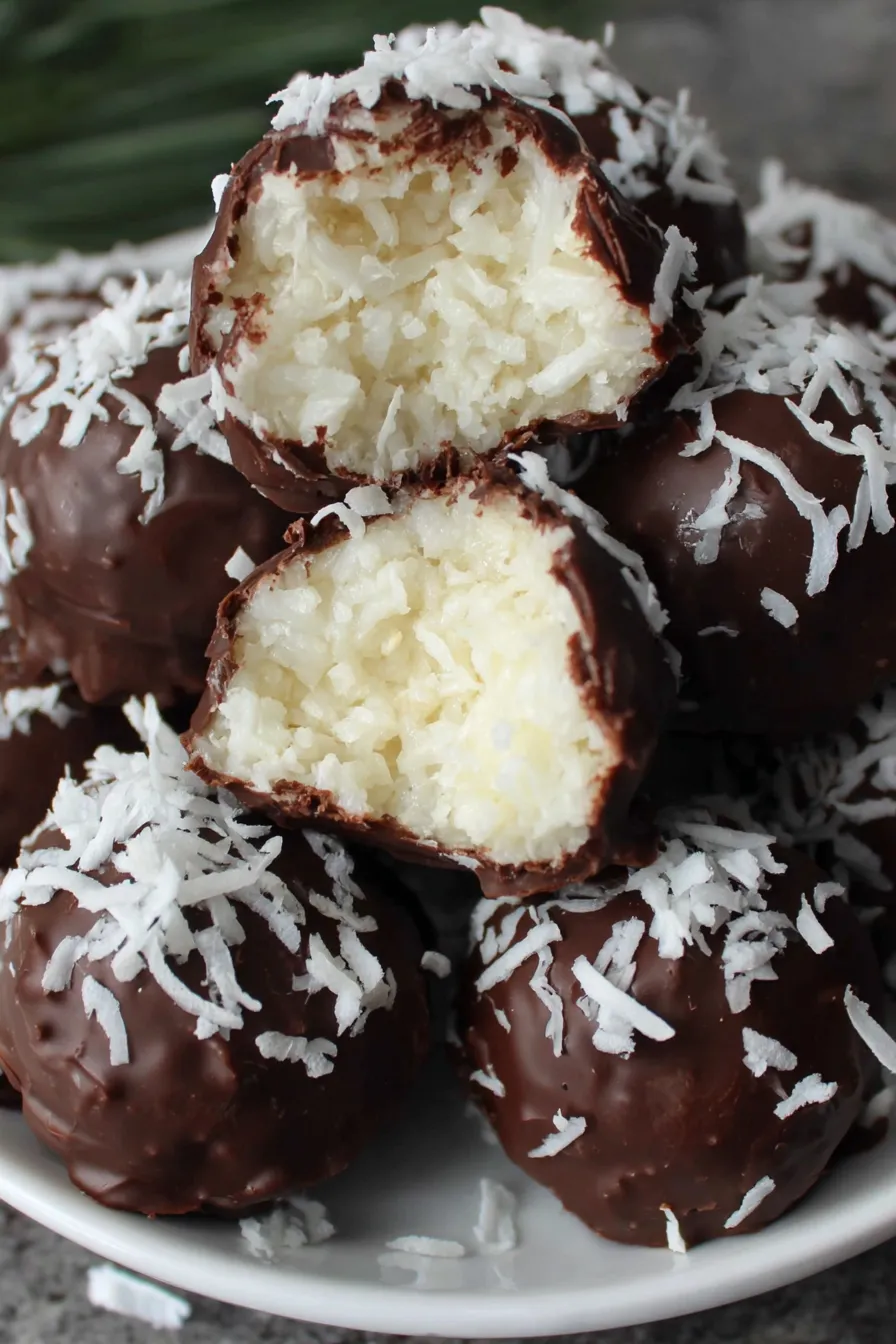
No-bake chocolate coconut balls made with just shredded coconut, condensed milk, and dark chocolate. Quick, crowd-pleasing, and perfect for gifting.
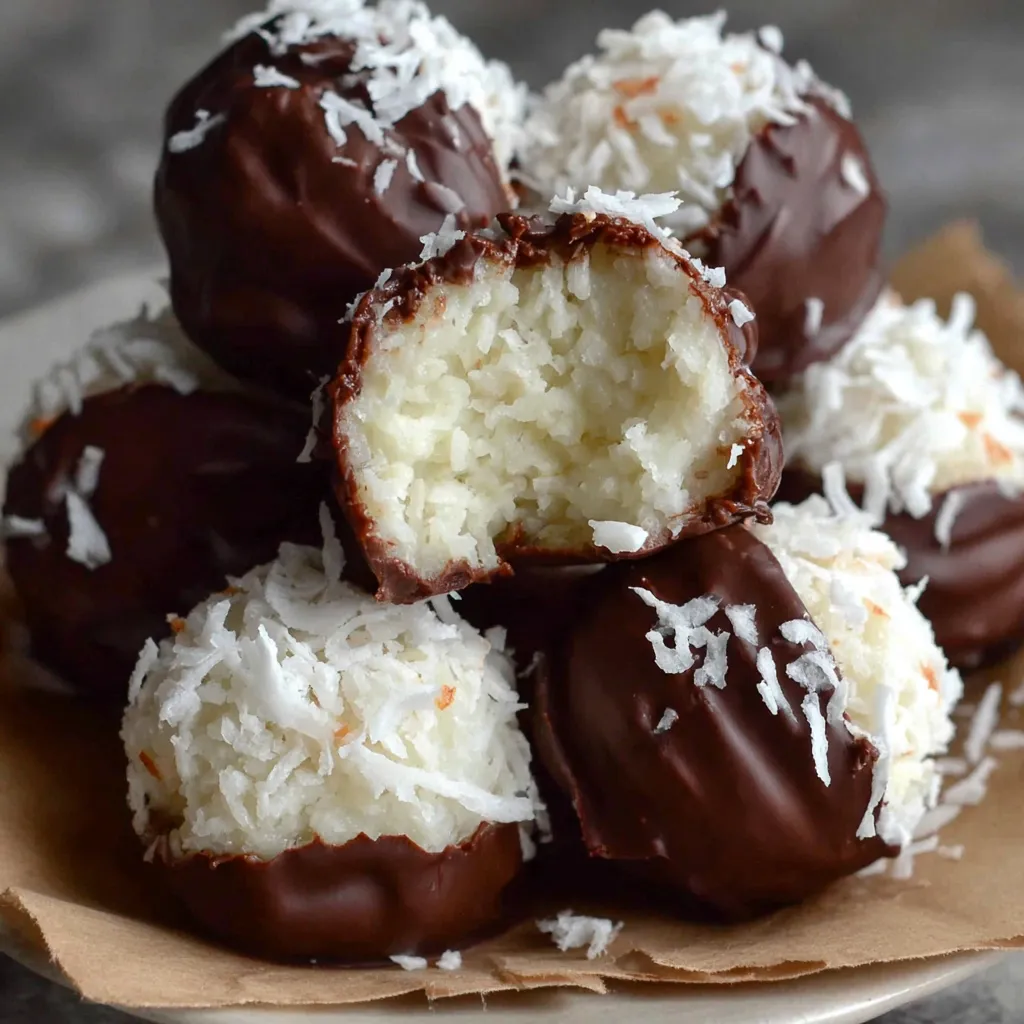
This simple three ingredient treat has been my go to when I want something sweet that feels special but does not require an armory of pantry items. I first made these coconut chocolate balls on a rainy afternoon when the kids wanted to bake and the pantry offered only shredded coconut and a tin of condensed milk. The combination produced a rich, chewy center coated in glossy dark chocolate that everyone raved about. They are indulgent without being overly sweet because the unsweetened coconut brings texture and a nutty backbone while the dark chocolate adds depth.
What I love most is how forgiving the method is. You can make them tiny for bite size treats or a little larger for an elegant petit four. The condensed milk binds the coconut beautifully so there is no need for eggs or flour. They set quickly in the fridge making them perfect for last minute celebrations, packed lunches, or a simple after dinner nibble with coffee. Over the years I have adapted the ratio slightly for humidity and different coconut textures, and I include those adjustments below so every batch turns out just right.
Why You'll Love This Recipe
- Only three main ingredients so shopping is simple and the recipe is budget friendly for regular baking needs.
- No oven required which saves time and keeps the kitchen cool during summer gatherings.
- Ready in about 30 minutes including chilling time, making these ideal for quick party prep or spontaneous dessert cravings.
- Adaptable to dietary preferences by swapping condensed milk for coconut condensed milk to make them dairy free.
- Uses pantry staples so you can scale the quantities easily for gifting or small batch testing.
- Textural contrast between chewy coconut interior and crisp chocolate shell makes every bite satisfying.
I remember gifting a tin of these to neighbors the week I moved into my current home and everyone kept asking for the recipe. They are consistently praised by kids and adults alike and travel well in a container for potlucks. The recipe has saved many last minute dessert dilemmas and still feels thoughtful when presented on a simple platter.
Ingredients
- Shredded coconut, unsweetened: Use two cups of loose packed unsweetened shredded coconut. I prefer larger flakes for more texture. If using finely desiccated coconut, you may need a touch less condensed milk to avoid a sticky mix.
- Sweetened condensed milk or coconut condensed milk: One cup binds the coconut into a thick, moldable mixture. Regular condensed milk gives a classic flavor and coconut condensed milk creates a dairy free version with a subtler sweetness.
- Dark chocolate, 3.5 ounces: Choose a chocolate around 60 to 70 percent cocoa for balance. Chocolate chips or a small bar both work; chop larger bars for easier melting. Select a brand you enjoy eating by the bar because it shines when used as a coating.
Instructions
Mix the coconut and condensed milkPour the two cups of shredded coconut into a medium bowl. Add one cup of condensed milk and use your hands to mix until a thick, slightly tacky mixture forms. The mixture should hold together when pressed. If it seems dry, add a teaspoon more condensed milk. Work quickly so the mixture does not become overly warm.Form the ballsUsing one to two tablespoons of mixture per ball, roll into even rounds with lightly floured or dampened hands to prevent sticking. Aim for uniform size so they set evenly. Place each formed ball on a lined baking sheet. If you want perfectly round shapes, chill slightly first and then roll again for a smoother finish.Chill to solidifyPlace the tray in the refrigerator for 15 to 30 minutes to firm up. If short on time, freeze the balls for five to ten minutes until they are solid but not frozen through. Proper chilling helps the chocolate adhere cleanly without melting the center.Melt the chocolateChop the chocolate if using a bar and melt in a microwave in 20 to 30 second bursts, stirring between each increment until smooth. Alternatively, use a double boiler. Take care not to overheat; a few small unmelted pieces, stirred until smooth, will prevent burning.Coat the balls in chocolateUse a fork or dipping tool to lower each chilled coconut ball into the melted chocolate and lift it out allowing excess chocolate to drip back. Transfer to a wire rack set over parchment to catch any drips. If desired, spoon additional chocolate over any thin spots then let it set at room temperature before refrigerating to fully harden.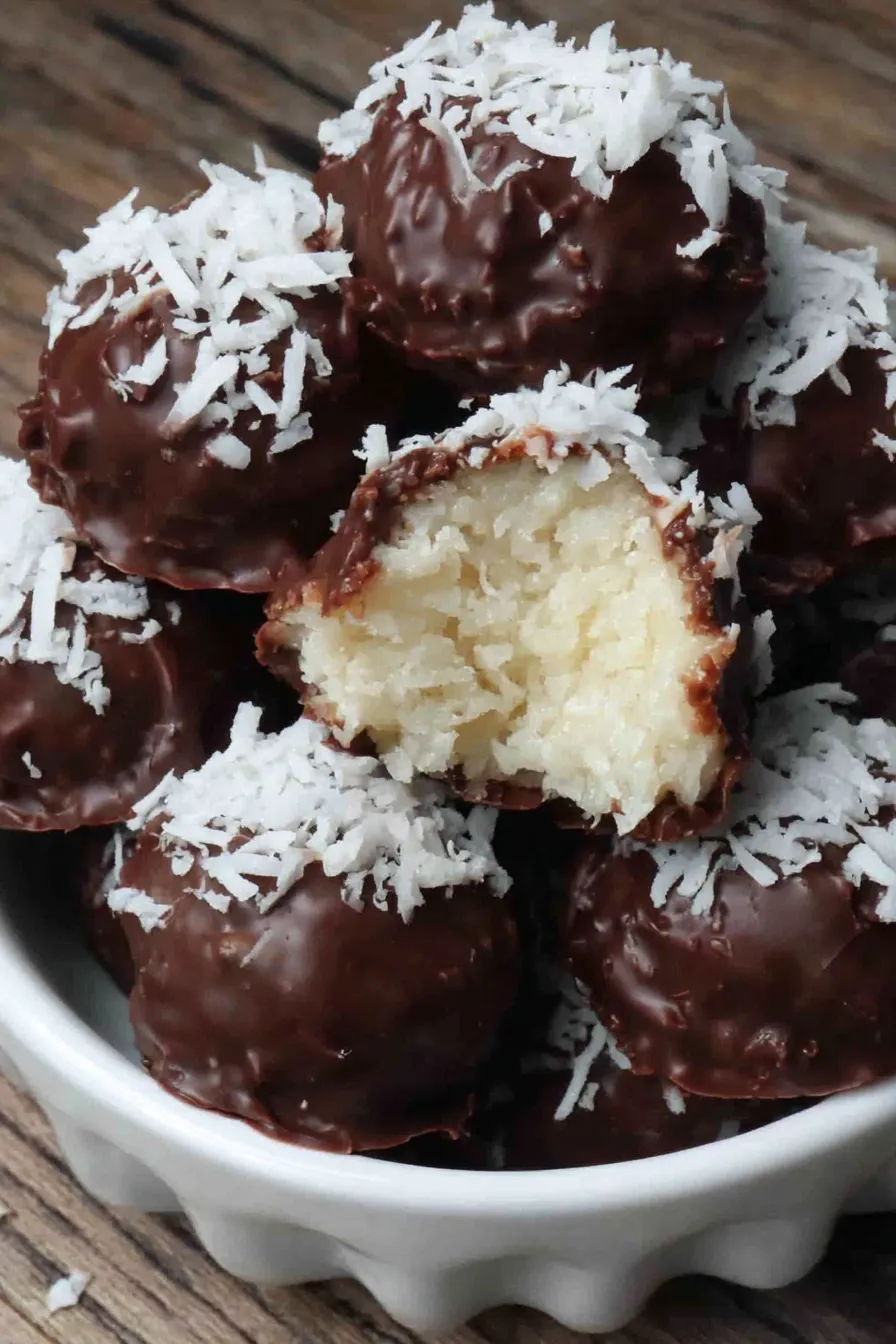
You Must Know
- These keep well in the refrigerator for up to two weeks when stored in an airtight container on parchment to prevent sticking.
- They freeze well for up to three months. Thaw overnight in the refrigerator and bring to room temperature before serving for the best texture.
- Using unsweetened shredded coconut controls sweetness; regular canned condensed milk is sweet so taste the chocolate before adding extra toppings.
- If the chocolate blooms after storage, it is still safe to eat; gently re-melt and recoat if appearance matters.
My favorite part of these is how portable they are. I have stored them in a small tin with layers of parchment between rows for gifting. Friends have reported enjoying them with tea on a rainy afternoon and at holiday cookie swaps where they were often the first items to disappear. I like to keep a small batch in the freezer for unexpected guests which makes entertaining effortless.
Storage Tips
Store cooled treats in an airtight container layered with parchment to avoid sticking. Keep them in the refrigerator for up to two weeks for best texture. For longer storage, freeze on a tray until firm then transfer to a freezer safe container and separate layers with parchment. Thaw in the refrigerator overnight to prevent condensation forming on the chocolate surface, then bring to room temperature before serving for the best mouthfeel.
Ingredient Substitutions
If you need a dairy free version, swap regular sweetened condensed milk for coconut condensed milk or a canned sweetened coconut creamer. For a less sweet interior, use light sweetened condensed milk or reduce the condensed milk by one to two teaspoons when using finely shredded coconut. Swap dark chocolate for milk or white chocolate for a sweeter coating. You can also add a teaspoon of vanilla extract or one to two teaspoons of cocoa powder to the coconut mix for flavor variation.
Serving Suggestions
Arrange them on a small platter with a dusting of cocoa or a sprinkle of toasted coconut for a polished look. They pair beautifully with a strong coffee or a light dessert wine. For a festive table, place each on a mini cupcake liner or garnish with a tiny edible gold leaf. They also make excellent additions to homemade gift boxes alongside biscotti or spiced nuts.
Cultural Background
These little confections draw from traditions of combining shredded coconut with sweetened condensed milk to create chewy sweets found in many cuisines. Versions can be seen across Australia, Latin America, and parts of Southeast Asia where coconut is abundant. The addition of a chocolate coating is a modern twist that adds texture and a slightly bitter counterpoint to the sweet center.
Seasonal Adaptations
In winter I like to add a pinch of ground cinnamon or orange zest to the coconut mixture for warmth. In summer, roll the centers in finely chopped freeze dried raspberries before chilling for a fruity surprise. For holidays, mix in a teaspoon of instant espresso for depth or press a whole toasted almond into the top before the chocolate sets for an elegant touch.
Meal Prep Tips
Make the centers several days in advance and freeze them on a sheet tray. Once solid, store in a freezer safe container. Melt and coat the centers on the day you need them. This two step approach allows quick finishing when you are short on time and prevents the chocolate from softening if you need to transport them to a gathering.
These coconut chocolate balls are simple to make, adaptable to many tastes, and always a crowd pleaser. They are one of those small projects that reward you with big flavor and plenty of smiles, so try a batch this week and make them your own.
Pro Tips
If your mixture is too sticky add a teaspoon of shredded coconut at a time until it holds together easily.
Chill the formed centers well before dipping to prevent the chocolate from melting the interior.
Use a fork and tap gently on the edge of the bowl to release excess chocolate for a neater finish.
If chocolate thickens while dipping, stir in a teaspoon of neutral oil to loosen it slightly.
This nourishing 3-ingredient chocolate coconut balls recipe is sure to be a staple in your kitchen. Enjoy every moist, high protein slice — it is perfect for breakfast or as a wholesome snack any time.
FAQs about Recipes
Can I make these dairy free?
Yes. For a dairy free option use sweetened coconut condensed milk instead of regular condensed milk and choose a dairy free chocolate.
How long do they keep in the freezer?
Freeze on a tray until solid then transfer to a freezer safe container for up to three months. Thaw in the fridge overnight.
Tags
3-Ingredient Chocolate Coconut Balls
This 3-Ingredient Chocolate Coconut Balls recipe makes perfectly juicy, tender, and flavorful steak every time! Serve with potatoes and a side salad for an unforgettable dinner in under 30 minutes.
Ingredients
Main
Instructions
Combine coconut and condensed milk
Place two cups shredded coconut in a bowl and pour in one cup condensed milk. Mix with hands until the mixture is thick and holds together when pressed. Adjust with small amounts of extra coconut or milk if texture needs balancing.
Shape into balls
Scoop one to two tablespoons of the mixture and roll into even rounds with lightly damp hands. Place on a lined baking sheet with space between each to chill.
Chill until firm
Refrigerate for fifteen to thirty minutes or freeze for five to ten minutes until the centers are firm but not frozen solid. Proper chilling prevents the chocolate from melting the interior during coating.
Melt the chocolate
Melt three and a half ounces of chocolate in a microwave in twenty to thirty second bursts, stirring between bursts, or use a double boiler. Stir until smooth and glossy.
Dip and set
Dip each chilled ball into the melted chocolate using a fork, tapping gently to remove excess, then transfer to a wire rack over parchment. Let the chocolate set at room temperature before refrigerating to fully harden.
Store and serve
Store in an airtight container in the refrigerator for up to two weeks or freeze for longer storage. Bring to room temperature before serving for best texture.
Last Step: Please leave a rating and comment letting us know how you liked this recipe! This helps our business to thrive and continue providing free, high-quality recipes for you.
Nutrition
Did You Make This?
Leave a comment & rating below or tag
@gusteen on social media!
Categories:
You might also like...

Fudgy Mississippi Mud Brownies
Ultra-fudgy brownies crowned with melty marshmallows and a glossy cocoa icing. A nostalgic crowd-pleaser that slices cleanly and disappears fast.

Buttery Pecan Pie Bars
Buttery shortbread crust meets gooey brown-sugar pecan filling in these quick, crowd-pleasing bars, prepped in just 10 minutes.

No-Crack Pumpkin Cheesecake
Ultra-smooth pumpkin cheesecake with warm spice, sturdy graham crust, and a foolproof, crack-free bake. Perfect with caramel and whipped cream.
Did You Make This?
Leave a comment & rating below or tag @gusteen on social media!
Rate This Recipe
Share This Recipe
Enjoyed this recipe? Share it with friends and family, and don't forget to leave a review!
Comments (1)
This recipe looks amazing! Can't wait to try it.
Comments are stored locally in your browser. Server comments are displayed alongside your local comments.

Hi, I'm Charlotte!
What's Popular

30-Minute Meals!
Join to receive our email series which contains a round-up of some of our quick and easy family favorite recipes.