
>>

Chewy oat cookie bars layered with milk chocolate and a buttery caramel sauce — a nostalgic treat that's simple to make and perfect for sharing.
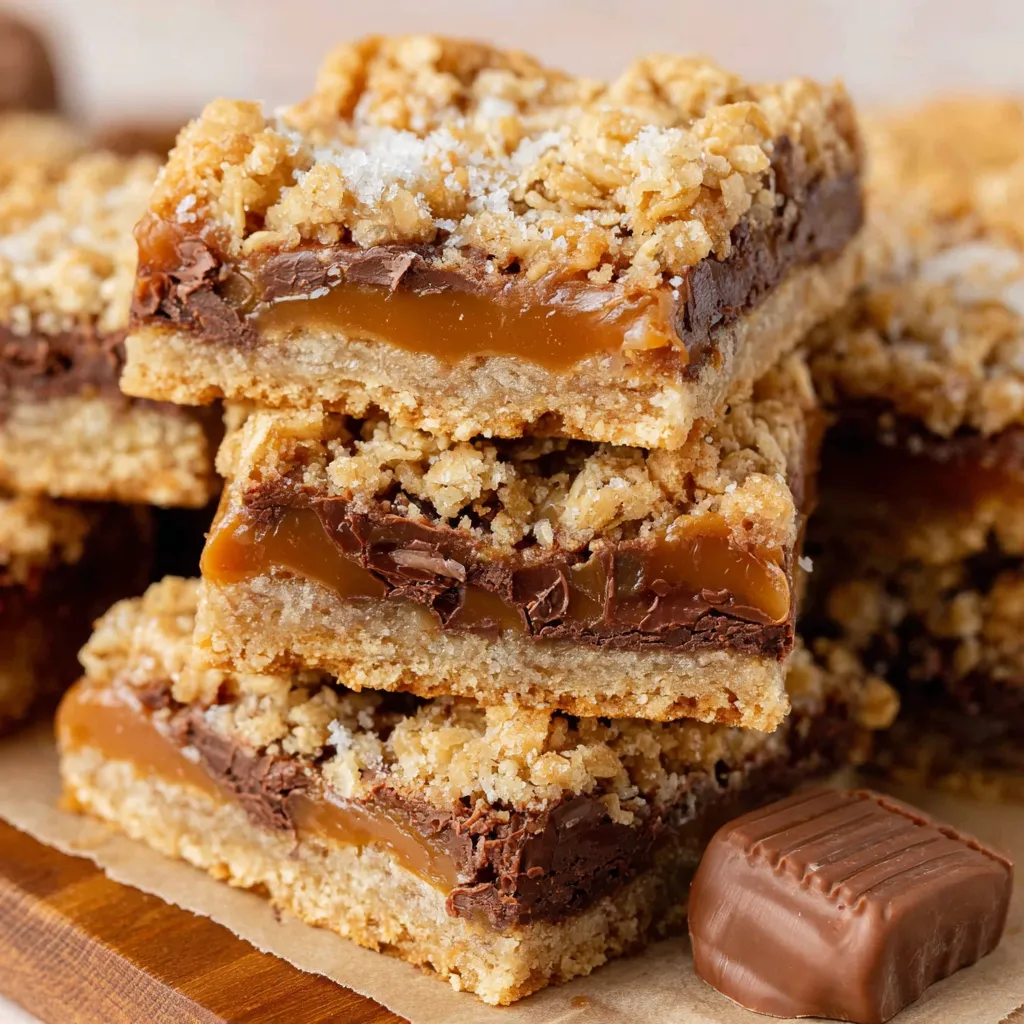
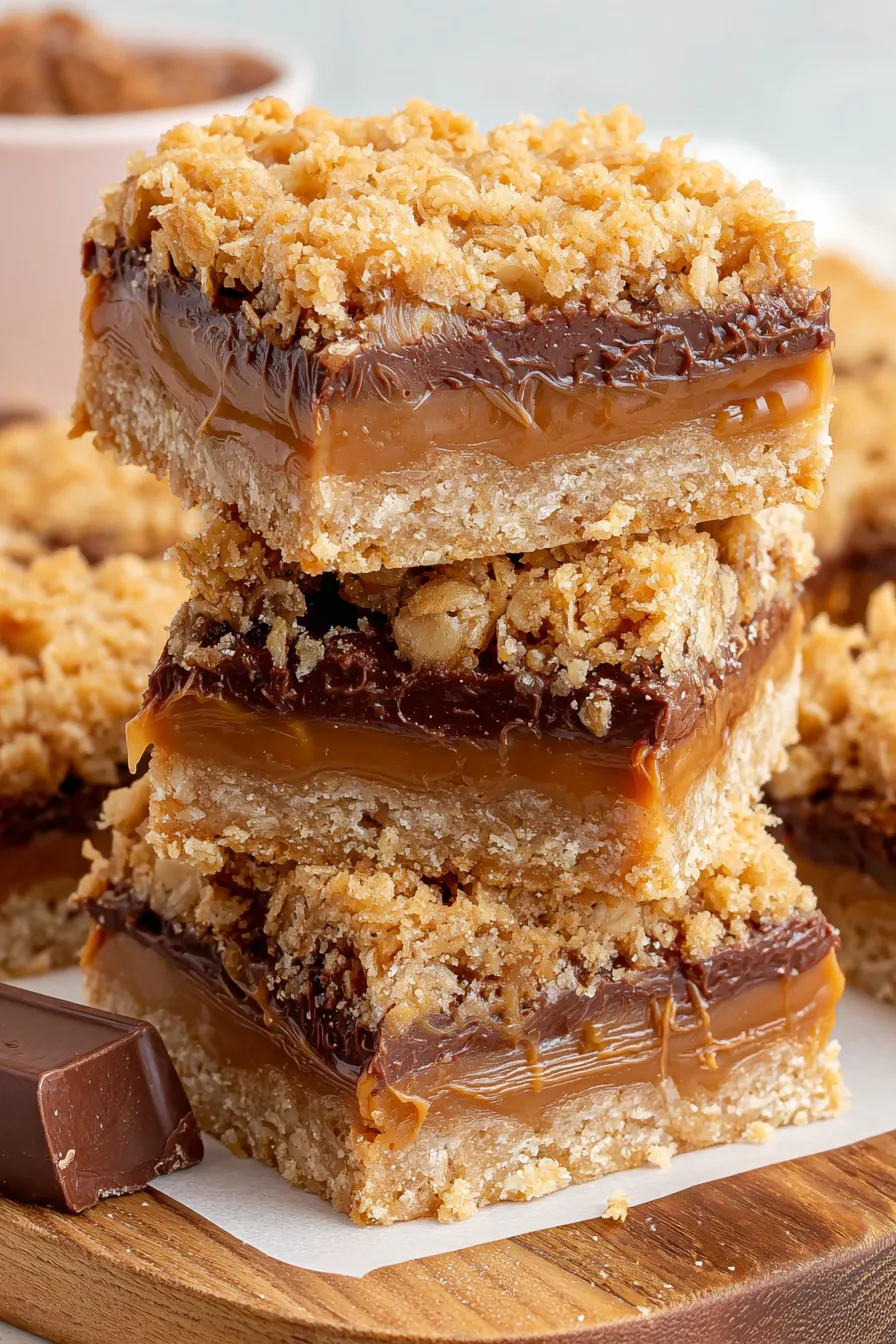
This batch of carmelitas has been my go-to for holiday plates and after-school treats ever since I stumbled on a simpler version of the classic bar during a rainy weekend baking binge. I remember unwrapping the first gooey pieces with a cup of coffee and thinking how such humble pantry staples—oats, butter, brown sugar, chocolate, and caramels—could combine into something that felt indulgent and familiar at the same time. The texture is the star here: a slightly crumbly, buttery oat base that crisps a little at the edges, topped with a glossy milk chocolate layer and a soft, chewy caramel center that pulls apart when you slice into it.
What makes these so special is how forgiving they are. I baked my first pan when I didn’t have eggs on hand and expected a flop; instead I got sweet, balanced bars that became the centerpiece of a casual potluck. They travel well, last for several days in the fridge, and are easy to scale up. These carmelitas deliver complex, rich flavor with minimal effort—ideal for bakers who want a reliable dessert without fussy technique.
My family always asks for these when there’s a get-together at our house. Once, I brought a pan to a neighbor’s barbecue and it disappeared before the main course was even finished—neighbors came back asking for the recipe the next day. That kind of instant approval is hard to beat.
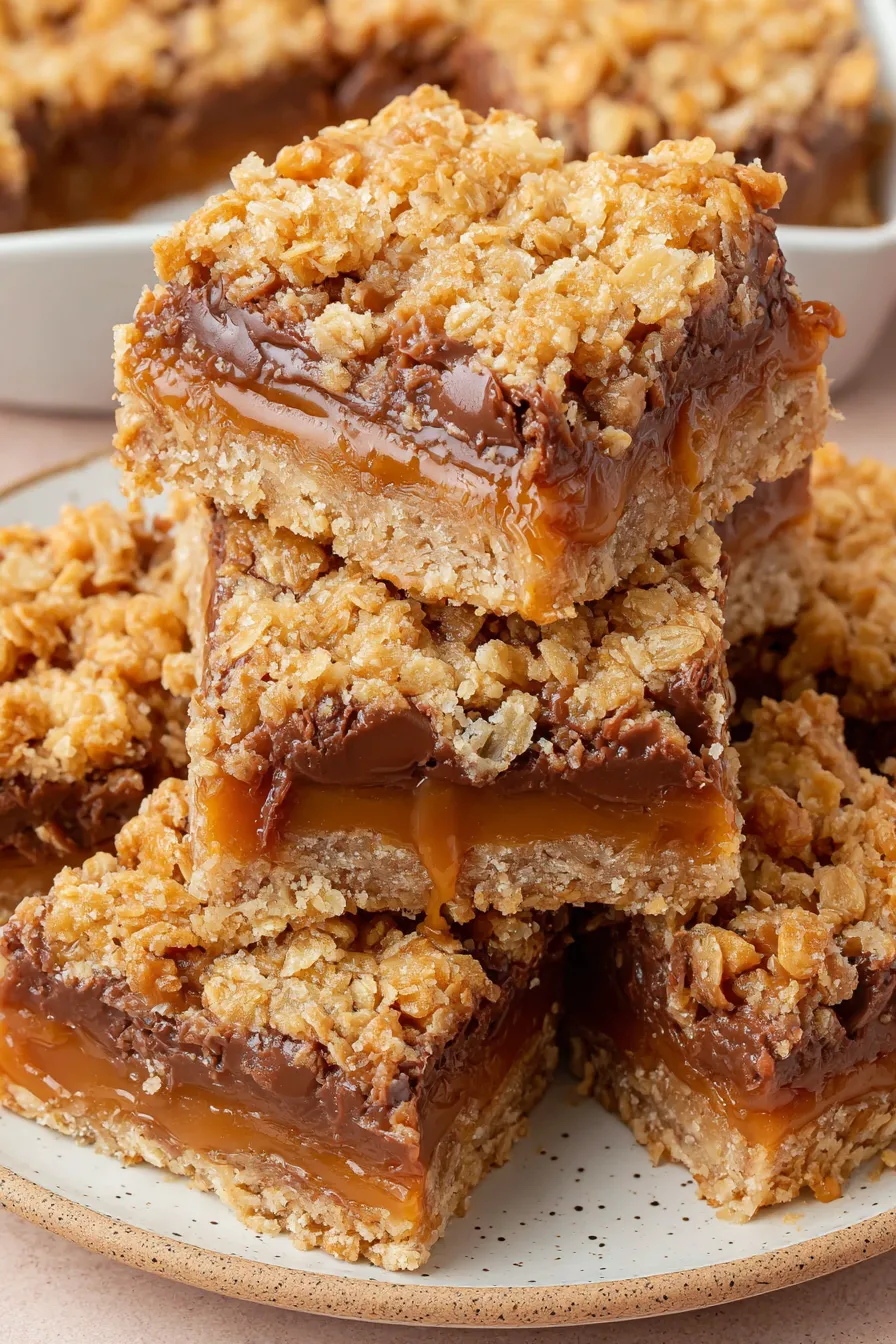
My favorite part is the way the caramel tucks into the pockets of the oat crumb—each bite offers a mix of textures. Guests often ask whether I used homemade caramel; the answer is always no, because the individually wrapped caramels make this so much easier without sacrificing flavor. It’s a small baking convenience that yields big results.
Once cooled, store the bars in an airtight container in the refrigerator for the best texture and easiest slicing—they keep 4–5 days chilled. To freeze, wrap individual bars in plastic wrap and place in a freezer-safe bag for up to 3 months; thaw in the fridge overnight. Reheat briefly in a warm oven (275°F for 8–10 minutes) if you want the caramel slightly gooey again.
If you need dairy-free options, use dairy-free butter and swap the heavy cream for a full-fat coconut cream; choose dairy-free caramel candies designed for melting. For less sweetness, reduce the chocolate chips to 1 cup and use semi-sweet chips. Gluten-free oats and a certified gluten-free flour blend will make this safe for gluten-sensitive eaters, though texture will vary slightly.
Serve chilled squares with a sprinkle of flaky sea salt for contrast, or pair with coffee or a simple vanilla ice cream scoop for a nostalgic dessert. For gatherings, arrange on a tiered platter with small cards labeling allergens. These also make excellent gifts wrapped in parchment and ribbon.
Bars like these hail from North American home baking traditions where layered cookie bars became popular in mid-20th century cookbooks. Carmelitas are a cousin to the more famous seven-layer bars and magic bars—each uses an accessible base and sweet layers to create something more complex than its ingredients imply. The nostalgia factor is high because these flavors evoke school bake sales and family kitchens.
In autumn, swap milk chocolate for chopped dark chocolate and stir in 1 teaspoon pumpkin pie spice to the base. For winter holidays, add ½ cup chopped toasted pecans between the chocolate and caramel for crunch. In summer, keep them chilled and serve with fresh berries on the side to cut the sweetness.
To streamline, prepare the crumb base and press into the pan up to two days ahead and keep refrigerated. When ready to finish, par-bake, melt chocolate and caramel, assemble, and chill. For batch cooking, double the recipe and bake in two 9×13 pans, increasing set time in the fridge.
There’s something comforting about a simple tray of carmelitas: they’re approachable to make, generous to serve, and reliably beloved. I hope this version becomes a staple in your rotation as it has in mine.
Press the bottom layer firmly and evenly for a stable base that supports the caramel layer without sinking.
Chill the pan for at least 1½–2 hours before slicing to ensure clean, neat pieces.
To slice perfectly even bars, use the parchment overhang to lift the slab and warm the knife under hot water, wiping between cuts.
This nourishing carmelitas recipe is sure to be a staple in your kitchen. Enjoy every moist, high protein slice — it is perfect for breakfast or as a wholesome snack any time.
This Carmelitas recipe makes perfectly juicy, tender, and flavorful steak every time! Serve with potatoes and a side salad for an unforgettable dinner in under 30 minutes.
Preheat oven to 350°F. Line a 9x9-inch baking dish with parchment leaving an overhang and lightly grease the paper.
Combine flour, oats, melted butter, brown sugar, vanilla, baking soda, and kosher salt in a large bowl; stir until just combined.
Press half the mixture evenly into the prepared pan and bake for 10 minutes until set and lightly golden.
Remove pan from oven and immediately sprinkle milk chocolate chips evenly over the warm base so they begin to soften.
In a small saucepan over medium heat, melt unwrapped caramels with heavy cream, stirring until smooth. Alternatively, microwave in 45-second intervals.
Pour warm caramel over the softened chocolate chips, then sprinkle the remaining cookie crumb over the caramel layer.
Bake 20 minutes until top is golden and firm, cool 10–15 minutes, then refrigerate 1½–2 hours until completely set.
Lift bars using the parchment overhang, transfer to a cutting board, and slice into 16 pieces. Warm the knife between cuts for cleaner slices.
Last Step: Please leave a rating and comment letting us know how you liked this recipe! This helps our business to thrive and continue providing free, high-quality recipes for you.
Leave a comment & rating below or tag
@gusteen on social media!

Ultra-fudgy brownies crowned with melty marshmallows and a glossy cocoa icing. A nostalgic crowd-pleaser that slices cleanly and disappears fast.

Buttery shortbread crust meets gooey brown-sugar pecan filling in these quick, crowd-pleasing bars, prepped in just 10 minutes.

Ultra-smooth pumpkin cheesecake with warm spice, sturdy graham crust, and a foolproof, crack-free bake. Perfect with caramel and whipped cream.
Leave a comment & rating below or tag @gusteen on social media!
Enjoyed this recipe? Share it with friends and family, and don't forget to leave a review!
This recipe looks amazing! Can't wait to try it.
Comments are stored locally in your browser. Server comments are displayed alongside your local comments.

Join to receive our email series which contains a round-up of some of our quick and easy family favorite recipes.
