
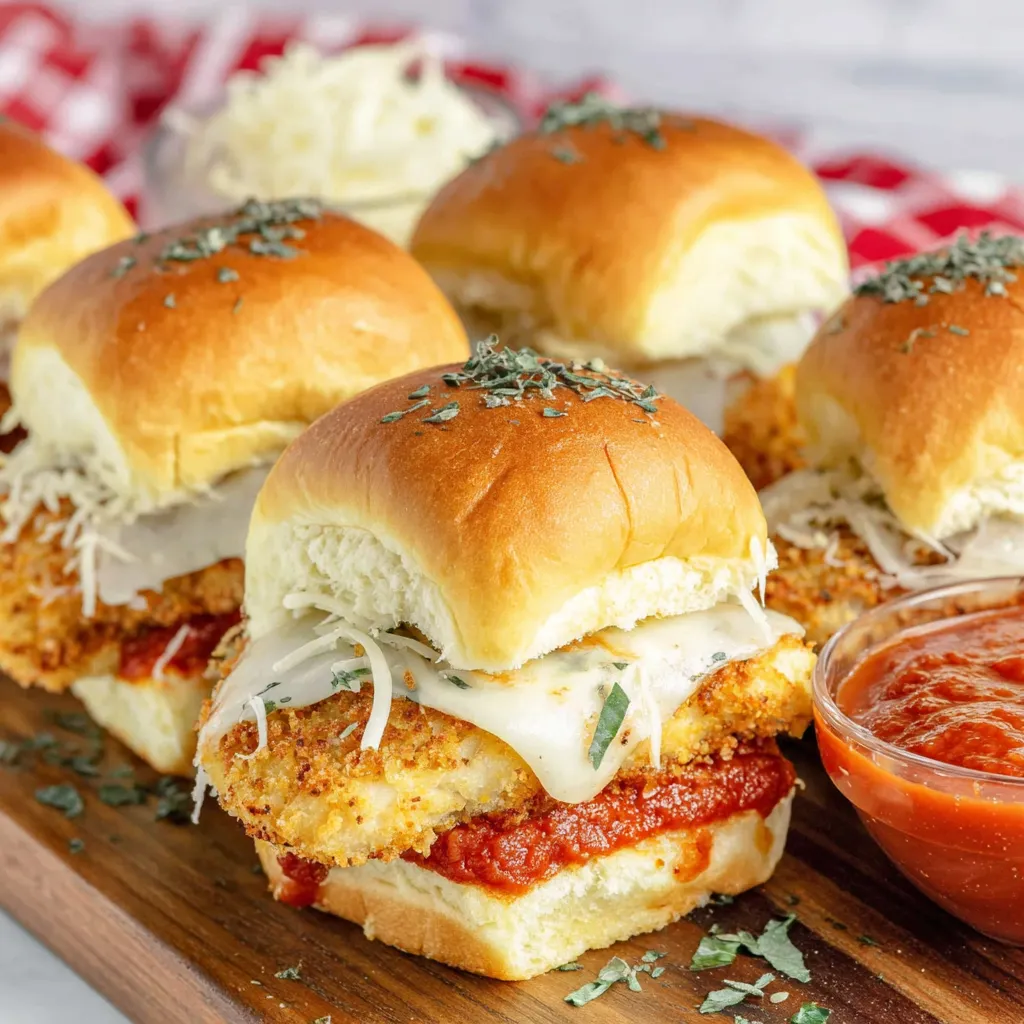
Chicken Parmesan Sliders

Crispy Southern-style chicken tucked into soft slider buns, layered with marinara and mozzarella, brushed with garlic-butter and finished with grated Parmesan—perfect for parties and weeknight dinners.
This recipe for Chicken Parmesan Sliders is one of those small-plate miracles that shows up whenever I need effortless crowd-pleasing comfort. I first put these together for a family movie night after discovering a sale on frozen Southern-style chicken tenderloins; the idea was to turn familiar pantry staples into something shareable and hand-held. The result was a tray of golden, cheesy sliders that disappeared within minutes. The combination of crisp, breaded chicken, bright marinara, melty mozzarella, and a garlic-butter brushed top is simple but specific—it hits crunchy, saucy, and savory notes in every bite.
What I love most about these sliders is how forgiving they are. You can use store-bought marinara and pre-sliced cheese, and the assembly takes only a few minutes while the chicken finishes in the oven. They have become my go-to for casual get-togethers and busy weeknights: easy to scale, quick to put together, and reliably delicious. Taste-wise, expect warm tomato tang, the soft pull of melted mozzarella, and a buttery, herbed bun top finished with a sprinkle of Parmesan that gives just the right sharpness. Every family member, from teenagers to grandparents, asks for seconds.
Why You'll Love This Recipe
- Quick to assemble and perfect for feeding a crowd—ready in about 35 minutes of active time once the chicken is prepared, so you can multitask while it bakes.
- Uses pantry and freezer staples: frozen Southern-style chicken, jarred marinara, pre-sliced mozzarella, and store-bought slider buns—no specialty shopping required.
- Crowd-pleasing flavors: crispy chicken, warm tomato sauce, gooey cheese, and a garlic-butter brushed top that gives a restaurant-style finish.
- Great for make-ahead or reheating: assemble ahead and bake before guests arrive, or bake and reheat gently for leftovers without losing texture.
- Flexible for dietary tweaks: easy to swap marinara for a lower-sugar sauce or use gluten-free buns for guests with sensitivities.
I first tested this version on a rainy Sunday when friends stopped by unexpectedly; the sliders turned a casual drop-in into a proper event. My husband said they tasted better than any takeout we’d ordered recently, and my youngest declared them “perfect party food.” Over time I refined the butter-brush and Parmesan finish—those small steps create a big difference in both flavor and presentation.
Ingredients
- Frozen Southern-style chicken tenderloins (2.5 pounds): Choose a brand with a crisp coating designed for oven baking; the breading provides that classic crunch without extra dredging. I used a 2.5 lb package that bakes at 425°F for about 18–20 minutes.
- Slider buns (15 ounces, 12-count): Look for soft, slightly sweet slider buns in a 12-pack (15 oz is typical). The soft crumb soaks up sauce while holding its shape—potato-style buns work especially well.
- Marinara sauce (1 1/4 cups): Jarred marinara makes this fast—pick a variety you enjoy (low-sugar or herb-forward brands are great). Use a full-flavored sauce for balance against the buttery top.
- Mozzarella slices (6 sandwich slices): Pre-sliced, sandwich-size mozzarella makes a single-layer melt over the chicken; use whole-milk mozzarella for creamier results.
- Unsalted butter (1/4 cup, melted): Melted and brushed on top provides toasty color and savory richness. Unsalted lets you control saltiness when combined with garlic salt.
- Garlic salt (1/2 teaspoon) & dried parsley flakes (1/2 teaspoon): These flavor the butter for a classic garlic-parm finish; adjust to taste and use fresh parsley if you prefer a brighter herb note.
- Grated Parmesan (1 1/2 tablespoons): Finishes the tops with sharp, salty brightness—use real Parmigiano-Reggiano for the best aroma.
Instructions
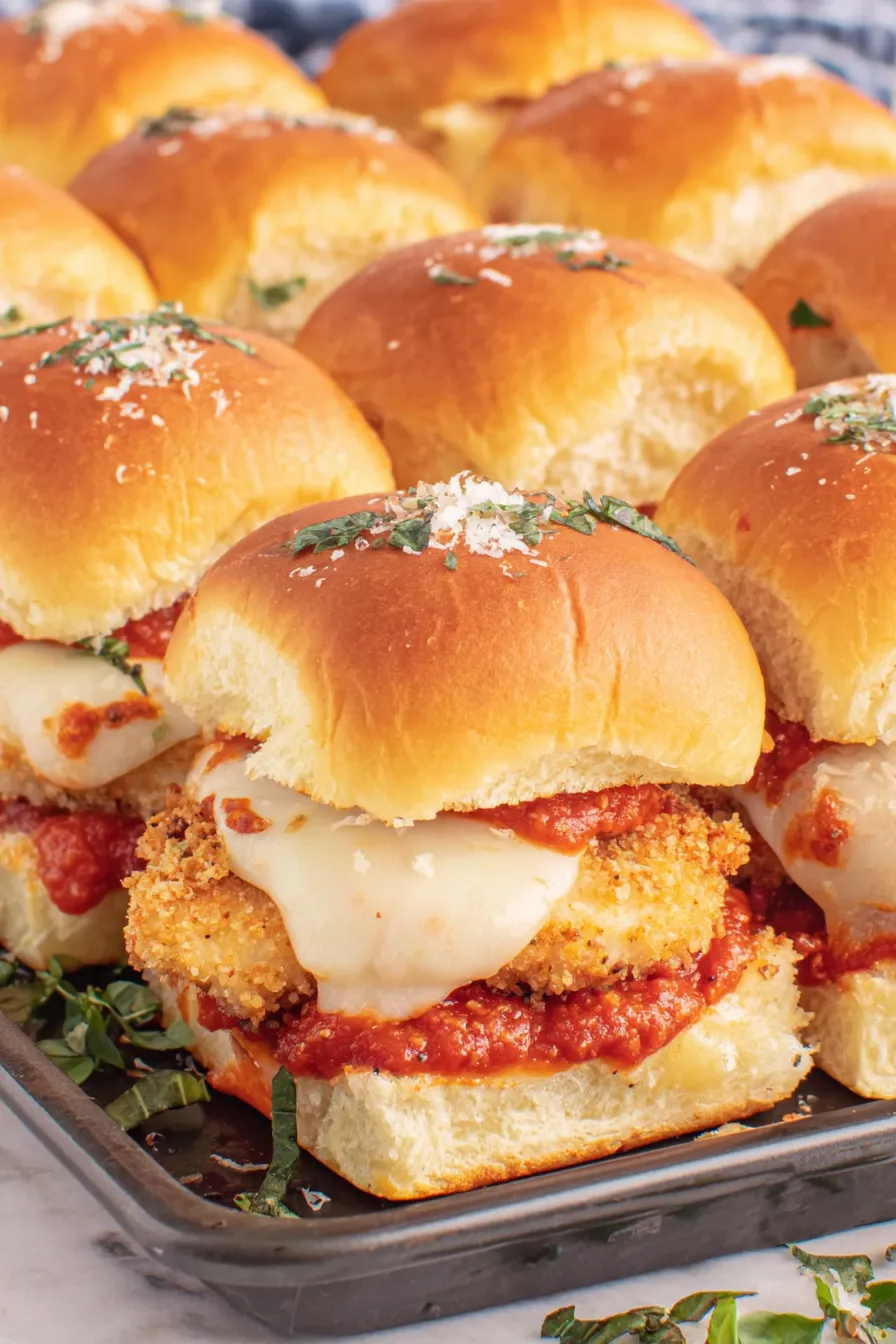
Prepare the chicken: Preheat your oven and cook the frozen Southern-style chicken tenderloins according to the package directions. For the brand I used, bake on a baking sheet in a 425°F conventional oven for 18–20 minutes until the internal parts are hot and the coating is crisp. Remove from the oven and reduce the oven temperature to 350°F for assembling the sliders. Arrange the buns and sauce: Place the bottom halves of a 12-count slider bun pack into a 9x13-inch baking pan in a snug single layer. Evenly spread half of the marinara sauce over the bottom buns using the back of a spoon, creating a saucy base that keeps the buns from drying in the oven. Layer the chicken: Arrange the cooked chicken tenderloins across the sauced buns in a continuous layer. It’s okay if the shape of the pieces varies; press them lightly so they cover as much surface as possible—the more contact with sauce and cheese, the better the meld of flavors. Add sauce and cheese: Spoon the remaining marinara over the chicken to add moisture and tomato flavor. Lay the six sandwich-sized mozzarella slices in a single overlapping layer to cover the chicken; you want an even melt rather than thick lumps of cheese. Close and butter the tops: Place the top halves of the slider buns over the cheese. In a small bowl, whisk together the melted butter, garlic salt, and dried parsley flakes. Brush the tops of the buns with about half of the butter mixture, reserving the rest for after baking. Bake until melty: Bake the assembled sliders at 350°F for 13–15 minutes, or until the cheese is melted and the bun tops are lightly toasted. Visual cues: cheese should be fully melted and glossy, and edges of buns should show golden color. Finish and serve: Remove the pan from the oven and immediately brush the remaining garlic-butter mixture across the tops for extra shine and flavor. Sprinkle the grated Parmesan over the tops. Using a sharp knife, slice the pan into 12 individual sliders and serve hot.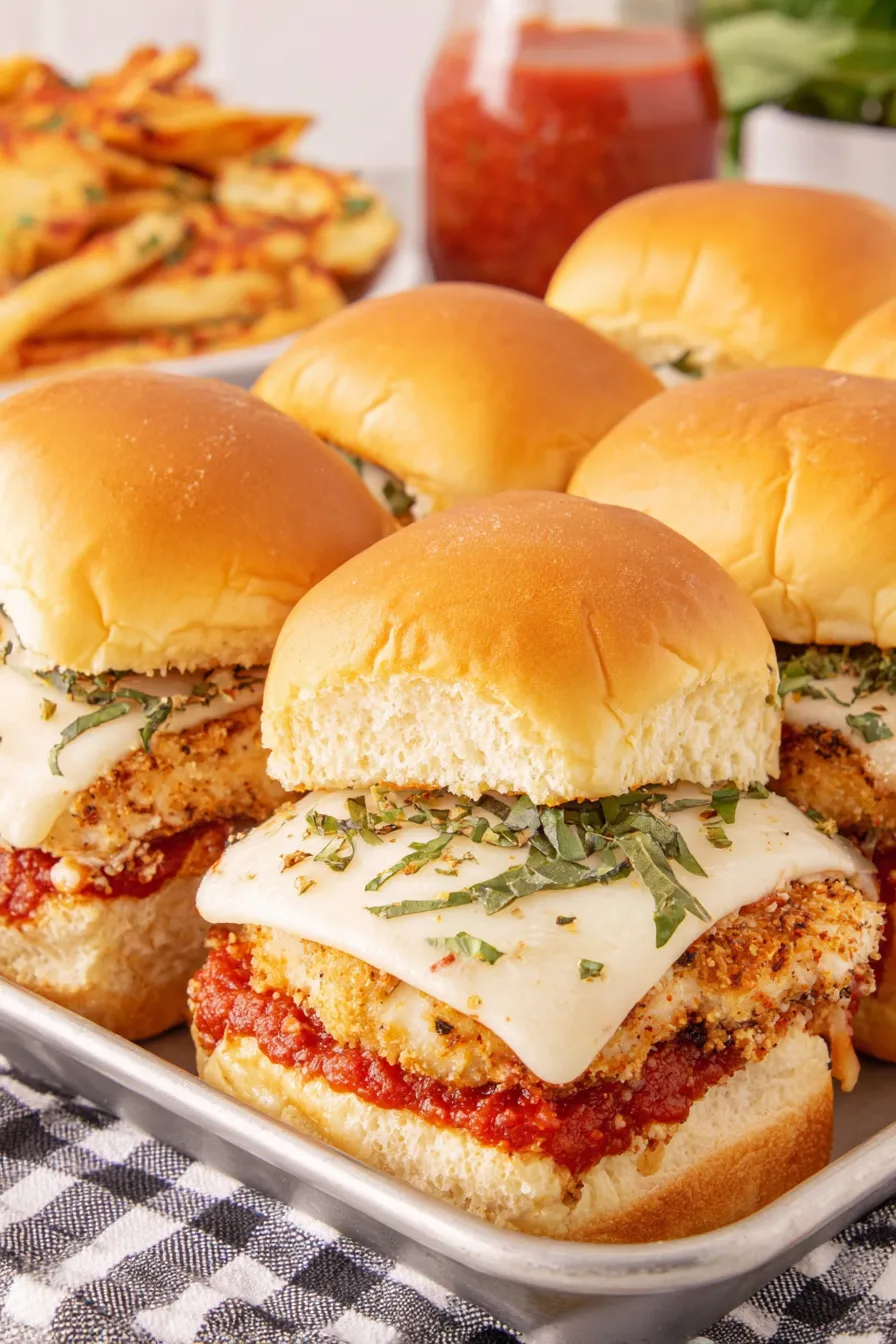
You Must Know
- These sliders reheats well and can be frozen for up to 3 months—wrap the cooled pan tightly in foil and place in a freezer-safe container.
- The total bake time includes cooking the frozen chicken per package (about 18–20 minutes at 425°F) plus 13–15 minutes at 350°F to melt the cheese and toast the buns.
- One 15 oz package of slider buns typically contains 12 rolls; adjust the recipe proportionally if your bun count differs.
- For crispier bottoms, place the assembled slider pan on the lower oven rack so the bun bottoms develop a little more color.
My favorite thing about this tray-bake approach is how fast it turns store-bought components into something that tastes homemade. I’ve taken these to potlucks where people assumed I’d spent hours; in reality, prep is quick and the oven does the heavy lifting. The garlic-butter brush and the final Parmesan sprinkle are small steps but they lift the sliders from good to memorable.
Storage Tips
Store leftovers in an airtight container in the refrigerator for up to 3 days. To preserve texture, separate layers with parchment paper and refrigerate flat. Reheat in a 350°F oven for 8–12 minutes covered loosely with foil to warm through without drying; remove the foil for the last 2 minutes if you want the tops toasted. For freezing, cool completely, wrap the assembled pan tightly in plastic wrap and foil, then freeze for up to 3 months. Reheat from frozen at 350°F for 20–25 minutes covered, then uncover to brown the tops.
Ingredient Substitutions
If you need to adapt ingredients, several swaps are straightforward: use gluten-free slider buns for a wheat-free option (note the texture will be denser), swap dairy-free mozzarella slices to make the dish dairy-free (brush a little olive oil on top instead of butter for richness), or use shredded mozzarella if you can’t find sandwich slices—spread it evenly. For a lighter version, choose a low-fat mozzarella and a reduced-sodium marinara. If fresh herbs are available, replace the dried parsley with 1 tablespoon chopped fresh parsley for a brighter finish.
Serving Suggestions
Serve these sliders with a crisp green salad or a simple arugula dressed with lemon and olive oil to cut the richness. A side of roasted vegetables or oven-baked sweet potato fries balances the meal well. For parties, offer extra warmed marinara for dipping and a bowl of red pepper flakes and grated Parmesan for guests to customize. Garnish with additional fresh basil leaves for color and an aromatic lift.
Cultural Background
These sliders riff on classic Italian-American flavors—tomato sauce, mozzarella, and Parmesan—applied to an American party food format. The notion of turning Italian flavors into handheld sandwiches is a common regional adaptation in the U.S., blending convenience with familiar tastes. While not a traditional Italian preparation, the combination is inspired by the classic Parmigiana concept: breaded protein, tomato sauce, and melted cheese, reimagined for modern gatherings and snackable service.
Seasonal Adaptations
In summer, replace jarred marinara with a quick fresh tomato sauce made from ripe tomatoes, garlic, and basil for a brighter flavor. For cooler months, add sautéed mushrooms or caramelized onions between the chicken and cheese for a heartier profile. Around the holidays, swap dried parsley for a pinch of Italian seasoning in the butter and finish with a scatter of chopped roasted red peppers for festive color.
Meal Prep Tips
To streamline busy weeks, assemble the sliders in the pan but hold off on the final butter brush and Parmesan. Cover and refrigerate for up to 24 hours; when ready, brush with butter and bake at 350°F for 13–15 minutes. For freezer meal prep, assemble completely, then wrap and freeze. Thaw overnight in the refrigerator before baking, or bake from frozen adding 5–10 minutes to the bake time. Use parchment between layers if you’re stacking portions in containers.
These sliders are comforting, portable, and well-suited to sharing—simple assembly, maximum return. Make them for game day, potlucks, or a low-fuss family dinner, and adapt the components to suit your pantry and preferences.
Pro Tips
Brush the tops with half the garlic-butter before baking and the rest immediately after to maximize flavor and sheen without over-browning.
Use sandwich-sized mozzarella slices to get a uniform melt and avoid thick cheese clumps—six slices spread thinly across a 9x13 pan melts evenly.
If your slider buns are slightly dry, toast them bottom-side briefly in a hot pan before assembling to add crunch and prevent sogginess.
This nourishing chicken parmesan sliders recipe is sure to be a staple in your kitchen. Enjoy every moist, high protein slice — it is perfect for breakfast or as a wholesome snack any time.
FAQs about Recipes
Can I assemble these ahead of time?
Yes. You can assemble the sliders and refrigerate them for up to 24 hours before baking. Add the butter brush and Parmesan just before baking for the best texture.
How long do these freeze and what is the reheating method?
Wrap the cooled slider pan tightly in plastic wrap and foil and freeze for up to 3 months. Reheat from frozen at 350°F for about 20–25 minutes covered, then uncover to brown the tops.
Tags
Chicken Parmesan Sliders
This Chicken Parmesan Sliders recipe makes perfectly juicy, tender, and flavorful steak every time! Serve with potatoes and a side salad for an unforgettable dinner in under 30 minutes.
Ingredients
Chicken
Buns & Cheese
Sauce & Butter
Seasonings & Finish
Instructions
Cook the frozen chicken
Preheat the oven and bake the frozen Southern-style chicken tenderloins according to the package instructions (for the referenced brand, 425°F for 18–20 minutes). Remove and set aside; reduce oven temperature to 350°F.
Prepare the bun base
Place the bottom halves of the 12 slider buns into a 9x13-inch baking pan and spread half of the marinara sauce evenly over them.
Layer the chicken
Arrange the cooked tenderloins across the sauce-covered bun bottoms, covering as much surface as possible for even coverage.
Top with sauce and cheese
Spoon the remaining marinara over the chicken and place the six mozzarella slices in an even layer over the top.
Close the sliders
Place the top halves of the buns over the mozzarella. In a small bowl, combine melted butter, garlic salt, and dried parsley flakes; brush half of this mixture over the bun tops.
Bake until cheese melts
Bake at 350°F for 13–15 minutes, until the cheese is melted and the buns are lightly toasted on top.
Finish and serve
Remove from the oven, brush the tops with the remaining butter mixture, sprinkle grated Parmesan over all sliders, slice into 12 pieces, and serve hot.
Last Step: Please leave a rating and comment letting us know how you liked this recipe! This helps our business to thrive and continue providing free, high-quality recipes for you.
Nutrition
Did You Make This?
Leave a comment & rating below or tag
@gusteen on social media!
Categories:
You might also like...

Fudgy Mississippi Mud Brownies
Ultra-fudgy brownies crowned with melty marshmallows and a glossy cocoa icing. A nostalgic crowd-pleaser that slices cleanly and disappears fast.

Buttery Pecan Pie Bars
Buttery shortbread crust meets gooey brown-sugar pecan filling in these quick, crowd-pleasing bars, prepped in just 10 minutes.

No-Crack Pumpkin Cheesecake
Ultra-smooth pumpkin cheesecake with warm spice, sturdy graham crust, and a foolproof, crack-free bake. Perfect with caramel and whipped cream.
Did You Make This?
Leave a comment & rating below or tag @gusteen on social media!
Rate This Recipe
Share This Recipe
Enjoyed this recipe? Share it with friends and family, and don't forget to leave a review!
Comments (1)
This recipe looks amazing! Can't wait to try it.
Comments are stored locally in your browser. Server comments are displayed alongside your local comments.

Hi, I'm Charlotte!
What's Popular

30-Minute Meals!
Join to receive our email series which contains a round-up of some of our quick and easy family favorite recipes.