
>>

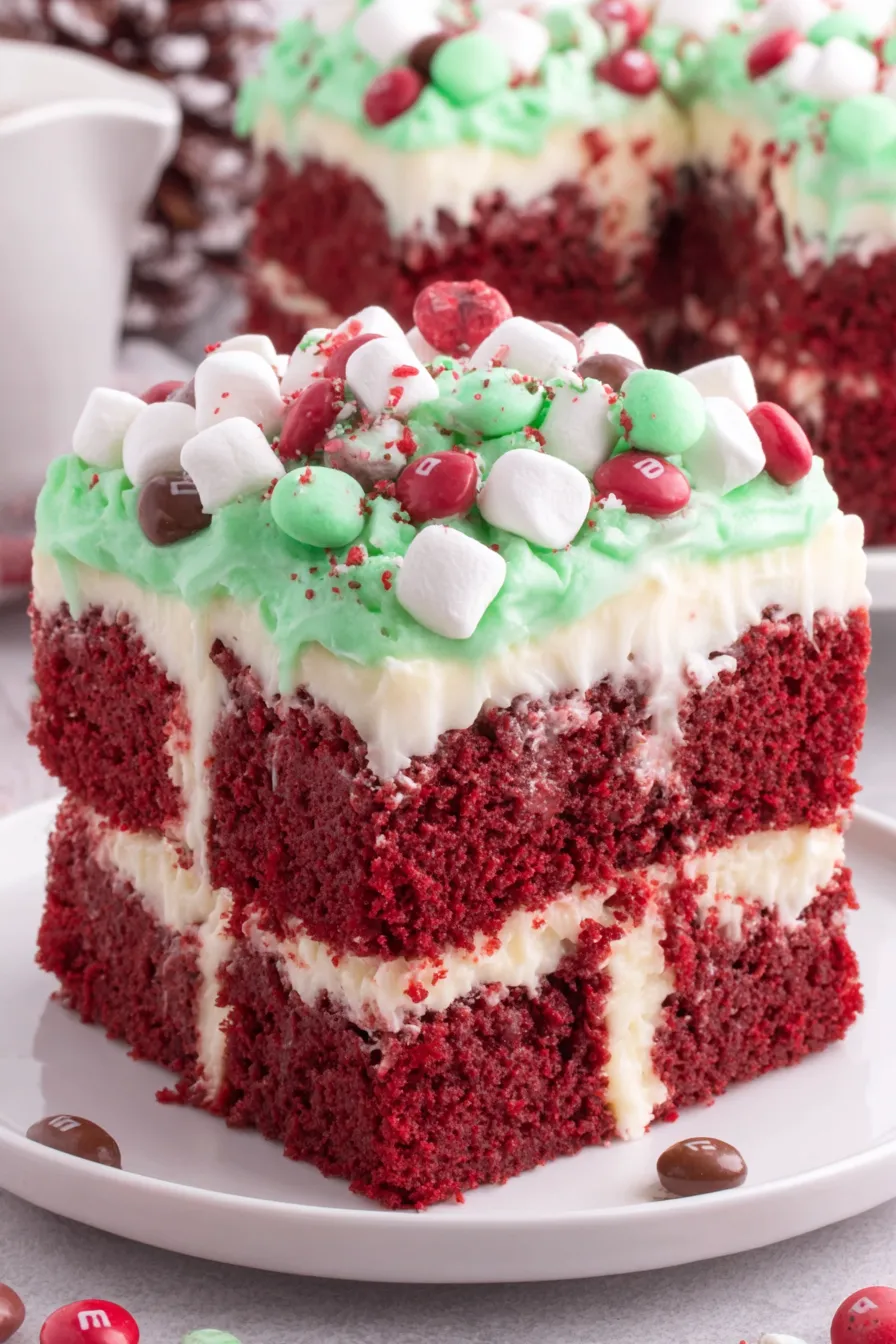
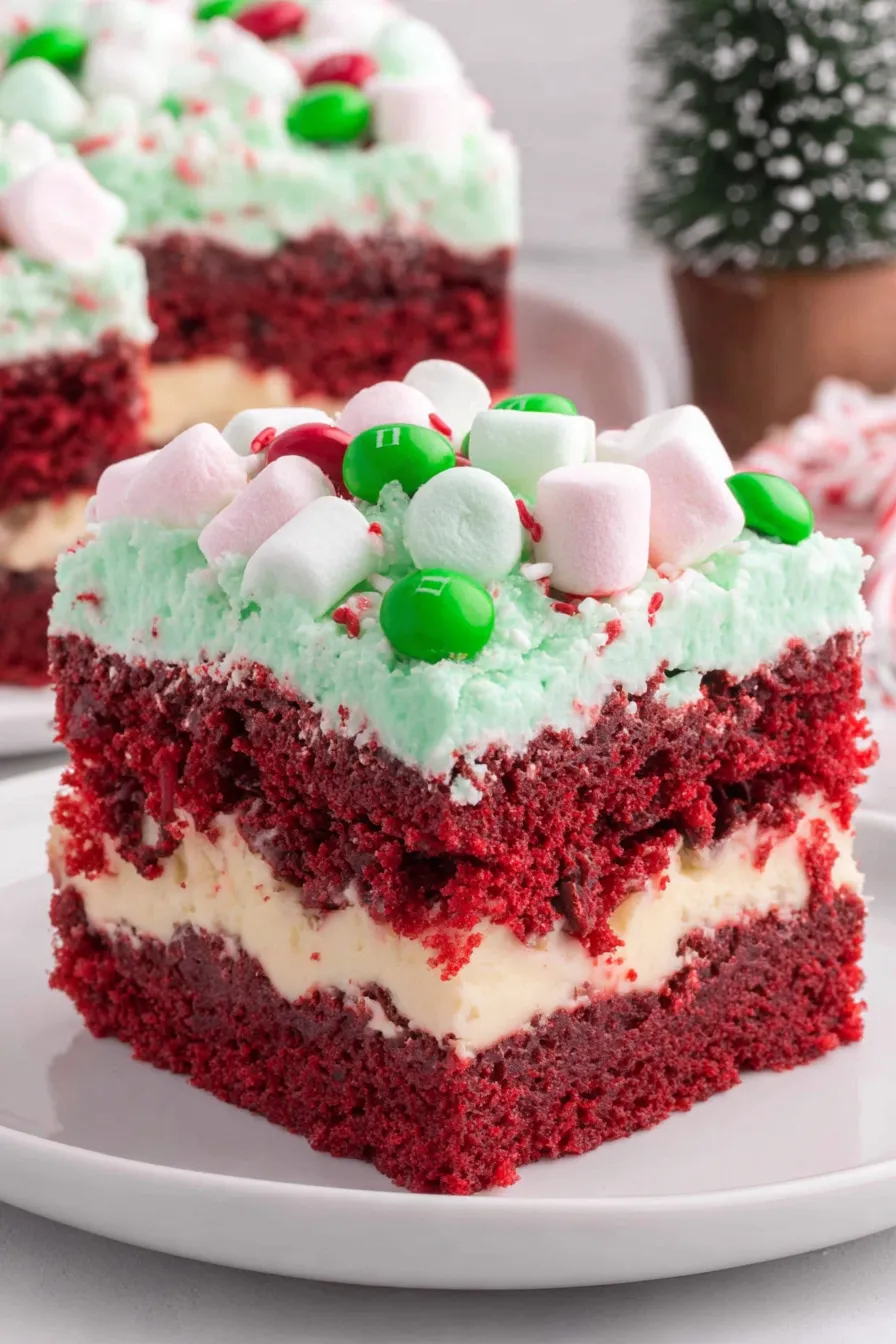
A festive, make-ahead red velvet poke cake layered with cheesecake-flavored filling and green-tinted whipped topping, decorated with marshmallows and red and green M&M’s—perfect for holiday gatherings.
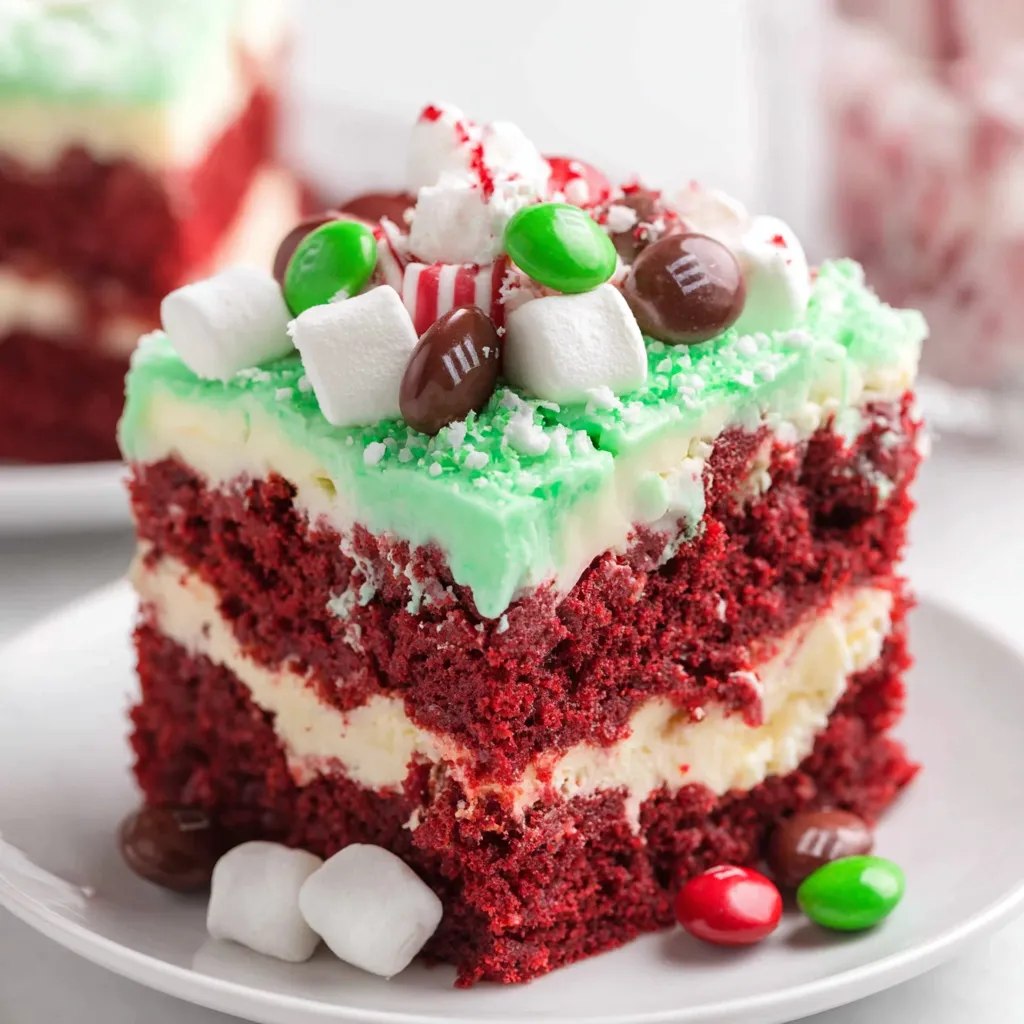
This Christmas red velvet poke cake has been a holiday staple in my kitchen for years. I first made it at a frantic holiday potluck when I needed something that traveled well, looked festive, and fed a crowd. It surprised me in the best way: the tender red velvet crumb soaked up a creamy cheesecake-flavored filling, and the bright green whipped topping turned every plate into a tiny snow-dusted wreath. The texture is a delightful contrast—soft cake, silky pudding filling, and pillowy whipped topping—while the finishing candies and marshmallows add a playful crunch that kids and adults both adore.
I remember the first time my niece spotted the plate and squealed, "It looks like Christmas!" That reaction sealed it as a repeat dessert for holiday dinners and classroom parties. What makes this version special is the cheesecake instant pudding—its tang balances the sweet cake and whipped topping, keeping the dessert from feeling one-note. The recipe is forgiving, quick to assemble, and scales easily: make it in the morning, chill it while you wrap gifts, and slice it into neat 3-inch squares right before guests arrive.
Our family usually makes a double batch of this when neighbors drop by for coffee during the season. I often swap brands depending on sale cycles: Duncan Hines or Betty Crocker both bake reliably for the box mix, and Cool Whip or store-brand whipped topping works fine for the finish. Each variation yields the same festive cheer and a lot of empty plates.
My favorite aspect is how the simple step of poking holes transforms this into a rich, layered dessert without complicated piping or multiple bakes. At our last family gathering, guests were surprised to learn it started from a box mix—every bite tastes homemade because of the creamy cheesecake layer and the festive finish.
Store the cake covered in the refrigerator for up to three days; use an airtight container or tightly wrap the pan with plastic wrap to prevent odors from transferring. For longer storage, cut into individual squares, wrap each square in plastic wrap, then place in a freezer-safe container. Freeze up to three months. To serve, thaw in the refrigerator for several hours or overnight; avoid microwaving, which can make the whipped topping weep. If you plan to transport, place the pan in a cooler with ice packs to maintain temperature and prevent condensation on the topping.
If you need to alter ingredients: swap the boxed red velvet mix for a from-scratch red velvet batter if you prefer—just ensure the finished cake bakes in a 9x13 pan in roughly the same time. To make it dairy-free, use a non-dairy whipped topping and a non-dairy instant pudding (coconut-based options exist), and substitute whole milk with an unsweetened full-fat plant milk, although texture will differ. For a lower-sugar version, choose sugar-free pudding packets and reduced-sugar whipped topping, but expect a less rich mouthfeel. For a stronger cheesecake tang, fold in 2 ounces of softened cream cheese into the prepared pudding before pouring.
Serve chilled alongside strong coffee or a spiced holiday tea to balance the sweetness. Garnish individual squares with a small sprig of fresh mint to echo the green topping, or dust with a pinch of cocoa near the edges for contrast. Pair with roasted chestnuts or simple sugar cookies on the dessert table so guests can sample a variety of textures and flavors. This dessert also works well plated with a warm berry compote spooned alongside for a contrast of temperature and fruit acidity.
Red velvet has roots in Southern American baking and became widely popularized in the 20th century as bakers emphasized its striking color and delicate crumb. While not a traditional holiday dessert by origin, the vivid red makes it a natural fit for Christmas celebrations. The poke-and-fill technique emerged as a practical way to add luscious fillings—like pudding or pudding-cheesecake blends—without elaborate layering. This modern twist on Southern comfort adds celebratory colors and textures perfect for today’s festive tables.
Adapt it for other holidays by changing the topping color and decorations—pink and white for Valentine’s Day, orange and brown for Thanksgiving, or pastel shades for spring celebrations. In winter, swap mini marshmallows for crushed peppermint candy for a minty crunch, or sprinkle chopped toasted pecans for a nutty finish. For a New Year’s version, add a shimmer of edible gold dust to the whipped topping for extra sparkle.
Make the cake and pudding the day before to save time on the event day: bake, poke, pour the pudding, and chill overnight. Tint and add whipped topping and decorations the morning of serving to keep colors bright and toppings fresh. Use disposable 9x13 pans when bringing to large gatherings for easy cleanup, and transport chilled in a cooler. If cutting ahead, use a chef’s knife warmed under hot water and dried between cuts for cleaner slices.
Finish with a flourish: this dessert is simple, celebratory, and reliably beloved. Whether you’re bringing it to a potluck or setting it out for family dessert, the combination of soft red velvet, tangy cheesecake pudding, and festive decorations makes it an unforgettable holiday treat—one that invites smiles and seconds.
Use room-temperature eggs for a smoother cake batter and more even rise.
Poke holes 1/2 inch apart so the pudding distributes evenly without breaking the cake into pieces.
Tint whipped topping gradually—start with 8 drops of gel coloring and add more until you reach the desired green.
Chill overnight if possible; the flavors meld and slices hold better the next day.
Warm and dry your knife between cuts for cleaner squares.
This nourishing christmas red velvet poke cake recipe is sure to be a staple in your kitchen. Enjoy every moist, high protein slice — it is perfect for breakfast or as a wholesome snack any time.
Yes. Chill the assembled cake tightly covered for at least 4 hours or overnight for clean slices.
Use whole milk for the pudding for best texture; using low-fat milk may result in a thinner set.
This Christmas Red Velvet Poke Cake recipe makes perfectly juicy, tender, and flavorful steak every time! Serve with potatoes and a side salad for an unforgettable dinner in under 30 minutes.
Preheat oven to 350°F and spray a 9x13-inch pan with baker’s spray. Set aside while mixing batter.
In a medium bowl, beat the red velvet mix with 1 1/4 cups water, 1/2 cup vegetable oil, and 3 large eggs on medium speed until smooth, about 1–2 minutes.
Pour batter into prepared pan and bake for about 25 minutes, or until a toothpick comes out with moist crumbs but no raw batter.
While still warm, use the rounded end of a wooden spoon to poke holes about 1/2 inch apart across the surface so the pudding can seep into the cake.
Whisk the 6.8-oz pudding mix with 3 3/4 cups cold whole milk until it begins to thicken, about 1–1.5 minutes. Pour immediately over the warm cake and smooth.
Cover tightly and refrigerate at least 4 hours or overnight to set the filling and firm up slices.
Stir 10–12 drops of green food coloring into 16 oz of thawed whipped topping until evenly colored, then spread over the chilled pudding layer.
Top with mini marshmallows, red and green M&M’s, and red sprinkles. Cut into twelve 3" x 3" squares to serve.
Last Step: Please leave a rating and comment letting us know how you liked this recipe! This helps our business to thrive and continue providing free, high-quality recipes for you.
Leave a comment & rating below or tag
@gusteen on social media!

Ultra-fudgy brownies crowned with melty marshmallows and a glossy cocoa icing. A nostalgic crowd-pleaser that slices cleanly and disappears fast.

Buttery shortbread crust meets gooey brown-sugar pecan filling in these quick, crowd-pleasing bars, prepped in just 10 minutes.

Ultra-smooth pumpkin cheesecake with warm spice, sturdy graham crust, and a foolproof, crack-free bake. Perfect with caramel and whipped cream.
Leave a comment & rating below or tag @gusteen on social media!
Enjoyed this recipe? Share it with friends and family, and don't forget to leave a review!
This recipe looks amazing! Can't wait to try it.
Comments are stored locally in your browser. Server comments are displayed alongside your local comments.

Join to receive our email series which contains a round-up of some of our quick and easy family favorite recipes.
