Christmas Truffles | Gusteen
30-MINUTE MEALS! Get the email series now
Royal Recipe

Christmas Truffles

5 from 1 vote
1 Comments
Charlotte Anne
By: Charlotte AnneUpdated: Jan 20, 2026
This post may contain affiliate links. Please read our disclosure policy.

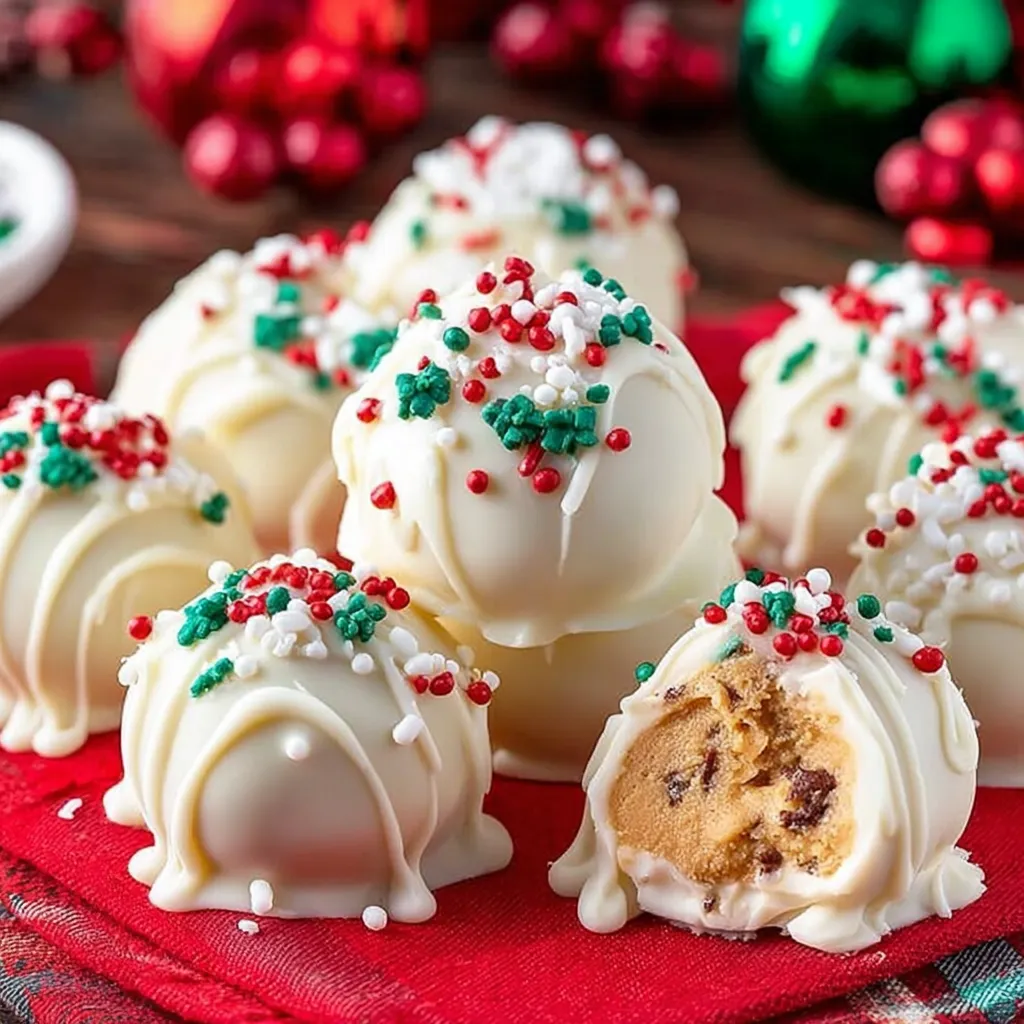
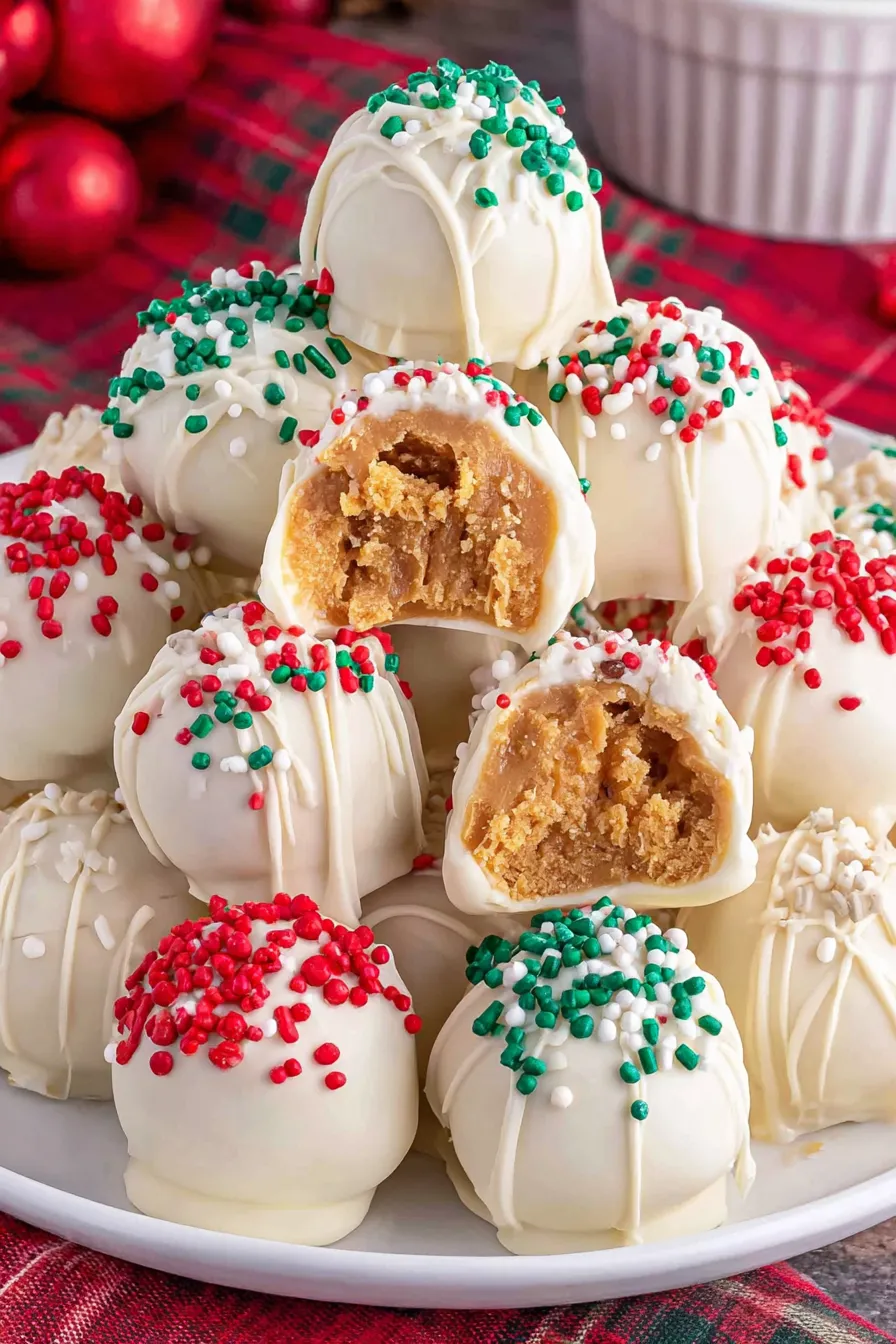
Creamy peanut butter centers dipped in white chocolate and sprinkled with festive toppings — a no-bake holiday treat that's ready in under an hour.

Christmas Truffles
This small-batch treat has been my go-to holiday quick fix ever since I first assembled a tray for a last-minute office cookie swap. I discovered the combination of powdered sugar, peanut butter, and a touch of butter when I wanted something that tasted indulgent but required no baking. The result is a bite-sized confection with a tender, fudgy center and a smooth white chocolate shell that snaps pleasantly when you bite into it. Every family gathering since has seen at least one tray disappear within the first hour. I love these because they carry the nostalgia of classic peanut butter candies while adding a festive white chocolate coat and colorful sprinkles. The filling is sweet but not cloying, with peanut butter providing depth and a hint of salt. The white coating brightens the flavor and gives a beautiful canvas for sprinkles, crushed candy canes, or toasted nuts. They’re especially handy during the holidays when you want to make something that looks special without spending all day in the kitchen.

Why You'll Love This Recipe

  • Ready in about 45 minutes start to finish including chilling; active hands-on time is roughly 20–25 minutes, making it perfect for busy holiday afternoons.
  • Uses pantry staples — powdered sugar, peanut butter, butter, and melting chocolate — so you can usually assemble without a special grocery run.
  • Make-ahead friendly: centers can be prepared up to 2 days in advance and coated the day you plan to serve, or fully assembled and frozen for up to 3 months.
  • Crowd-pleaser for both adults and children; gluten-free when you use gluten-free sprinkles and chocolate, and easy to tweak for texture by choosing creamy or chunky peanut butter.
  • Versatile finish: decorate with holiday sprinkles, crushed peppermint, toasted coconut, or a drizzle of dark chocolate for contrast.
  • Great for gifting — package in small boxes or cellophane bags with a ribbon for a thoughtful homemade present.

My first tray became an instant favorite at a winter potluck. I remember someone sneaking back for three more pieces while pretending to admire the decorations — that’s when I knew this combination worked. Over the years I’ve learned small tricks, like chilling the centers until firm and tempering the coating slightly so it sets with a crisp, glossy finish.

Ingredients

  • Powdered sugar — 1 cup: Choose a fine, sifted powdered sugar for a silky filling. I favor Domino or store-brand fine confectioners; sifting removes any lumps that can make rolling difficult.
  • Peanut butter — 1/2 cup: Use creamy for smooth centers or chunky for a more rustic texture. Natural peanut butter works but may alter firmness; if using natural, stir well and chill longer.
  • Unsalted butter — 3 tablespoons, room temperature: Adds richness and helps bind the filling. If all you have is salted butter, omit any extra added salt in the coating.
  • White melting chocolate — 16 ounces (1 lb): Use candy melts or high-quality white chocolate chips (Ghirardelli, Guittard) melted gently. Candy melts set easier but white chocolate gives a superior flavor.
  • Christmas sprinkles and other toppings: Choose nonpareils, jimmies, crushed candy cane, chopped pistachios, or cocoa nibs. Ensure sprinkles are gluten-free if needed.

Instructions

Combine the filling: In a medium mixing bowl, add 1 cup powdered sugar, 1/2 cup peanut butter, and 3 tablespoons room-temperature butter. Use a large rubber spatula to fold and press the mixture until it forms a dense, pliable dough. The texture should be firm enough to hold a shape but soft enough to roll — if too dry, add 1/2 teaspoon peanut butter; if too sticky, add 1 tablespoon powdered sugar. Shape the centers: Use a small cookie scoop (about 1 tablespoon) or a portion scoop to form uniform balls. Roll quickly between your palms to smooth the surface. Aim for 1-inch diameter balls for neat bites. Place each ball on a parchment-lined tray, leaving a little space between each one. Chill until firm: Refrigerate the tray for 15–30 minutes. Chilling firms the centers so they hold shape when dipped. If you’re short on time, freeze for 8–10 minutes; if preparing ahead, keep them refrigerated up to 48 hours before coating. Melt the coating: Place 16 ounces white melting chocolate in a microwave-safe bowl. Heat in 30-second intervals at medium power, stirring thoroughly between intervals until smooth. Avoid overheating — white chocolate burns easily and will seize. Alternatively, melt gently in a double boiler over simmering water. Dip and decorate: Using a fork or dipping tool, lower chilled centers into the melted chocolate, tapping off excess. Return to parchment paper and immediately add sprinkles or toppings before the coating sets. If the coating thickens while you work, warm briefly in the microwave for 10–15 seconds and stir. Set the coating: Let the coated pieces sit at room temperature until the coating hardens, about 20–30 minutes. For faster setting, place the tray in the refrigerator for 10–15 minutes. Store completed confections in an airtight container in the refrigerator or at cool room temperature if your kitchen is below 70°F. User provided content image 1

You Must Know

  • These confections are rich — a small piece goes a long way; they store well in the fridge for up to 2 weeks or can be frozen up to 3 months.
  • High in calories and fat due to peanut butter and white chocolate; great as an occasional holiday treat or for gifting in small quantities.
  • To keep them gluten-free, verify sprinkles and chocolate are labeled gluten-free.
  • Melting chocolate should be warmed gently to avoid graininess; using a thermometer is helpful — keep white chocolate under 120°F while melting.

My favorite part of making these is watching friends’ faces when they realize the center is peanut butter and not ganache — it’s a simple surprise that always elicits a smile. Once, I made a platter for a winter open house, and a neighbor later told me she ate three before leaving for the bus — a small victory for any home baker.

User provided content image 2

Storage Tips

Store in an airtight container layered with parchment to prevent sticking. Keep refrigerated if your home temperature is warm; at cool room temperature they can sit out for a day. For longer storage, freeze in a single layer on a tray, then transfer to a freezer-safe container; thaw in the refrigerator overnight before serving. When removing from the fridge, let sit 10 minutes to take the chill off for the best flavor and texture.

Ingredient Substitutions

If you’re nut-free, substitute sunflower seed butter at a 1:1 ratio — the centers will be slightly softer and may darken over time, but they remain delicious. For a firmer center, increase powdered sugar by 1–2 tablespoons. Switch the white coating to dark or milk chocolate for a richer contrast; if using dark chocolate, consider adding a pinch of sea salt to the filling to balance sweetness.

Serving Suggestions

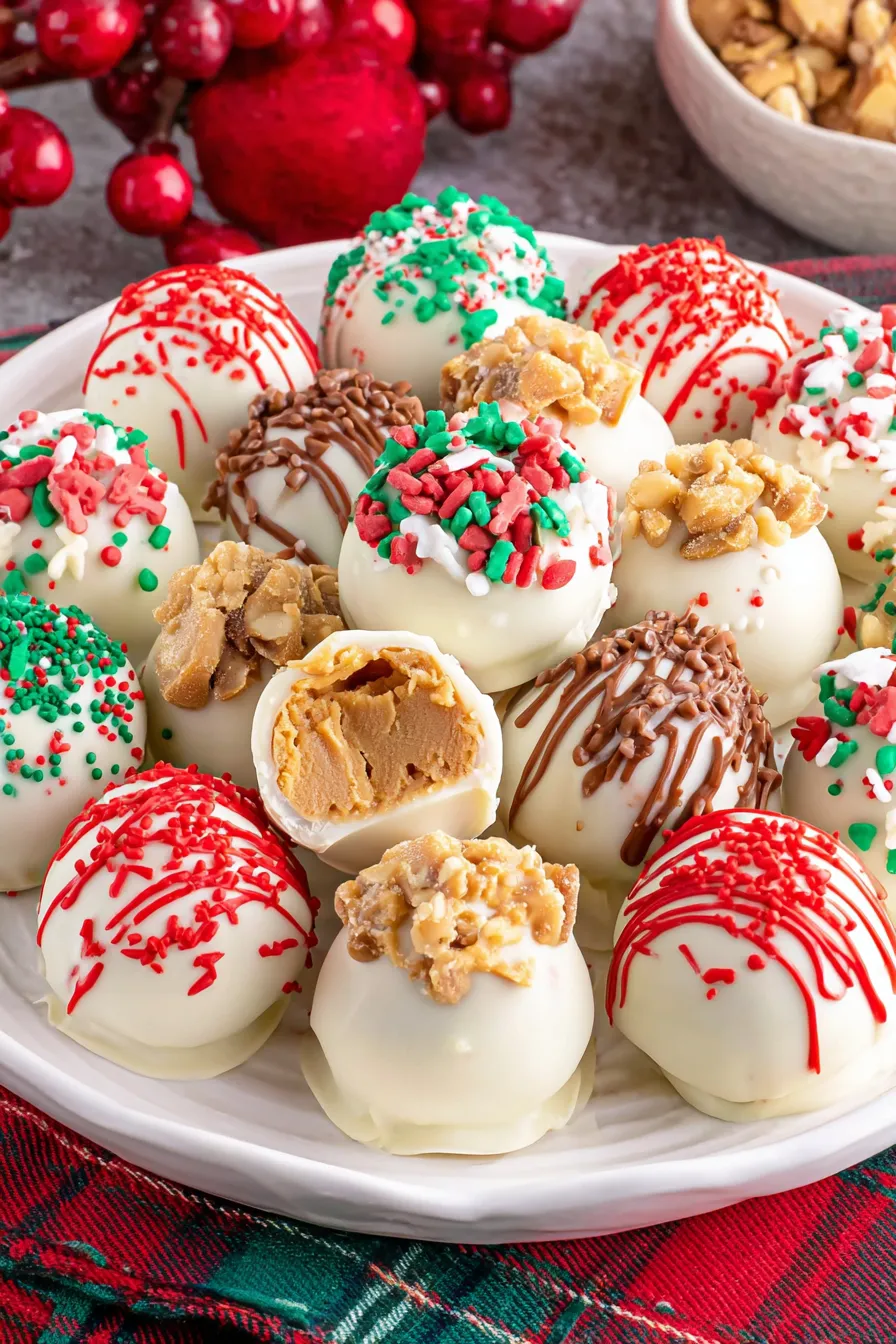
Serve on a decorative tray with parchment doilies for a holiday spread. Pair with coffee or a nutty dessert wine. For kids’ parties, use colorful sprinkles and mini candy canes; for adult gatherings, garnish with a light dusting of flaky sea salt or a thin drizzle of dark chocolate for visual contrast and flavor balance.

Cultural Background

While not tied to a specific regional tradition, peanut butter confections have long been a staple in American holiday baking, often showing up in cookie exchanges and gift boxes. These truffles are an evolution of classic no-bake candies like buckeye candies and peanut butter balls, adapted with modern melting wafers and festive decoration for seasonal charm.

Seasonal Adaptations

For winter holidays, top with crushed peppermint or red-and-green sprinkles. In summer, swap the white coating for milk chocolate and finish with toasted coconut. For Thanksgiving, sprinkle with finely chopped pecans and a dash of cinnamon. Small ingredient swaps can shift the flavor profile dramatically while keeping the same simple method.

Meal Prep Tips

Prepare the centers in advance and freeze them on a tray; once solid, bag them for later coating. This lets you produce large batches over time without rushing. When ready to assemble, warm the centers for a few minutes at room temperature so the coating adheres smoothly. Package in small cellophane bags for gifting, adding a festive label with storage instructions.

These truffles are a quick, forgiving option that bring a lot of holiday cheer with minimal fuss. Experiment with finishes and enjoy sharing them — homemade sweets become memorable tokens at any celebration.

Pro Tips

  • Chill centers thoroughly before dipping to prevent melting and ensure a clean coating.

  • If white chocolate thickens, microwave in 10–15 second bursts and stir; avoid overheating.

  • Use a small cookie scoop for uniform pieces which ensures even coating and consistent portion sizes.

  • For a glossy finish, melt white chocolate slowly and avoid water contact which can cause seizing.

This nourishing christmas truffles recipe is sure to be a staple in your kitchen. Enjoy every moist, high protein slice — it is perfect for breakfast or as a wholesome snack any time.

Tags

Finger FoodsChristmas TrufflesNo-BakePeanut ButterDessertsHoliday TreatsRecipes
No ratings yet

Christmas Truffles

This Christmas Truffles recipe makes perfectly juicy, tender, and flavorful steak every time! Serve with potatoes and a side salad for an unforgettable dinner in under 30 minutes.

Servings: 24 steaks
Christmas Truffles
Prep:25 minutes
Cook:10 minutes
Rest Time:10 mins
Total:35 minutes

Ingredients

Main

Instructions

1

Mix filling

Combine 1 cup powdered sugar, 1/2 cup peanut butter, and 3 tablespoons room-temperature butter in a medium bowl. Stir with a spatula until a smooth, firm dough forms. Adjust texture with small amounts of powdered sugar or peanut butter as needed.

2

Shape centers

Use a small cookie scoop or tablespoon to portion the dough and roll into 1-inch balls. Place on parchment-lined tray and space evenly.

3

Chill centers

Refrigerate for 15–30 minutes until firm. For quicker chilling, freeze for 8–10 minutes. Proper chilling prevents the centers from melting during dipping.

4

Melt coating

Melt 16 ounces white melting chocolate in a microwave-safe bowl in 30-second intervals, stirring between each, until smooth. Alternatively, melt over a double boiler, keeping chocolate under 120°F.

5

Dip and decorate

Using a fork or dipping tool, submerge each chilled center into melted chocolate, tap off excess, and return to parchment. Immediately add sprinkles or toppings before the coating sets.

6

Set and store

Allow coating to harden at room temperature for 20–30 minutes or refrigerate for 10–15 minutes. Store in an airtight container in the refrigerator or at cool room temperature.

Last Step: Please leave a rating and comment letting us know how you liked this recipe! This helps our business to thrive and continue providing free, high-quality recipes for you.

Nutrition

Calories: 170kcal | Carbohydrates: 18g | Protein:
3g | Fat: 12g | Saturated Fat: 4g |
Polyunsaturated Fat: 2g | Monounsaturated Fat:
5g | Trans Fat: 1g | Cholesterol: 253mg | Sodium:
0mg | Potassium: 953mg | Fiber: 0g | Sugar:
0g | Vitamin A: 577IU | Vitamin C: 3mg | Calcium:
47mg | Iron: 6mg

Did You Make This?

Leave a comment & rating below or tag
@gusteen on social media!

Christmas Truffles

Categories:

Christmas Truffles

Did You Make This?

Leave a comment & rating below or tag @gusteen on social media!

Rate This Recipe

Share This Recipe

Enjoyed this recipe? Share it with friends and family, and don't forget to leave a review!

Comments (1)

Leave a Comment

0/1000 characters
Food Lover
1 day ago

This recipe looks amazing! Can't wait to try it.

Rating:

Comments are stored locally in your browser. Server comments are displayed alongside your local comments.

Family Photo

Hi, I'm Charlotte!

Chef and recipe creator specializing in delicious Finger Foods cooking. Passionate about sharing easy-to-follow recipes that bring families together around the dinner table.

30-Minute Meals!

Join to receive our email series which contains a round-up of some of our quick and easy family favorite recipes.