
>>

A nostalgic, make-ahead frozen treat built on a crunchy cookie base, layers of chocolate and vanilla ice cream, hot fudge, and cloud-like whipped cream—just like Dairy Queen's classic.
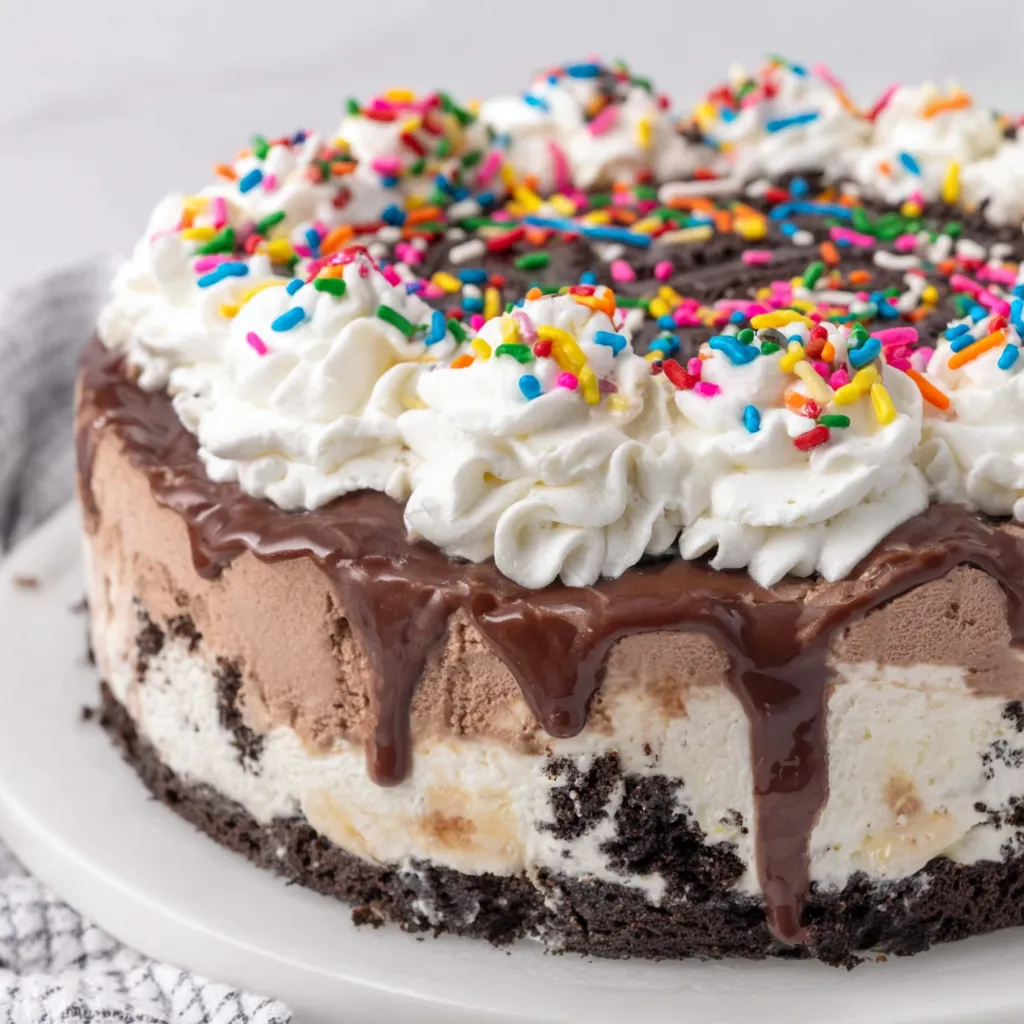
This Copycat Dairy Queen ice cream cake has been one of my summer showstoppers for years. I first recreated it after a childhood birthday party when I discovered how surprisingly simple the components are: a crunchy cookie layer, a thick ribbon of hot fudge, two generous ice cream layers, and a pillowy whipped-cream exterior. The first time I served this, my family immediately recognized the familiar combination of textures—the satisfying snap of the cookie crumbs, the dense creaminess of chocolate and vanilla ice cream, and the cooling sweetness of whipped cream. It’s the kind of dessert that lands you in a room full of smiles and second-helping requests.
I discovered this assembly while trying to simplify a nostalgic favorite into something I could assemble at home without specialized equipment. The technique that made the difference for me was taking short, controlled thawing windows for the ice cream so each layer spreads cleanly without melting into the one below. The hot fudge layered over semi-soft chocolate ice cream gives a chewy ribbon once frozen, while the baked cookie crumb crust stays crisp enough to contrast with the creamy layers. For holidays, birthdays, or a hot afternoon, this cake is a no-fail crowd pleaser that stores well and slices beautifully when properly frozen.
From a practical standpoint I love how forgiving the technique is. If one layer spreads a little unevenly, a short refreeze smooths things out. Family members always ask for details on how to keep slices intact when plating—my trick is to let slices sit at room temperature for 2 minutes before cutting and use a hot, dry knife. This cake has been the highlight of backyard barbecues and chilly indoor celebrations alike.
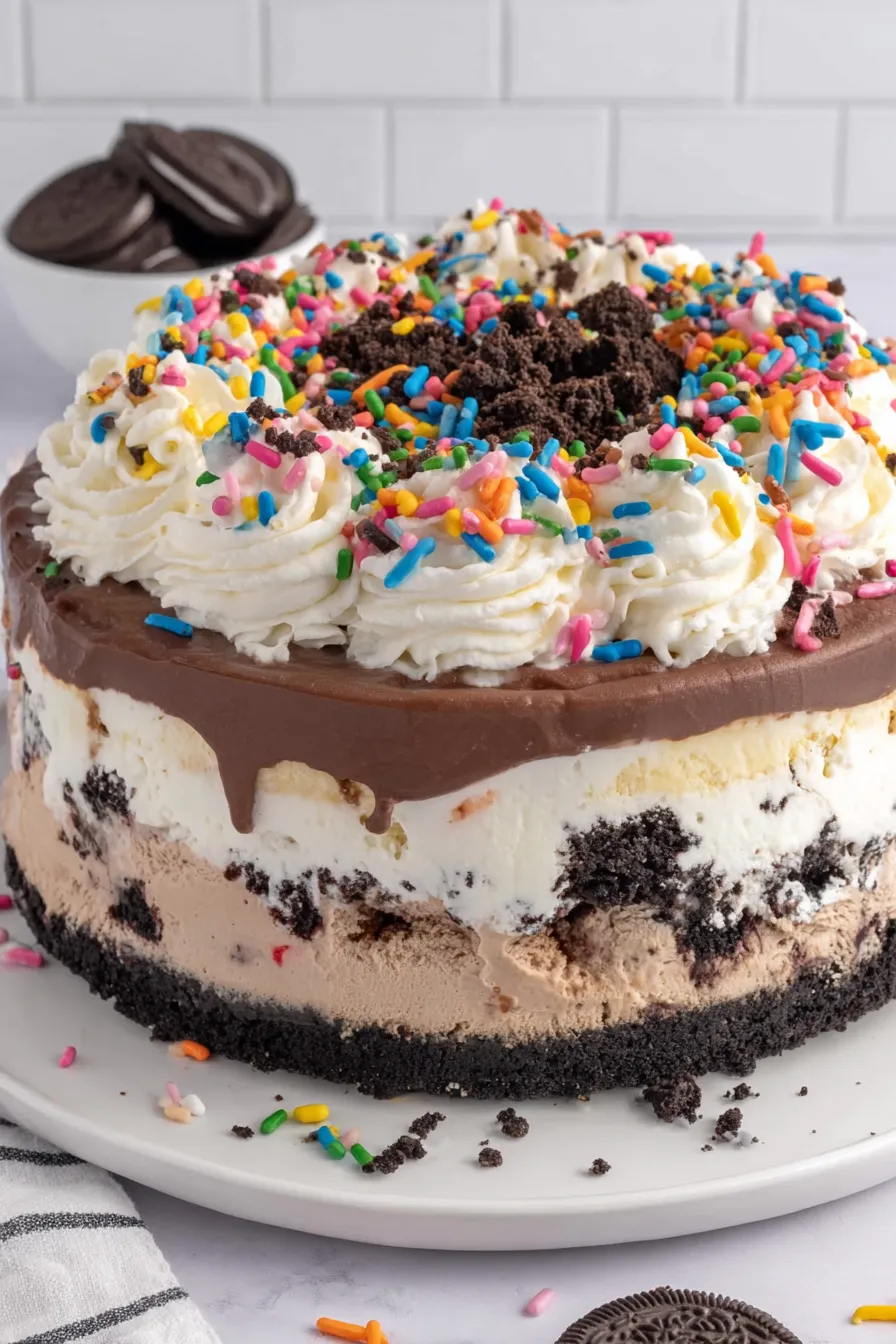
My favorite aspect is the texture play: the baked cookie crumbs provide a faint crunch that family members always comment on, and the hot fudge becomes a chewy ribbon once fully frozen. I remember assembling one the night before a graduation party; guests kept guessing where I’d purchased it because of the professional look the whipped frosting gives when piped. That same cake survived a balmy drive without melting because I packed it in a chilled cooler—small logistics like that can save the day for outdoor gatherings.
Wrap the cake tightly with plastic wrap and then place it in a large airtight container or cake keeper. Keep it in the coldest section of the freezer (not the door) to avoid temperature fluctuations; properly wrapped, it will maintain quality for up to 3 months. For shorter storage, a week is ideal. When reheating or softening, transfer to the refrigerator for 30 minutes before slicing if you prefer slightly softer texture than straight-from-freezer slices. Always avoid repeated thaw-freeze cycles to preserve texture.
To make a nut-free or simpler version, swap the sandwich cookies for gluten-free chocolate sandwich cookies if you need a gluten-free version—though texture and crumb binding may differ slightly. Use vegan or dairy-free ice creams and a coconut-based whipped topping to create a dairy-free alternative; expect a slightly different mouthfeel. For lower sugar, choose reduced-sugar ice cream and use powdered erythritol blends in place of powdered sugar for the whipped cream, adjusting sweetness to taste.
Serve thin slices with a hot espresso or iced coffee to contrast the cold dessert. For parties, place slices on chilled plates to slow melting. Garnish with extra hot fudge drizzled warm, chopped toasted nuts (unless allergens are a concern), or fresh berries for brightness. This cake also pairs wonderfully with a scoop of sorbet if you want a fruit-forward contrast to the dense chocolate and vanilla layers.
The layered ice cream cake concept has been a celebratory staple across North America for decades, with fast-food and ice-cream chains popularizing the assemble-and-freeze approach. The flavor profile—sandwich cookie crumbs, chocolate and vanilla ice creams, and whipped cream—mirrors classic American dessert preferences for contrasting textures and simple, nostalgic flavors. This copycat captures the essence of roadside ice cream culture while allowing home cooks to refine quality with premium ice cream or homemade hot fudge.
In summer, use bright sprinkles or diced strawberries on top for a Fourth of July or picnic vibe. For winter holidays, fold crushed peppermint into the cookie crumb or sprinkle crushed candy canes on the whipped topping; swap vanilla bean for eggnog ice cream in December for a festive spin. Small seasonal touches update the dessert without changing the underlying assembly method.
Assemble the cake 1–2 days ahead and keep frozen until the event. If you need to travel with the cake, pack it in a pre-chilled cooler with ice packs and insulate the sides; an insulated cake carrier works best. For slice-friendly meal prep, freeze the cake solid, then use a serrated knife to portion into single slices and wrap individually for grab-and-go dessert servings.
Making this at home gives you control over ice cream quality and final presentation, and once you get the timing for thawing and refreezing down, it becomes a straightforward part of your entertaining toolkit. Enjoy the smiles it brings at your next celebration!
Chill the mixing bowl and beaters before whipping cream to achieve stiff peaks faster.
Warm your knife under hot water and dry it between cuts for cleaner slices.
Work quickly when frosting to keep the cake cold and prevent melting.
Thaw ice cream in 15–20 minute windows until spreadable but not runny to prevent layers from blending.
This nourishing copycat dairy queen ice cream cake recipe is sure to be a staple in your kitchen. Enjoy every moist, high protein slice — it is perfect for breakfast or as a wholesome snack any time.
This Copycat Dairy Queen Ice Cream Cake recipe makes perfectly juicy, tender, and flavorful steak every time! Serve with potatoes and a side salad for an unforgettable dinner in under 30 minutes.
Line a 9-inch springform pan with plastic wrap and preheat oven to 350°F. Line a 10×15-inch baking sheet with parchment. These steps prepare equipment and create easy unmolding later.
Combine 20 crushed chocolate sandwich cookies with 4 tablespoons melted salted sweet cream butter until evenly moistened. Spread on the prepared baking sheet and bake 7 to 8 minutes until slightly toasted. Cool completely so crumbs remain crisp as a topping.
Thaw 1 quart chocolate ice cream for 15–20 minutes until spreadable. Press into the bottom of the lined springform in an even layer. Freeze 30–60 minutes to set before adding hot fudge.
Warm 11.75 oz hot fudge in the microwave for 20–25 seconds to loosen. Spread over the set chocolate ice cream layer, then sprinkle the baked cookie crumbs evenly. Return to the freezer for 1 hour for the fudge to firm.
Thaw 1 quart vanilla ice cream for 15–20 minutes and spread evenly over the cookie-topped fudge. Smooth and freeze for 4–6 hours or overnight until fully solid.
Chill your mixing bowl and beaters. Whip 2 cups cold heavy cream with 1 1/4 cups powdered sugar and 1 1/2 teaspoons clear vanilla flavoring until stiff peaks form, about 3–4 minutes. Reserve 1 cup for piping.
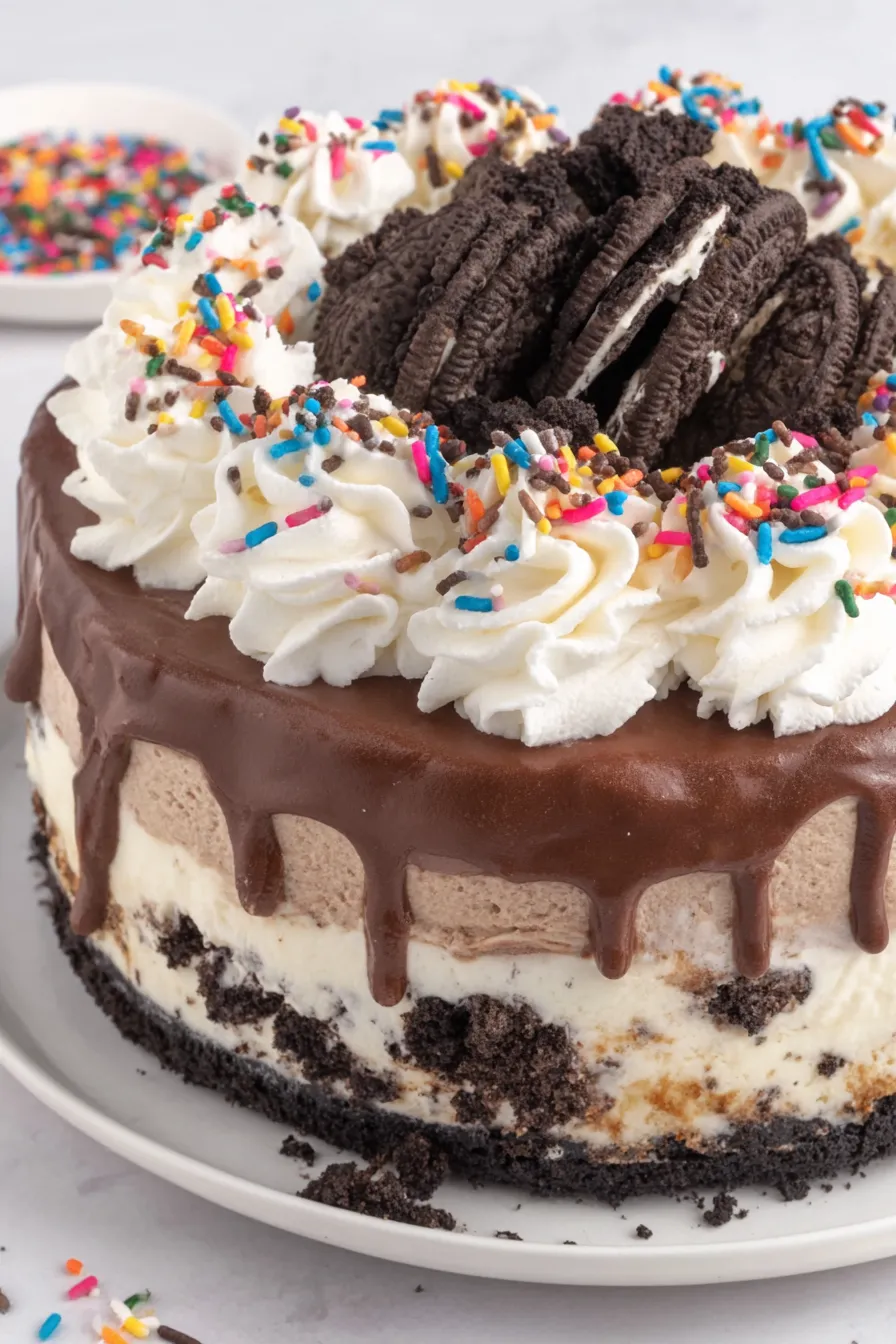
Remove springform sides, lift cake using plastic wrap onto a platter, and quickly frost sides and top with the whipped cream. Pipe decorative swirls with reserved whipped cream and add sprinkles if desired. Return to freezer until ready to serve.
Last Step: Please leave a rating and comment letting us know how you liked this recipe! This helps our business to thrive and continue providing free, high-quality recipes for you.
Leave a comment & rating below or tag
@gusteen on social media!

Ultra-fudgy brownies crowned with melty marshmallows and a glossy cocoa icing. A nostalgic crowd-pleaser that slices cleanly and disappears fast.

Buttery shortbread crust meets gooey brown-sugar pecan filling in these quick, crowd-pleasing bars, prepped in just 10 minutes.

Ultra-smooth pumpkin cheesecake with warm spice, sturdy graham crust, and a foolproof, crack-free bake. Perfect with caramel and whipped cream.
Leave a comment & rating below or tag @gusteen on social media!
Enjoyed this recipe? Share it with friends and family, and don't forget to leave a review!
This recipe looks amazing! Can't wait to try it.
Comments are stored locally in your browser. Server comments are displayed alongside your local comments.

Join to receive our email series which contains a round-up of some of our quick and easy family favorite recipes.
