
>>

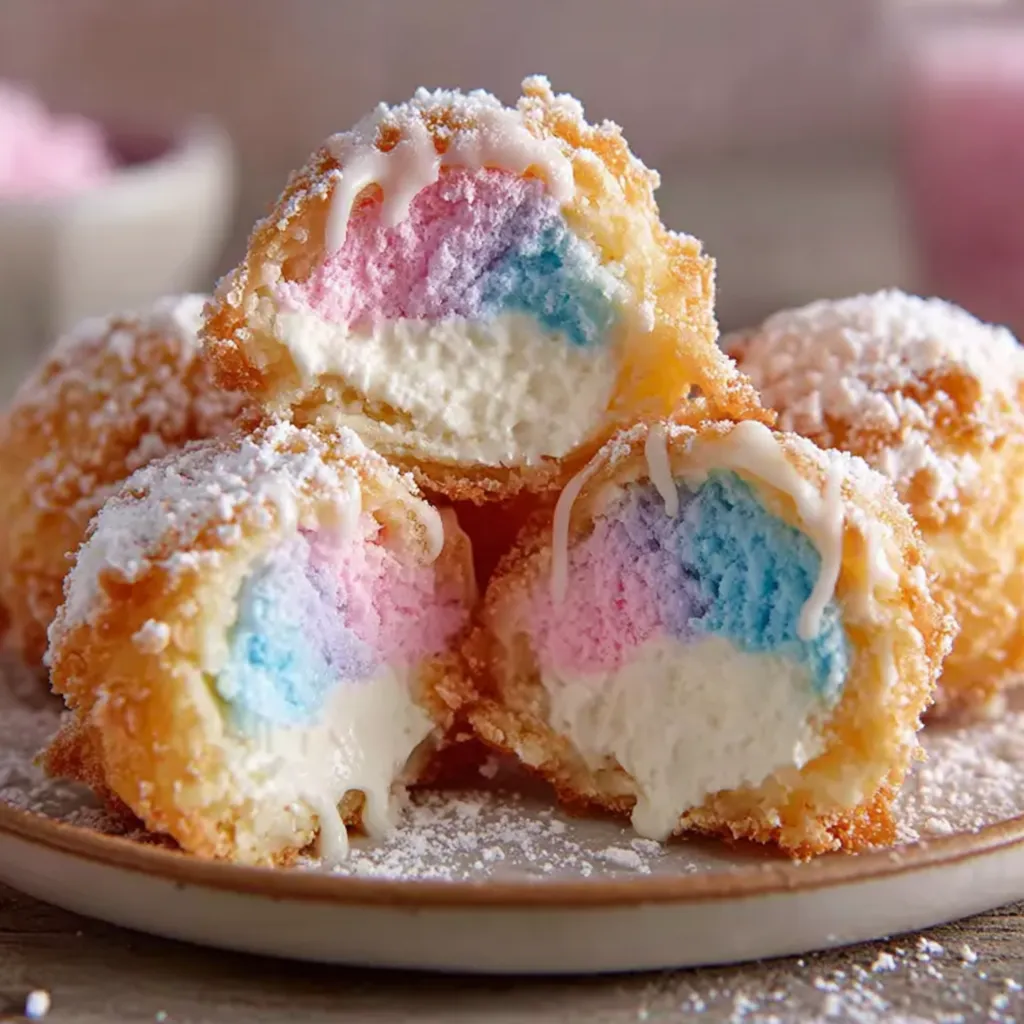
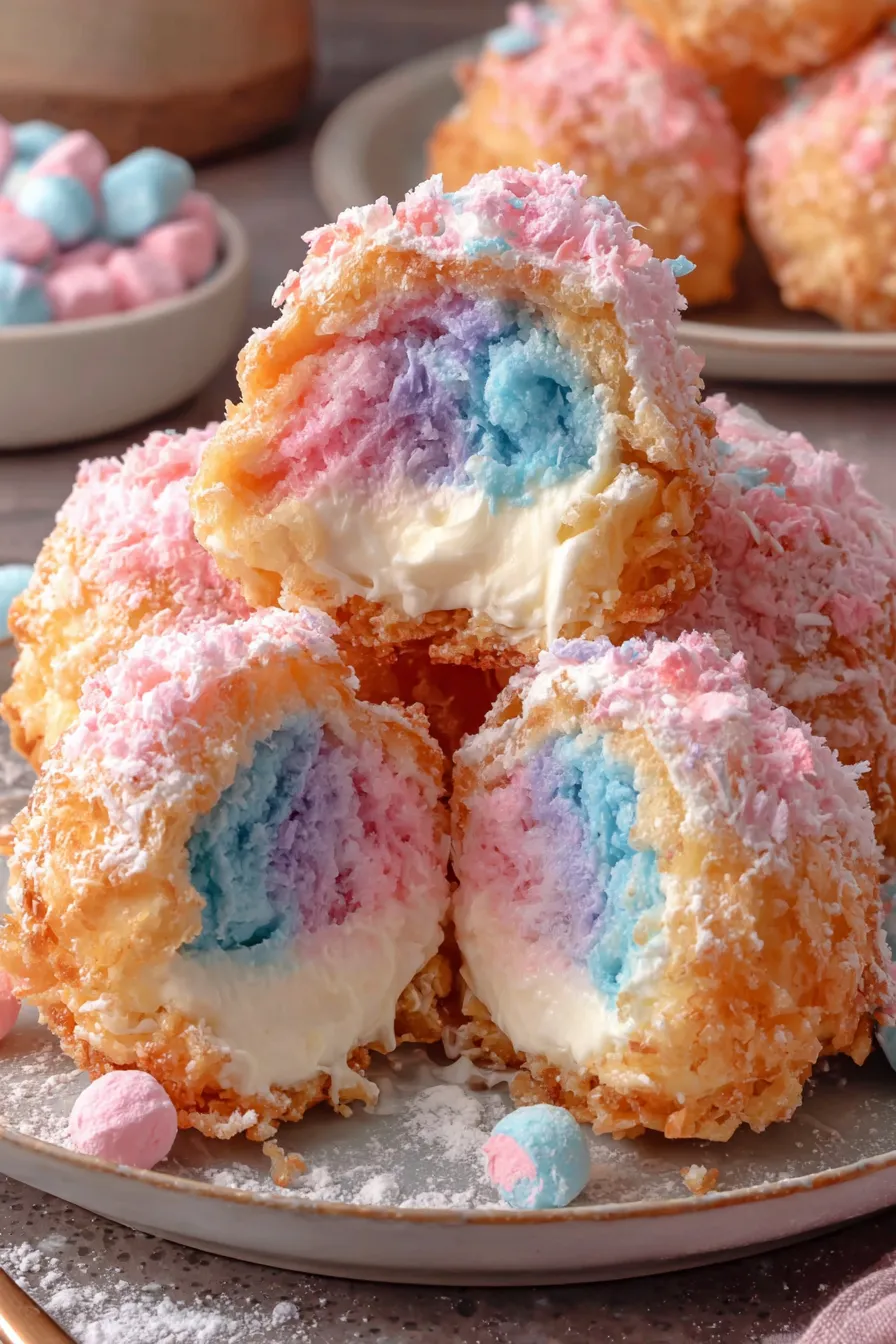
Mini fried cheesecake bombs with a whimsical cotton-candy twist — crispy golden exterior, creamy pink filling, and a carnival-ready finish.
This playful dessert was born out of a late-summer craving for something both nostalgic and a little rebellious. I wanted the pillowy sweetness of cotton candy paired with that unmistakable tang of cream cheese, all tucked into a warm, crispy shell you could eat with your hands. I first tested the idea on a backyard game night when a friend brought a packet of cotton candy extract; the combination of fried biscuit dough and a chilled, flavored cheesecake center immediately became the hit of the evening. Everyone kept reaching for "one more" until the platter was empty.
What makes these bites special is the contrast: the outside is a quick, hot fry that turns biscuit dough into a thin, crunchy golden crust while the inside remains smooth, cool, and slightly airy from whipped topping. The cotton candy flavor—subtle but distinct—brightens the cream cheese and powdered sugar mix so each bite tastes like a grown-up fair treat. They travel well to parties, hold up as finger food, and have that showy, Instagram-friendly look when dusted with spun sugar or drizzled with white chocolate.
When I served these the first time at a neighborhood potluck, kids and adults alike circled the platter. One of the neighborhood dads—never one for sweets—came back three times and said it reminded him of fair food he'd only had as a kid. That reaction alone made me glad I'd tested the idea.
My favorite part of this treat is the immediate contrast when you bite in: the warm, slightly crisp dough followed by the cool, creamy center that tastes like a nostalgic fair funnel cake crossed with a classic cheesecake. Watching friends’ faces when they spot the cotton candy is always fun—these are small moments of joy that make the extra steps worth it.
For best texture, keep the fried bites in a single layer at room temperature for short-term serving (up to 6 hours). If storing longer, place them in a sealed container in the refrigerator for up to 48 hours; expect the crust to soften as it absorbs moisture from the filling. To re-crisp, place on a wire rack in a 350°F oven for 4–6 minutes, watching carefully so they don’t over-brown. If you’ve frozen assembled balls before frying, fry from frozen and finish as directed—don’t thaw first, or they’ll leak filling into the oil.
If you prefer a lighter filling, substitute part of the cream cheese with mascarpone for a silkier texture, or use an equal amount of Greek yogurt strained in cheesecloth for tang with less fat (this will be softer and may need more chilling). For a gluten-free option, use store-bought gluten-free biscuit dough or make small rounds from gluten-free pastry and adjust fry time—expect a slightly different crust structure. If you’re avoiding dairy entirely, try a firm vegan cream cheese and plant-based whipped topping; note that frying behavior will be similar but the flavor will change slightly.

Serve these as hand-held desserts on a platter with small tongs or toothpicks for easy sharing. Complement them with a bowl of extra whipped cream, a white chocolate dipping sauce, or mini jars of berry compote for guests who want contrasting flavors. Garnish with small tufts of cotton candy and a light dusting of powdered sugar just before serving to preserve the spun sugar. Pair with sparkling lemonade, coffee, or a light rosé for adult gatherings—think carnival meets chic backyard party.
These bites are a playful riff on fair and carnival foods found across the United States—think funnel cakes, fried dough, and deep-fried confections invented for community celebrations. Combining cream cheese in small fried parcels borrows from various stuffed-fritter traditions (like stuffed beignets and sweet dumplings) while adding a modern flavor twist with cotton candy extract. The result is an Americana-inspired indulgence that feels both nostalgic and inventive.
In summer, highlight bright flavors: add a teaspoon of lemon zest to the filling, or roll the bombs in sugar mixed with freeze-dried raspberry powder for a fresh contrast. For winter parties, use cinnamon-sugar for the coating and a pinch of nutmeg in the filling; garnish with crushed peppermint instead of cotton candy for a holiday vibe. Color the filling to match seasonal themes—pastel for spring, vibrant for July celebrations, or red-and-green for Christmas.
Prepare the filling up to 24 hours ahead and pipe or scoop it into portions before chilling—this speeds assembly. You can also pre-flatten the biscuit rounds and keep them refrigerated, then assemble and freeze on a tray for convenient frying later. Label frozen bags with fry times and date; fry from frozen for parties and add 1–2 minutes to the total cook time. Use a mandoline or small scoop to keep sizes uniform so frying time stays consistent.
These bites are joyful, sharable, and adaptable—perfect for celebrations or a whimsical weeknight treat. Have fun with flavors and presentation, and enjoy the little crowd-pleasing moments they create.
Chill the filling thoroughly before portioning to prevent leaks when frying.
Use a thermometer to maintain oil at 350°F for even browning and minimal oil absorption.
Freeze assembled balls on a tray before storing to prevent them from sticking together.
Roll fried bombs in sugar while warm so the sugar adheres, then add cotton candy right before serving.
This nourishing crispy cotton candy cheesecake bombs recipe is sure to be a staple in your kitchen. Enjoy every moist, high protein slice — it is perfect for breakfast or as a wholesome snack any time.
This Crispy Cotton Candy Cheesecake Bombs recipe makes perfectly juicy, tender, and flavorful steak every time! Serve with potatoes and a side salad for an unforgettable dinner in under 30 minutes.
Beat cream cheese until smooth, add powdered sugar, vanilla and cotton candy extract, then fold in whipped topping and heavy cream. Chill 30 minutes to firm.
On a floured surface, flatten refrigerated biscuit dough to about 1/8-inch thickness and dust lightly with flour if sticky.
Scoop filling (about 1 tablespoon), place in center of dough, pinch edges tightly and roll into a smooth ball, ensuring seams are sealed.
Heat oil to 350°F in a heavy pot. Fry bombs 1–2 minutes per side until golden, working in small batches to avoid crowding.
Roll warm bombs in granulated sugar mixture, dust with powdered sugar or drizzle white chocolate, and top with a small tuft of cotton candy just before serving.
Last Step: Please leave a rating and comment letting us know how you liked this recipe! This helps our business to thrive and continue providing free, high-quality recipes for you.
Leave a comment & rating below or tag
@gusteen on social media!

Ultra-fudgy brownies crowned with melty marshmallows and a glossy cocoa icing. A nostalgic crowd-pleaser that slices cleanly and disappears fast.

Buttery shortbread crust meets gooey brown-sugar pecan filling in these quick, crowd-pleasing bars, prepped in just 10 minutes.

Ultra-smooth pumpkin cheesecake with warm spice, sturdy graham crust, and a foolproof, crack-free bake. Perfect with caramel and whipped cream.
Leave a comment & rating below or tag @gusteen on social media!
Enjoyed this recipe? Share it with friends and family, and don't forget to leave a review!
This recipe looks amazing! Can't wait to try it.
Comments are stored locally in your browser. Server comments are displayed alongside your local comments.

Join to receive our email series which contains a round-up of some of our quick and easy family favorite recipes.
