
>>

Crispy, golden gorditas made from Maseca (masa harina) — a simple, budget-friendly street-style favorite you can make at home in under an hour.
I remember serving these to a picky cousin who swore off tortillas but cleaned his plate of gorditas. They feel special yet simple, and guests keep asking how they’re so crisp without drying out inside. The method is forgiving enough that even inexperienced hands can shape and cook them with success.
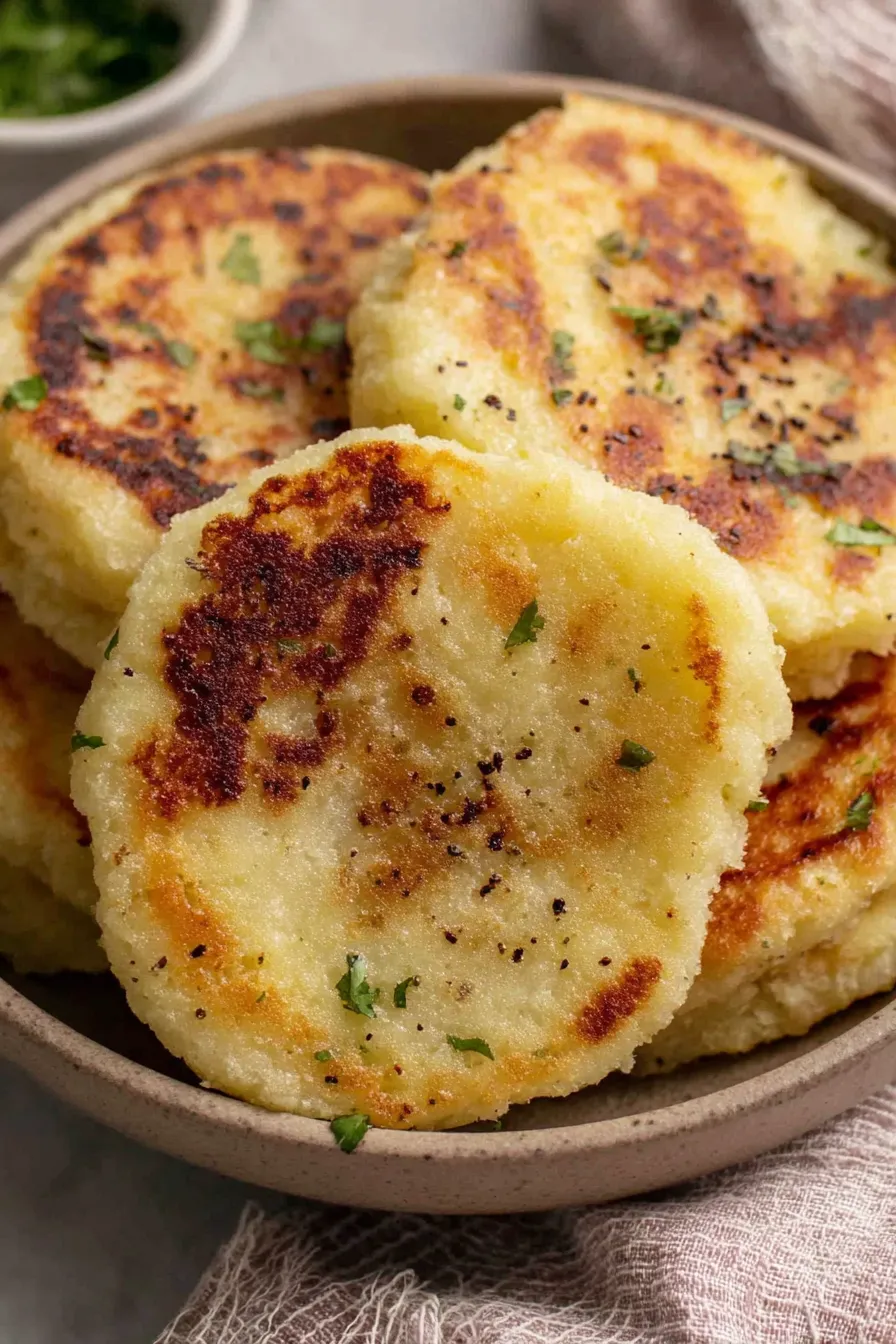
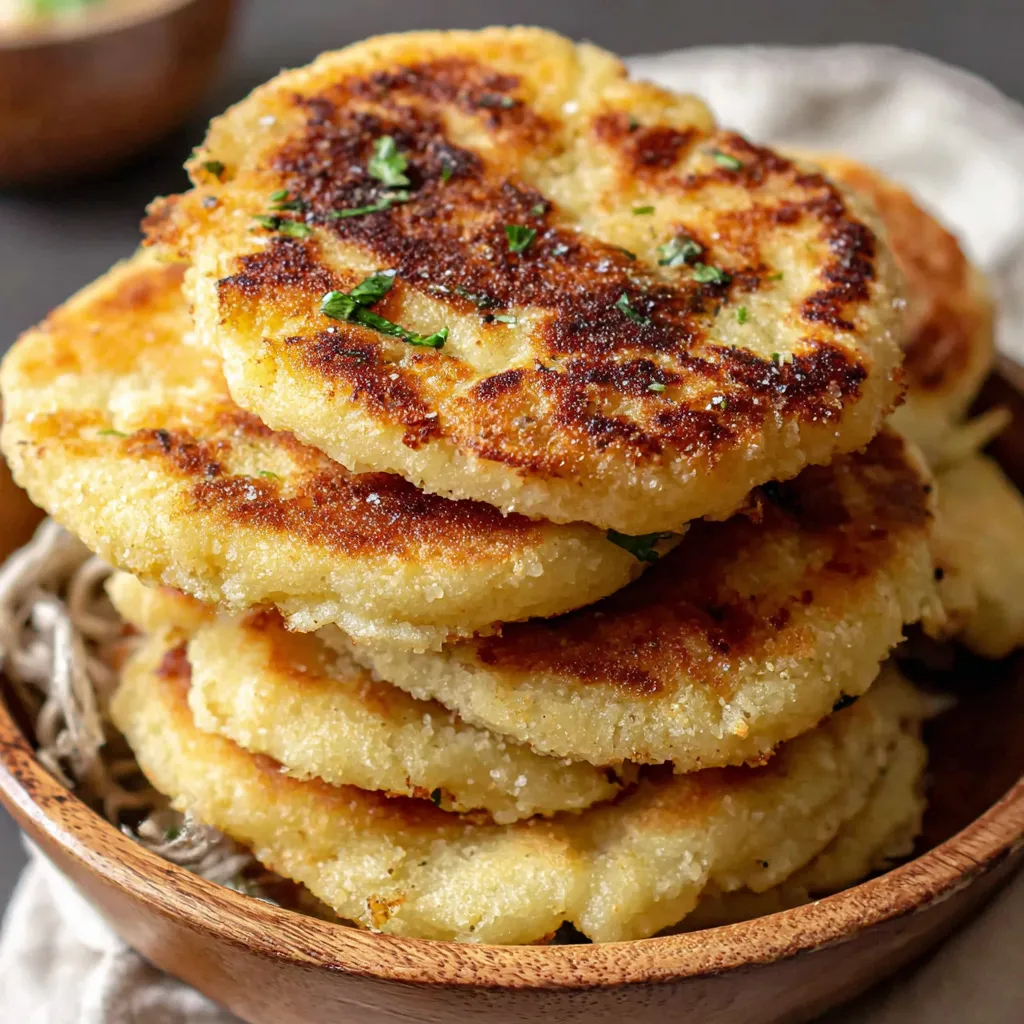
My favorite part is the contrast between the crunchy exterior and the tender interior filled with melting cheese. These gorditas became the centerpiece of a small fiesta once when a power outage turned an impromptu cooking session into a memorable evening. Family members praised the crust and requested extra pickled onions.
To store cooked gorditas, cool them completely then stack with parchment paper between each piece and seal in an airtight container in the refrigerator for up to 3 days. For longer storage, flash-freeze on a sheet pan until firm, then transfer to a freezer bag for up to 3 months. Reheat frozen gorditas in a 350°F oven for 8 to 12 minutes, flipping halfway, or warm in a skillet with a splash of oil to restore crispness. Avoid microwaving if you want to keep the exterior crunchy; use the microwave only for a quick softening before crisping in a pan.
If you do not have Maseca, another brand of masa harina will work but watch hydration differences; some brands absorb more water. For a slightly richer dough, substitute half the water with warm buttermilk if you are not dairy-free — this adds tang and tenderness. For a whole-grain note, mix up to 1/4 cup finely ground cornmeal into the masa, but expect a coarser texture. To make them gluten-free with certainty, look for certified gluten-free masa harina and check oil labels for cross-contact warnings.
Serve warm with traditional garnishes: crumbled queso fresco, shredded lettuce, pickled red onions, fresh cilantro, and a squeeze of lime. For a filling meal, offer refried beans, spiced shredded beef, or slow-cooked chicken tinga. For a lighter take, fill with roasted vegetables and avocado. Pair with a fresh salsa verde or smoky chipotle crema for contrast. I like to present them on a wooden board with small bowls of fillings so guests can assemble their own — it’s interactive and reduces plating time.

Gorditas have deep roots in Mexican home cooking and street food culture. Traditionally made with masa nixtamalizada, they were shaped and filled with local ingredients — beans, cheese, meats, and chiles — serving as portable, hearty food. The word gordita means little fat one, referencing the puffed, rounded shape after cooking. Regional variations range from corn-based masa to those made with flour; fillings and finishing toppings reflect local produce and culinary traditions. Making them at home connects you to a long tradition of casual, communal eating.
Adapt fillings to the season: summer calls for grilled vegetables and fresh salsas, while winter benefits from slow-cooked meats and warm bean stews. At harvest time, incorporate roasted squash or sweet potato with toasted pepitas. For holidays, offer a spiced pork filling with pickled cabbage to make them festive. Adjust cooking oil temperature slightly when ambient kitchen temperatures are low to maintain consistent frying performance.
Make the dough up to a day ahead and keep it covered in the fridge; bring it to room temperature before shaping. Par-cook plain gorditas and freeze; finish frying or crisping them at serving time. Pre-prepare fillings and keep warm in covered pans or slow cookers. If assembling for lunches, split and fill with cold fillings like black bean and corn salad and wrap individually; reheat briefly to restore texture if desired.
These gorditas are simple to master and endlessly versatile. Once you get the dough hydration and cooking rhythm right, they become a reliable crowd-pleaser — perfect for casual nights and special gatherings alike. Enjoy the process, and feel free to make them your own.
Test oil temperature with a small dough scrap; it should sizzle steadily without instant darkening.
Cover shaped disks with a damp towel to prevent drying while you finish shaping the batch.
After initial browning, reduce heat to low to cook through without burning the exterior.
For extra tender interior, add 1 tablespoon vegetable oil to the dough.
Use a sharp knife to split gorditas to avoid tearing their walls and losing fillings.
This nourishing how to make crispy maseca gorditas recipe is sure to be a staple in your kitchen. Enjoy every moist, high protein slice — it is perfect for breakfast or as a wholesome snack any time.
If the dough feels dry, add warm water a teaspoon at a time until it reaches a smooth, peanut-butter-like consistency. If too sticky, dust with 1 teaspoon masa at a time. Rest dough under a damp towel for 5 minutes to hydrate fully.
Yes. Cool completely, wrap each gordita in parchment, and freeze in an airtight bag for up to 3 months. Reheat in a 350°F oven for 8 to 12 minutes or crisp in a skillet to restore texture.
This How to Make Crispy Maseca Gorditas recipe makes perfectly juicy, tender, and flavorful steak every time! Serve with potatoes and a side salad for an unforgettable dinner in under 30 minutes.
Bring about 3 cups of water to a boil. In a large bowl, combine 2 cups Maseca with 1 1/2 cups hot water and mix by hand until the dough feels like smooth peanut butter. Add 1 tablespoon oil if desired. Adjust with small amounts of water or masa to reach proper consistency and cover to rest 5 minutes.
Divide the dough into 6 to 8 portions and flatten each into saucer-shaped disks about 1/4 inch thick. Keep a damp towel over finished disks to prevent drying and ensure even thickness for uniform cooking.
Heat a heavy skillet over medium-high heat and add oil to cover the base by 1/4 to 1/2 inch. Heat until shimmering but not smoking or reach about 350°F. Test with a small dough bit to confirm sizzle.
Fry each disk about 3 minutes per side until golden. Reduce heat to low and continue cooking 7 to 9 minutes per side to fully cook the interior, adjusting time for thickness to avoid raw centers.
Drain briefly on paper towels, then carefully split open with a sharp knife and stuff with fillings such as beans, cheese, or shredded meat. Serve warm for best texture.
Last Step: Please leave a rating and comment letting us know how you liked this recipe! This helps our business to thrive and continue providing free, high-quality recipes for you.
Leave a comment & rating below or tag
@gusteen on social media!

Ultra-fudgy brownies crowned with melty marshmallows and a glossy cocoa icing. A nostalgic crowd-pleaser that slices cleanly and disappears fast.

Buttery shortbread crust meets gooey brown-sugar pecan filling in these quick, crowd-pleasing bars, prepped in just 10 minutes.

Ultra-smooth pumpkin cheesecake with warm spice, sturdy graham crust, and a foolproof, crack-free bake. Perfect with caramel and whipped cream.
Leave a comment & rating below or tag @gusteen on social media!
Enjoyed this recipe? Share it with friends and family, and don't forget to leave a review!
This recipe looks amazing! Can't wait to try it.
Comments are stored locally in your browser. Server comments are displayed alongside your local comments.

Join to receive our email series which contains a round-up of some of our quick and easy family favorite recipes.
