
>>

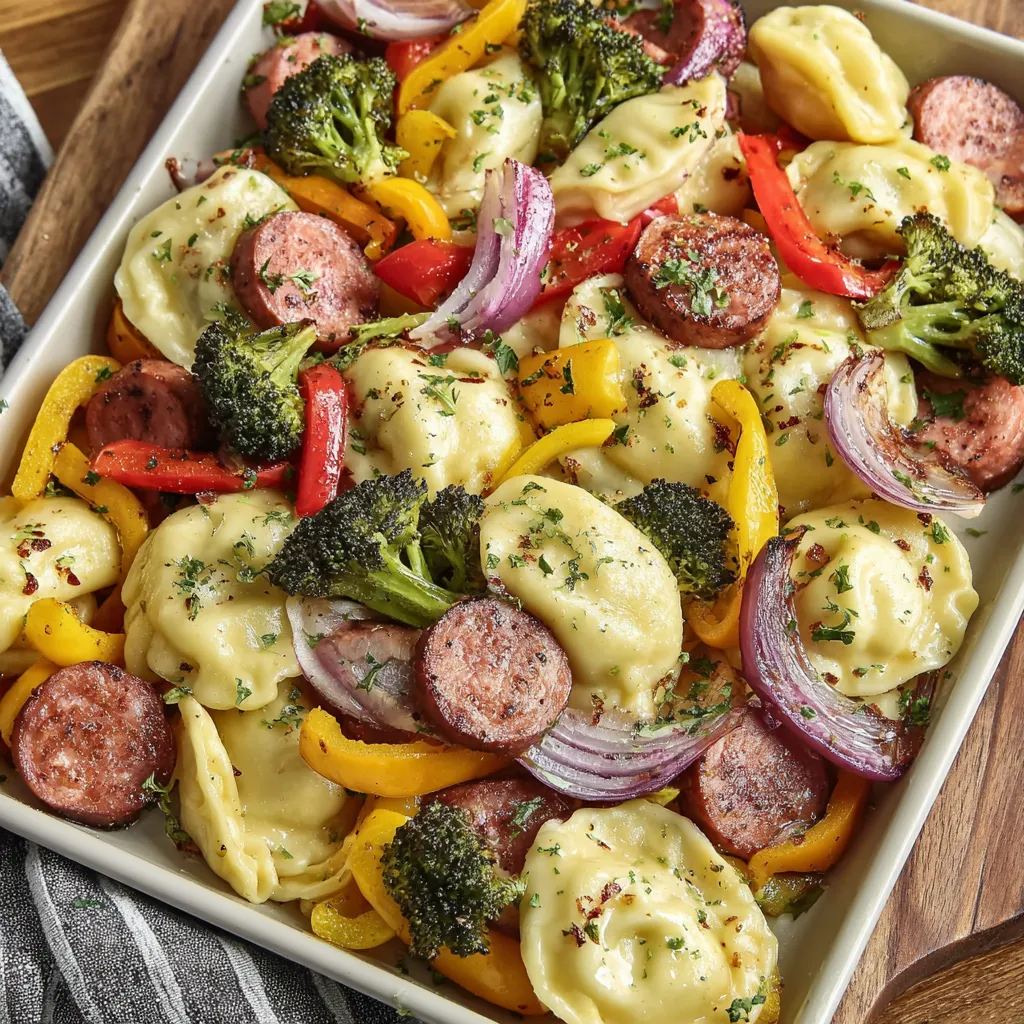
A quick, satisfying sheet pan meal: crispy pierogies, smoky kielbasa, and roasted vegetables finished with garlic butter and fresh herbs. Ready in about 30 minutes.
I remember the first time I doubled this for a casual neighborhood potluck. The tray vanished, with everyone asking for the simple method. It has since become a requested contribution to family gatherings because it travels well and remains flavorful when reheated gently.
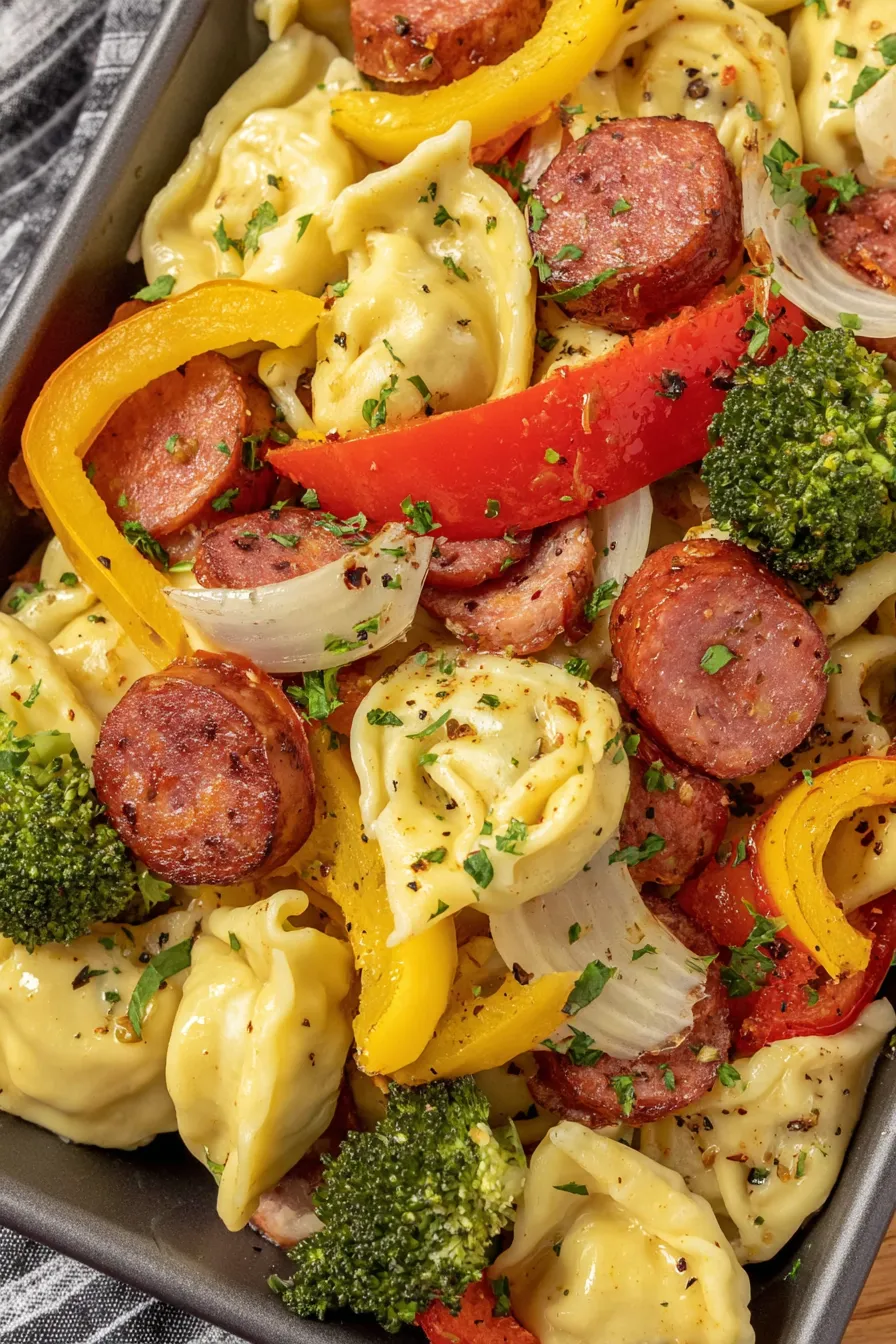
My favorite part is the way the kielbasa juices mingle with the vegetables and pierogies during roasting, forming little caramelized pockets of flavor. At home, this dish often becomes a shared tray on the table, with little hands reaching in for the crispiest pierogi. The contrast of textures and the straightforward assembly keep me making this over and over.

Let the tray cool slightly before transferring leftovers to an airtight container. Refrigerate for up to three days. For best texture, reheat on a sheet pan in a 375 degree Fahrenheit oven for 8 to 12 minutes rather than microwaving, which softens the crisped edges. To freeze, flash-freeze individual pieces on a tray, then pack them into freezer bags for up to three months; roast from frozen at 425 degrees Fahrenheit for an extended time until heated through and crisp.
If you prefer to avoid pork, use smoked turkey kielbasa or a plant-based smoked sausage in equal weight (12 ounces). Vegetarian cooks can swap pierogies for potato and cheese varieties made without animal rennet and finish with olive oil instead of butter. If broccoli is not available, use cauliflower florets or Brussels sprouts halved. Reduce the broccoli to 1 to 1.5 cups if you prefer more space on the pan for browning.
Serve this tray with individual bowls of sour cream and whole grain mustard for dipping. A crisp green salad or a simple cucumber and vinegar slaw cuts through richness and brightens the plate. For a heartier meal, add roasted baby potatoes to the pan (allow a longer cook time) or serve alongside pickled beets for a traditional Eastern European touch.
Pierogies are a staple of Eastern European cuisine, particularly Polish kitchens, where they are often handmade and filled with potato, cheese, or meat. Kielbasa is a smoked sausage with roots in Polish charcuterie traditions. This sheet pan method is a modern, Americanized approach that honors both components by combining them into a single, convenient tray for busy households—preserving the flavors while simplifying technique.
In summer, swap broccoli for zucchini and add halved cherry tomatoes in the final 8 minutes of roasting for freshness. In colder months, include cubed sweet potatoes or parsnips and use a heartier smoked sausage. For holidays, add caramelized apples and a sprinkle of caraway seeds for aromatic complexity that pairs beautifully with the sausage.
Assemble the seasoned mixture in a sealed container up to 24 hours ahead and store in the refrigerator; when ready to eat, spread on the sheet pan and roast as directed. This makes weeknight dinners extremely fast. If you double the recipe for meal prep, use two sheet pans to avoid crowding and maintain even roasting across all pieces.
There is a special joy in turning a frozen packet and a sausage link into something that feels celebratory. Share it straight from the pan and watch how quickly it becomes a simple favorite. Make the finishes your own, and enjoy the ease of a one-pan meal that still tastes like love shared around the table.
Pat frozen pierogies dry with a paper towel if slightly frosted so they crisp evenly in the oven.
Do not overcrowd the pan; give each piece room to brown for best texture.
Flip pierogies and stir vegetables halfway through the roast for even coloring and doneness.
Use high heat (425 F) to achieve Maillard browning quickly without long cook times.
If using butter as a finish, brush it on right after the pan comes out so it melts evenly.
This nourishing easy sheet pan pierogies and kielbasa recipe is sure to be a staple in your kitchen. Enjoy every moist, high protein slice — it is perfect for breakfast or as a wholesome snack any time.
This Easy Sheet Pan Pierogies and Kielbasa recipe makes perfectly juicy, tender, and flavorful steak every time! Serve with potatoes and a side salad for an unforgettable dinner in under 30 minutes.
Preheat oven to 425 degrees Fahrenheit and line a large rimmed sheet pan with parchment paper or lightly grease it to prevent sticking.
Combine the frozen pierogies, sliced kielbasa, chopped red and yellow peppers, sliced onion, and broccoli florets in a large mixing bowl.
Drizzle with 3 tablespoons olive oil and add 1 teaspoon garlic powder, 1 teaspoon paprika, 1/2 teaspoon onion powder, 1/2 teaspoon salt, and 1/2 teaspoon black pepper. Toss until evenly coated.
Spread the mixture onto the prepared sheet pan in a single layer, ensuring pieces are not stacked or crowded to allow even browning.
Bake at 425 degrees Fahrenheit for 25 to 30 minutes, flipping the pierogies and stirring the vegetables halfway through to achieve even crisping and caramelization.
Remove from the oven and drizzle with 2 tablespoons melted garlic butter if desired. Sprinkle with 2 tablespoons chopped parsley or green onions for brightness.
Serve warm from the pan or transfer to plates with sour cream on the side for dipping. Enjoy immediately for best texture.
Last Step: Please leave a rating and comment letting us know how you liked this recipe! This helps our business to thrive and continue providing free, high-quality recipes for you.
Leave a comment & rating below or tag
@gusteen on social media!

Ultra-fudgy brownies crowned with melty marshmallows and a glossy cocoa icing. A nostalgic crowd-pleaser that slices cleanly and disappears fast.

Buttery shortbread crust meets gooey brown-sugar pecan filling in these quick, crowd-pleasing bars, prepped in just 10 minutes.

Ultra-smooth pumpkin cheesecake with warm spice, sturdy graham crust, and a foolproof, crack-free bake. Perfect with caramel and whipped cream.
Leave a comment & rating below or tag @gusteen on social media!
Enjoyed this recipe? Share it with friends and family, and don't forget to leave a review!
This recipe looks amazing! Can't wait to try it.
Comments are stored locally in your browser. Server comments are displayed alongside your local comments.

Join to receive our email series which contains a round-up of some of our quick and easy family favorite recipes.
