
>>

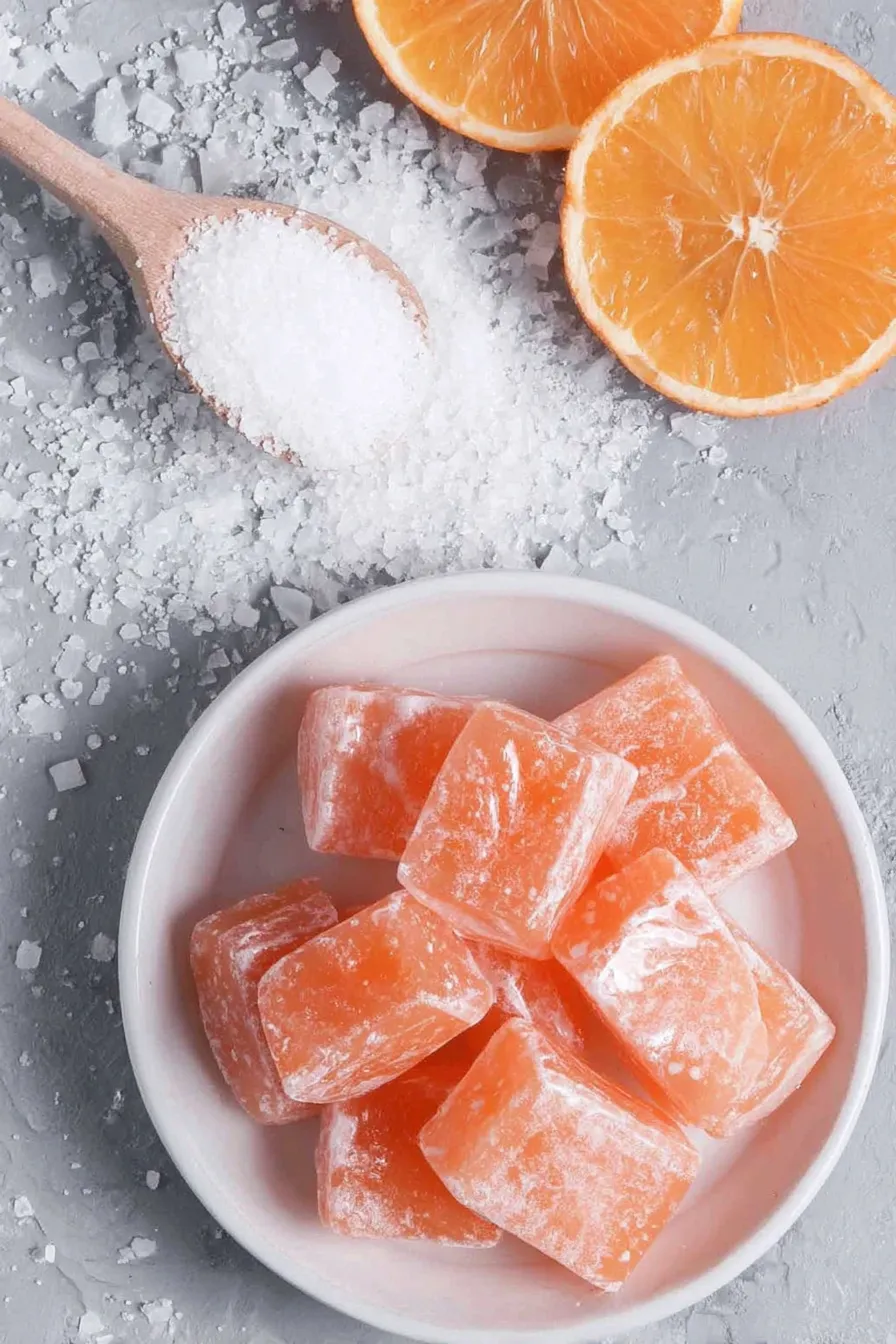
Classic old-fashioned hard candy made from a simple sugar syrup, flavored and colored to your liking—perfect for gifts, holiday bowls, or sweet cravings.
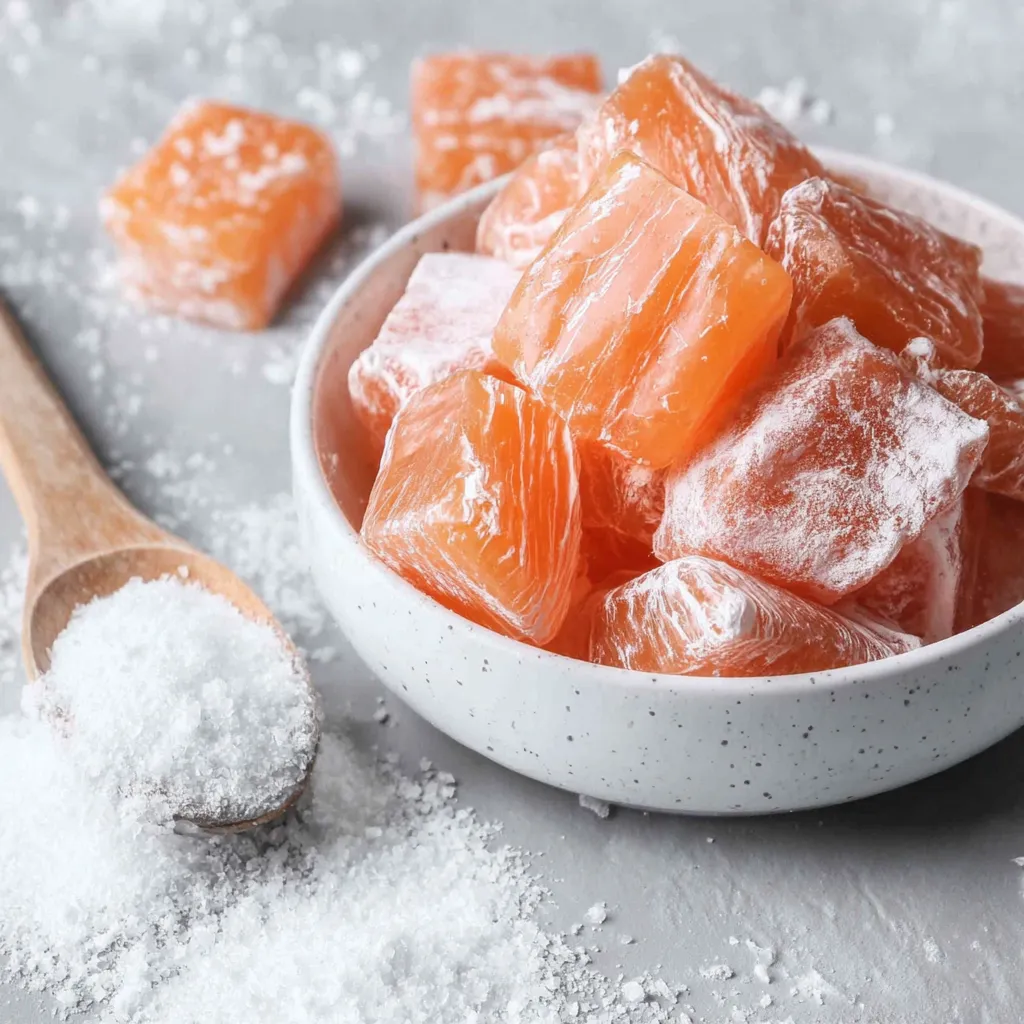
I’ve handed out these candies at winter gatherings and tucked them into care packages. My family always remarks on the clean flavor and the satisfying snap. One year I colored half the batch orange and half yellow for a birthday party; the kids loved helping cut the strips under supervision, and guests kept asking how simple they were to make.
My favorite aspect is the immediate visual reward: glossy poured candy that cools into translucent jewels. Friends often comment on how professional the candies look despite their simple ingredients. The process teaches patience and temperature control—once you master it, you’ll confidently create flavors and colors for every occasion.

Store the finished pieces in an airtight container at room temperature, ideally with a layer of parchment between layers to prevent sticking. Avoid refrigeration because humidity will soften the candy. For longer storage, keep candies in a cool, dry pantry; they will retain texture for several weeks. If you live in a humid climate, add a small packet of desiccant (not in direct contact with the candy) or store in a tightly sealed tin. When reheating leftovers is necessary, briefly warm under low oven heat on a lined sheet to restore a bit of sheen but note that reheating can change texture.
If light corn syrup is unavailable, golden syrup or glucose syrup can be substituted in roughly the same volume but the final texture may vary slightly; these alternatives still help prevent crystallization. For extract choices, citrus and anise oils are strong—use just 1/2 teaspoon of essential oil or 1 to 2 teaspoons of extract depending on potency. If you prefer natural color, small amounts of beet or turmeric-infused oil can tint pieces, but expect more muted hues. Avoid using unrefined sugar or coconut sugar; they introduce color and change the glassy clarity.
Serve the candies in small paper candy cups, glass bowls, or tied cellophane bags for gifting. They pair nicely with espresso or a citrus-forward tea; anise-flavored pieces complement coffee well. For parties, arrange mixed colors in a clear bowl for visual appeal. Use themed colors for holidays—orange and yellow for fall, red for Valentine’s Day. A light dusting of extra confectioners’ sugar before packing helps maintain separation and ease of handling.
Hard candy has a long history across many cuisines, from Victorian boiled sweets in England to traditional holiday lozenges in European households. The technique of boiling sugar to specific stages was refined in 19th-century confectionery; controlling temperature allowed confectioners to create distinct textures like soft-ball, firm-ball, and hard-crack. In the United States, flavored boiled candies have been popular as homemade treats and small-town candy shops, and the method remains a foundational skill in confectionery arts.
Adjust flavors and colors seasonally: peppermint or red-and-white swirls for winter holidays, lemon or pastel colors for spring, and warm orange or cinnamon for autumn. For summer, clear citrus candies are refreshing and look beautiful in glass jars. You can also infuse the water with steeped tea or herb reductions before combining with sugar for subtle herbal notes, but strain well to remove solids to keep clarity.
For making multiple batches ahead, line several pans with confectioners’ sugar at once and label them with intended flavors. Work in small batches when adding color or very strong extracts to avoid over-flavoring. Use a dedicated candy thermometer and a heavy-bottomed saucepan to ensure repeatable results. Clean pans and utensils promptly—dried sugar is difficult to remove. If planning to gift, package candies in airtight containers and add a fresh layer of powdered sugar right before sealing to prevent surface tackiness.
Making these candies is a joyful mix of chemistry and craft. Whether you make them for a celebration or a quiet afternoon project, they carry the warmth of hands-on cooking and the satisfaction of transforming simple ingredients into small edible treasures. Share them, store them carefully, and adjust flavors to make the recipe your own.
Use a reliable candy thermometer and test accuracy in boiling water if unsure before starting.
Cover the pot for 3 minutes after the syrup begins boiling to dissolve stray crystals and prevent graininess.
Always pour and handle the syrup with heat-resistant gloves or long-handled tools; the liquid is over 300°F and will cause severe burns.
Work quickly when adding color and pouring; the syrup sets fast once off the heat.
If your candy begins to crystallize, you can reheat gently with a small splash of water and a spoonful of corn syrup to smooth it.
This nourishing homemade hard candy recipe is sure to be a staple in your kitchen. Enjoy every moist, high protein slice — it is perfect for breakfast or as a wholesome snack any time.
This Homemade Hard Candy recipe makes perfectly juicy, tender, and flavorful steak every time! Serve with potatoes and a side salad for an unforgettable dinner in under 30 minutes.
Spread 5 to 6 cups confectioners’ sugar in a 15 x 10 x 1-inch pan to a depth of about 1/2 inch. Use a wooden spoon handle to carve a continuous curved-line indentation to guide pouring and shaping.
In a large heavy saucepan combine 2 cups granulated sugar, 3/4 cup light corn syrup, and 1/2 cup water. Heat over medium, stirring just until sugar dissolves. Stop stirring as you approach boiling to avoid crystals.
When mixture reaches a boil, cover the pan and cook for 3 minutes. This melts any stray crystals on the sides. Remove lid and continue cooking while monitoring temperature.
Increase heat to medium-high and cook without stirring until candy thermometer reads 300°F (hard-crack). Watch color and bubble size—remove promptly to avoid burning.
Remove pan from heat. Stir in 1 to 2 teaspoons of chosen extract and a few drops of food coloring. Mix quickly but carefully to combine without introducing air.
Transfer hot syrup into a heatproof glass measuring cup and pour into the sugar-lined indentation in the pan. Immediately dust the top with confectioners’ sugar to prevent sticking.
Allow to cool until firm, about 30–60 minutes. Use scissors to cut into pieces along the indentation. Store in an airtight container at room temperature.
Last Step: Please leave a rating and comment letting us know how you liked this recipe! This helps our business to thrive and continue providing free, high-quality recipes for you.
Leave a comment & rating below or tag
@gusteen on social media!

Ultra-fudgy brownies crowned with melty marshmallows and a glossy cocoa icing. A nostalgic crowd-pleaser that slices cleanly and disappears fast.

Buttery shortbread crust meets gooey brown-sugar pecan filling in these quick, crowd-pleasing bars, prepped in just 10 minutes.

Ultra-smooth pumpkin cheesecake with warm spice, sturdy graham crust, and a foolproof, crack-free bake. Perfect with caramel and whipped cream.
Leave a comment & rating below or tag @gusteen on social media!
Enjoyed this recipe? Share it with friends and family, and don't forget to leave a review!
This recipe looks amazing! Can't wait to try it.
Comments are stored locally in your browser. Server comments are displayed alongside your local comments.

Join to receive our email series which contains a round-up of some of our quick and easy family favorite recipes.
