
>>

Crisp, tender mini hand pies filled with cinnamon-scented apple filling—easy to make, perfect for parties, and utterly irresistible.
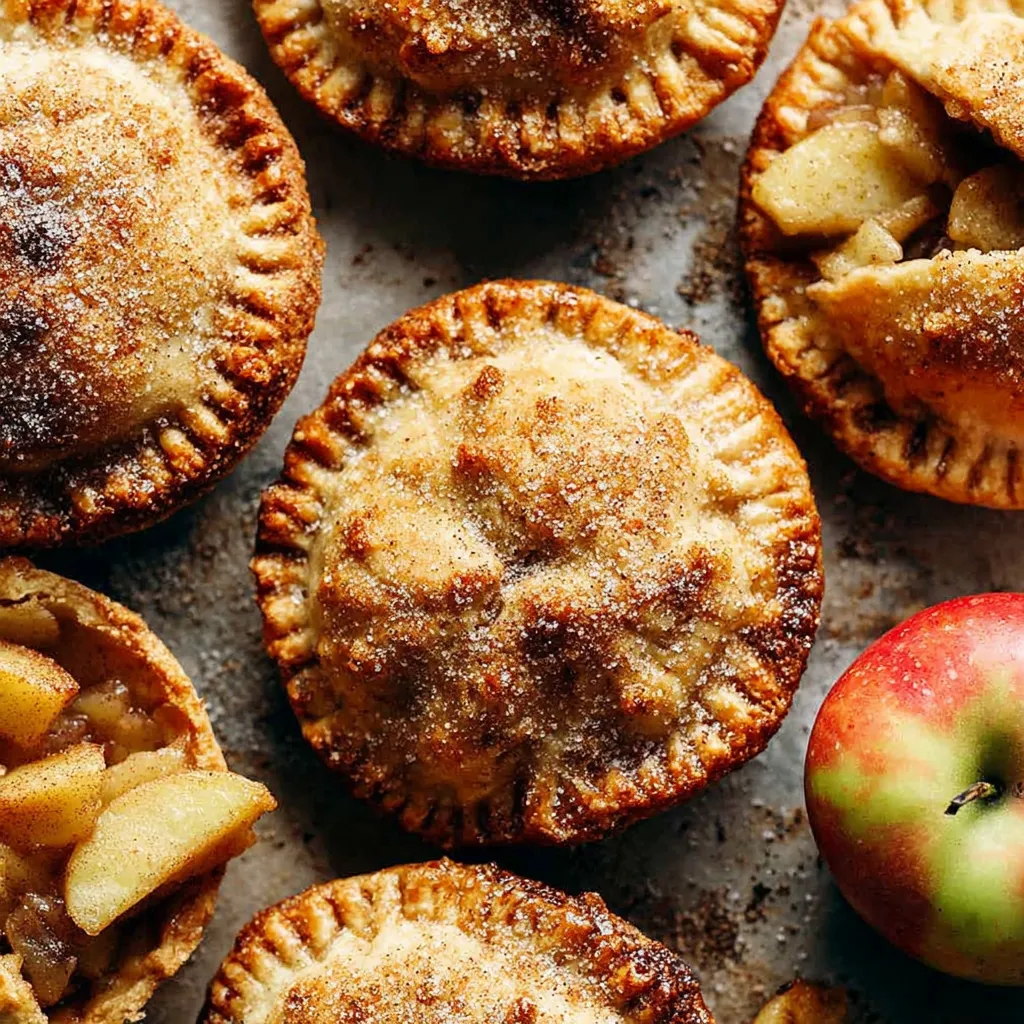
This batch of mini apple hand pies has been my favorite quick-bake for cozy afternoons and last-minute gatherings. I first adapted this little pastry several autumns ago when I wanted a small sweet to bring to a friend’s potluck without lugging a full pie. The result was tiny, perfectly portable apples encased in a golden crust that made everyone smile. The filling is bright with lemon juice and warm with cinnamon, the apples soften without turning to mush, and the sugar-cinnamon topping gives each pie a delicate sparkle that crunches with the first bite.
I love these for their texture contrast: a flaky exterior, a tender apple interior, and a bit of sticky syrup where the filling concentrates. They’re quick enough for a weeknight treat yet charming enough for holiday cookie exchanges. I usually make a double batch to freeze extras; they reheat beautifully in a warm oven and still maintain that fresh-baked character. These little pies are forgiving, beginner-friendly, and a wonderful way to use crisp apples like Fuji or Honeycrisp.
In my family these became a ritual: the first crisp day of fall we make a tray and send plates to neighbors. The combination of tart apple juices thickened just enough and a buttery crust always draws compliments, and I love how versatile the filling is—swap apples or spices to suit the season.

My favorite part is how these bring people together: friends who rarely bake swoon over the flaky crust and kids always beg to help sprinkle the cinnamon sugar. On a rainy afternoon, the smell of cinnamon and baked apples makes the whole house feel like a warm hug.
Store leftover pies in an airtight container at room temperature for up to 1 day, or refrigerate for 3 days. To retain crispness, place a paper towel under the pies to absorb excess moisture. For longer storage, freeze baked pies individually wrapped in plastic and foil for up to 2 months. Reheat directly from frozen in a 350°F oven for 10–12 minutes or until warmed through—avoid microwaving for best texture; the crust will become soft.
If you need a gluten-free version, use a store-bought gluten-free pie crust and handle it colder—press portions instead of rolling to prevent cracking. For a dairy-free option, swap in a plant-based butter stick at the same measure. If you prefer lower sugar, reduce brown sugar by one-quarter and replace half the granulated sprinkle with a sugar substitute that bakes well. You can also incorporate a pinch of nutmeg or cardamom for a spicier profile, and switch apples for pears in late winter for seasonal variety.
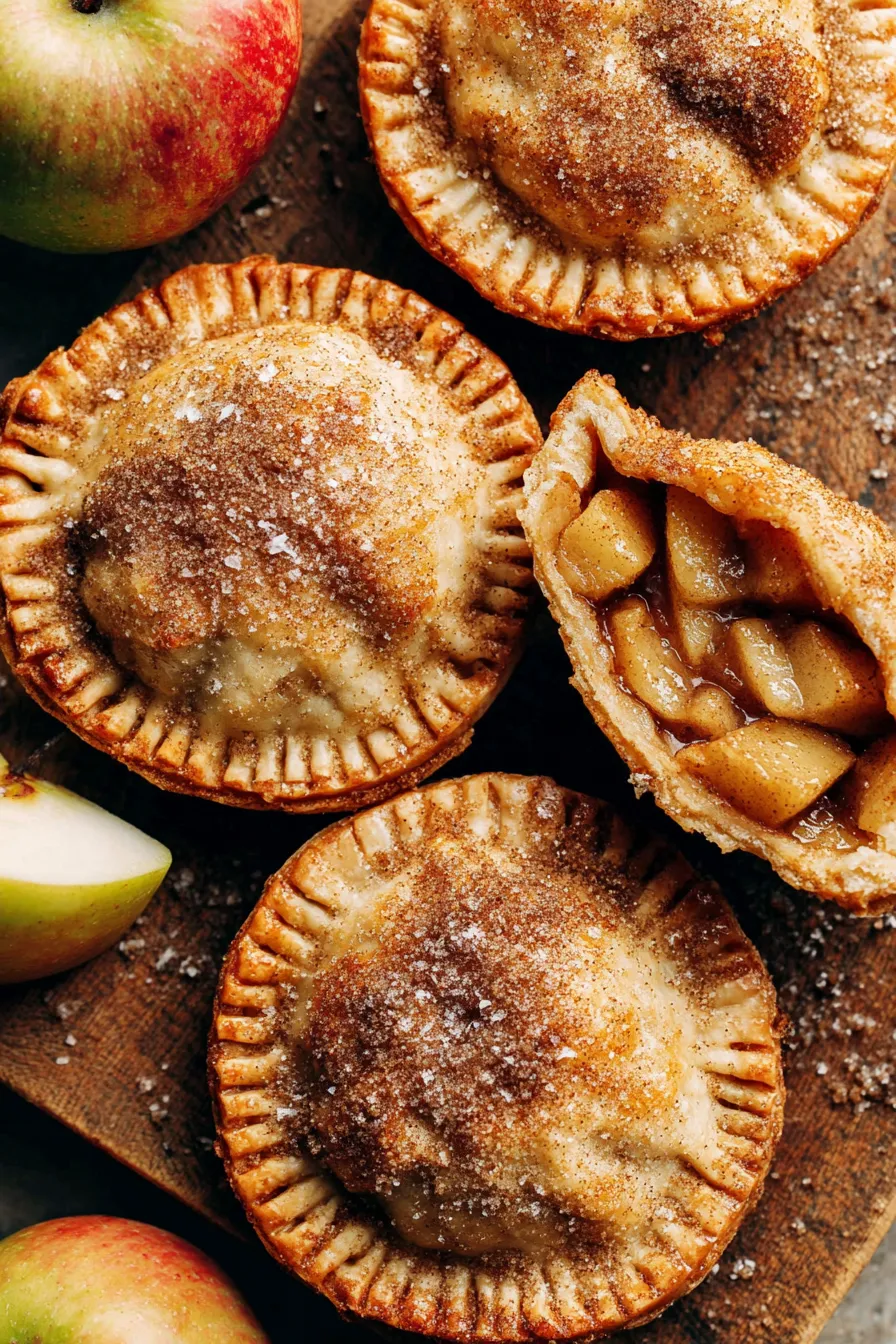
Serve warm from the oven with a small scoop of vanilla ice cream or a dollop of lightly whipped cream for an indulgent treat. For brunch, pair with coffee and a sharp cheddar for an unexpected savory contrast. Garnish with a light dusting of powdered sugar or a thin lemon glaze if you like extra shine. These are perfect for holiday platters—arrange on a wooden board with fresh apple slices and toasted pecans for an inviting spread.
Hand pies have long been a portable pastry concept across many cultures, from British meat or fruit pasties to American picnic turnovers. The miniature apple pie is a nod to classic American baking traditions—apples and cinnamon are emblematic of fall harvests and home baking. Making individual pies allows each portion to be enjoyed without utensils and reflects a practical, convivial approach to sharing desserts at communal gatherings.
Switch spices to suit the season: add warm cloves or ginger in winter, or a pinch of cardamom in early spring for floral notes. In summer, replace half the apple with peaches for a juicy hybrid or fold in a handful of fresh berries for color and tartness. For holiday versions, add chopped dried cranberries and orange zest to the filling for festive brightness.
For time-saving, prepare the filling up to 2 days in advance and keep refrigerated. Cut all dough shapes in one session and stack them between sheets of parchment to prevent sticking. Assemble pies the day you plan to bake or freeze on the tray for quick baking later. Pack assembled but unbaked pies in a freezer-safe container for convenient baking on demand—this is a great strategy for unexpected guests.
These mini apple hand pies balance simplicity and charm: they’re quick to make, easy to customize, and always a crowd-pleaser. Enjoy the baking process, and don’t be afraid to make this recipe your own.
Cool the filling completely before filling the dough to prevent soggy bottoms.
Chill cut dough shapes between batches to keep them firm and easy to handle.
Use a small cookie scoop or tablespoon for consistent filling amounts.
Brush the dough border with egg wash to improve the seal and prevent leaking.
Flash-freeze assembled pies on a tray before bagging for best freezer storage.
This nourishing mini apple hand pies recipe is sure to be a staple in your kitchen. Enjoy every moist, high protein slice — it is perfect for breakfast or as a wholesome snack any time.
Yes. Assemble and freeze unbaked on a tray, then transfer to a freezer bag. Bake from frozen, adding a few minutes to the baking time.
Use a gluten-free store-bought pie dough and keep it chilled; handle gently to avoid cracking.
This Mini Apple Hand Pies recipe makes perfectly juicy, tender, and flavorful steak every time! Serve with potatoes and a side salad for an unforgettable dinner in under 30 minutes.
Remove the pie dough from the refrigerator and let it sit while you prepare the filling so it softens slightly for easier rolling and cutting.
Melt butter in a saucepan over medium heat. Add chopped apples, brown sugar, cinnamon, and lemon juice. Cook for about 8–10 minutes until apples are tender and juices form.
Stir together cornstarch and water, add to the apples, and heat for about 30 seconds until slightly thickened. Remove from heat and cool completely before filling the dough.
Preheat oven to 400°F and line a baking sheet with parchment. Lightly dust work surface and gently roll one dough sheet to smooth wrinkles.
Cut apple shapes with a cutter or template, keep cut shapes chilled while you work on the second sheet to maintain structure.
Place half of the cut shapes on the sheet, add 1 tablespoon of cooled filling to each, brush border with egg wash, top with vented shapes, press to seal, crimp edges, and brush tops with egg wash.
Mix granulated sugar with cinnamon and sprinkle over each pie. Bake at 400°F for 12–14 minutes until golden. Cool 5 minutes on the sheet then transfer to a rack.
Last Step: Please leave a rating and comment letting us know how you liked this recipe! This helps our business to thrive and continue providing free, high-quality recipes for you.
Leave a comment & rating below or tag
@gusteen on social media!

Ultra-fudgy brownies crowned with melty marshmallows and a glossy cocoa icing. A nostalgic crowd-pleaser that slices cleanly and disappears fast.

Buttery shortbread crust meets gooey brown-sugar pecan filling in these quick, crowd-pleasing bars, prepped in just 10 minutes.

Ultra-smooth pumpkin cheesecake with warm spice, sturdy graham crust, and a foolproof, crack-free bake. Perfect with caramel and whipped cream.
Leave a comment & rating below or tag @gusteen on social media!
Enjoyed this recipe? Share it with friends and family, and don't forget to leave a review!
This recipe looks amazing! Can't wait to try it.
Comments are stored locally in your browser. Server comments are displayed alongside your local comments.

Join to receive our email series which contains a round-up of some of our quick and easy family favorite recipes.
