
>>

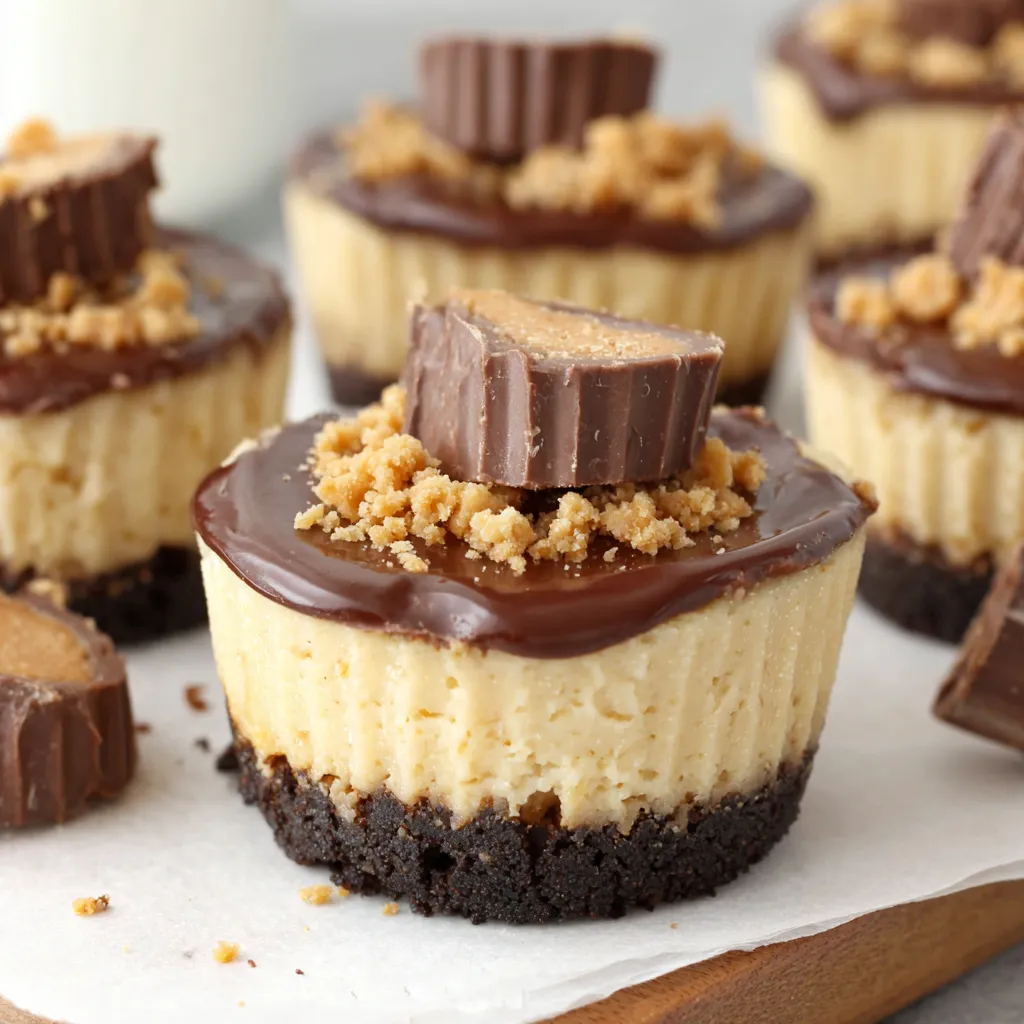
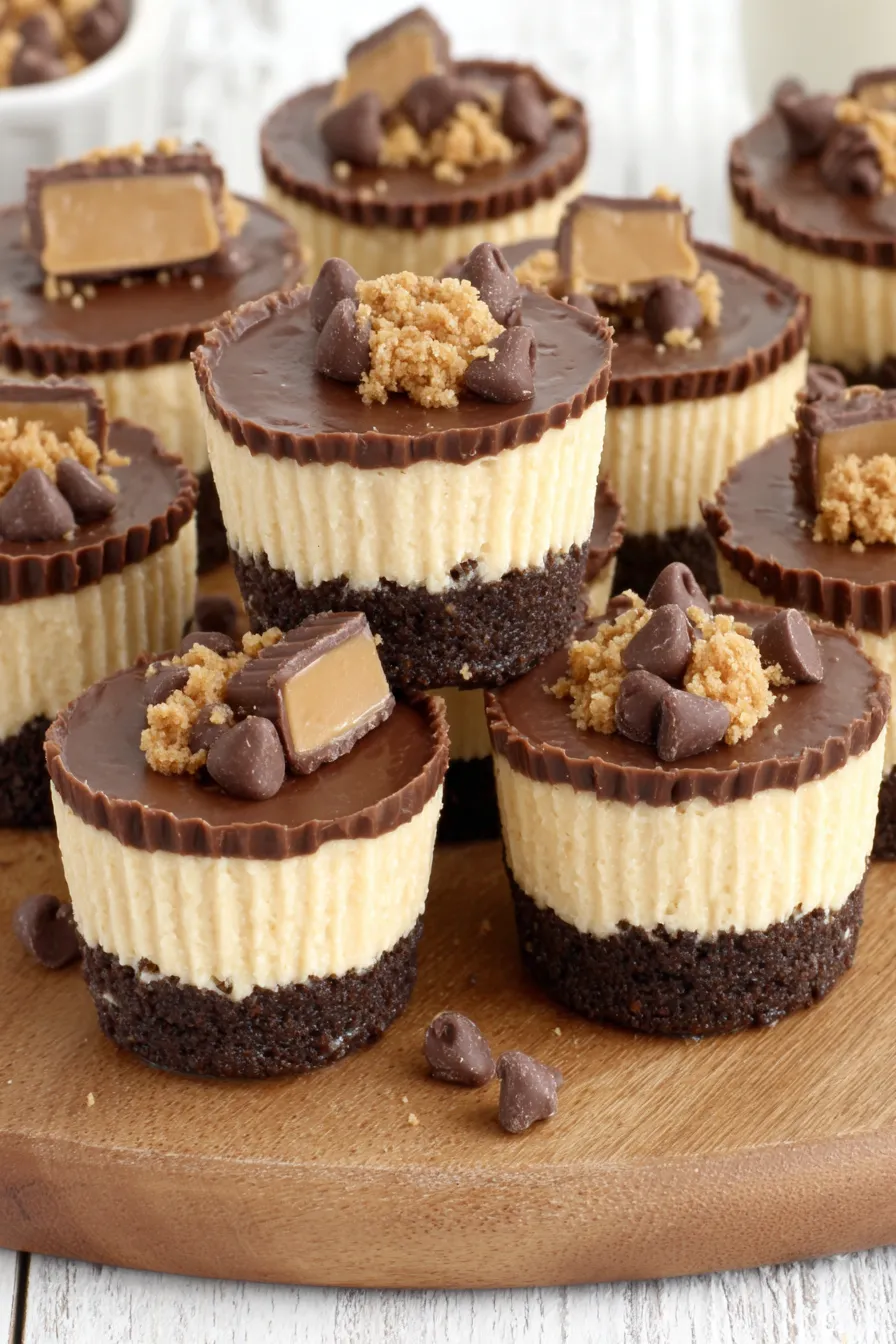
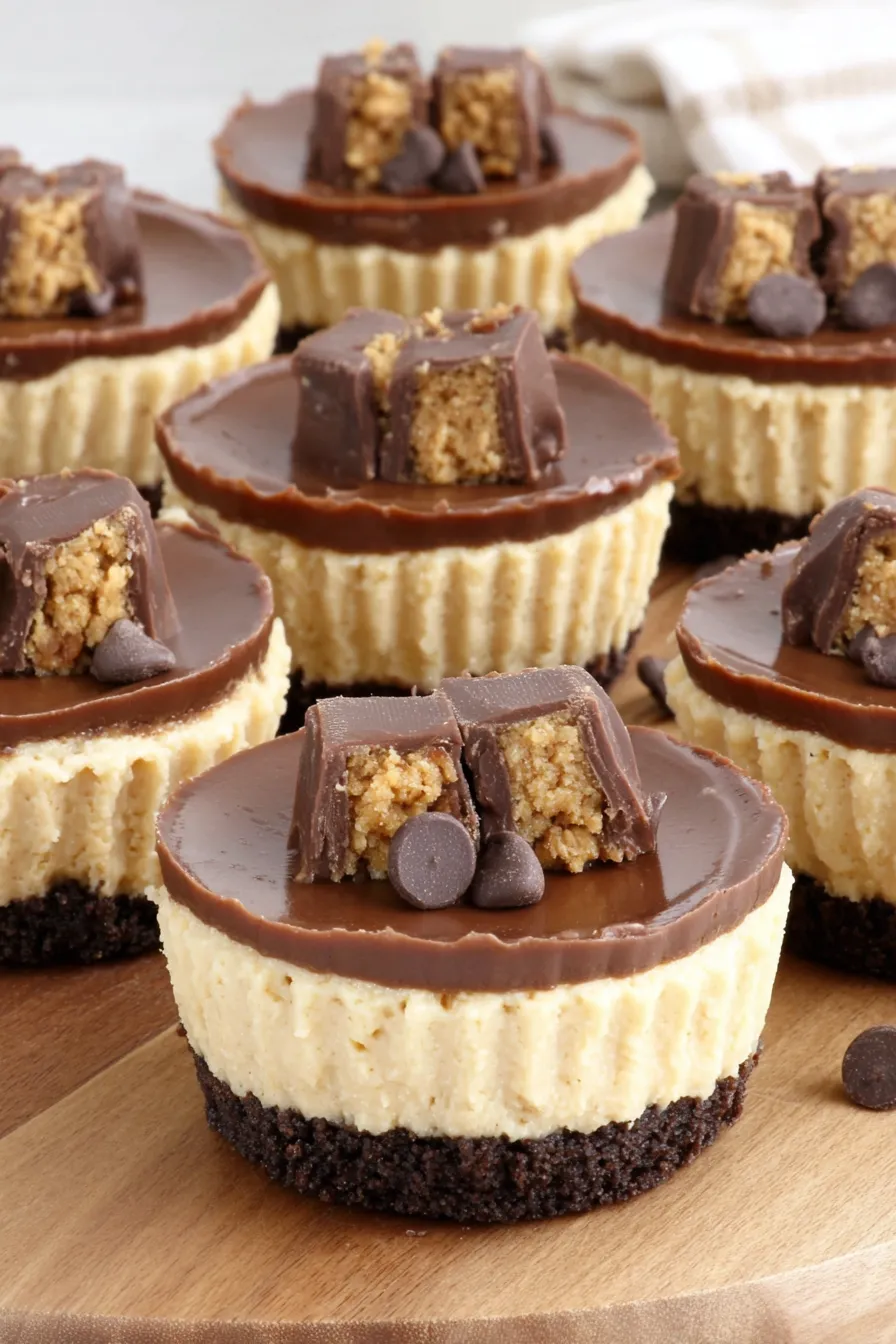
Creamy, bite-sized cheesecakes with a chocolate graham crust and rich peanut butter-chocolate topping—perfect for parties, make-ahead treats, or a special weeknight dessert.
On a personal note, my family always asks for a double batch. Once, I brought these to a summer picnic and a neighbor asked for the recipe on the spot; later she said they were the best portable dessert she'd ever eaten. The recipe's simplicity and the crowd-pleasing flavor have made it a regular request at birthdays and casual dinners.
 Make the chocolate-peanut topping:
In a microwave-safe bowl, combine 1/2 cup semi-sweet chocolate chips, 3 tablespoons peanut butter, and 2 tablespoons coconut oil. Microwave in 30-second bursts, stirring between each burst until smooth and glossy. Alternatively, melt over a double boiler, stirring constantly to prevent scorching. The coconut oil thins the mixture for an even pourable glaze; if omitted the topping will be thicker and may not spread as smoothly.
Top and finish:
Spoon a teaspoon of the warm chocolate mixture onto each cooled cheesecake and tilt the cupcake from side to side to coat the top. Alternatively, pipe the mixture or use an offset spatula for a neater finish. Return the pan to the refrigerator for at least 2 hours so the topping sets and the flavors marry. Store finished pieces in an airtight container in the fridge until serving.
Make the chocolate-peanut topping:
In a microwave-safe bowl, combine 1/2 cup semi-sweet chocolate chips, 3 tablespoons peanut butter, and 2 tablespoons coconut oil. Microwave in 30-second bursts, stirring between each burst until smooth and glossy. Alternatively, melt over a double boiler, stirring constantly to prevent scorching. The coconut oil thins the mixture for an even pourable glaze; if omitted the topping will be thicker and may not spread as smoothly.
Top and finish:
Spoon a teaspoon of the warm chocolate mixture onto each cooled cheesecake and tilt the cupcake from side to side to coat the top. Alternatively, pipe the mixture or use an offset spatula for a neater finish. Return the pan to the refrigerator for at least 2 hours so the topping sets and the flavors marry. Store finished pieces in an airtight container in the fridge until serving.
My favorite memory with these came during a holiday cookie swap where someone mistook them for store-bought confections. The guests loved the familiar peanut butter-chocolate combination presented in a refined, mini format. I learned that chilling the filling thoroughly before topping makes the final presentation much cleaner and helps the glossy topping set without bleeding into the filling.
Keep finished pieces chilled in a single layer in an airtight container. If stacking is necessary, separate layers with parchment paper to avoid damaging the glossy tops. Refrigerated, they stay at peak quality for up to 3 days. For longer storage, freeze in a single layer on a baking sheet until firm, then transfer to a freezer-safe bag for up to 3 months. Thaw in the refrigerator overnight before serving. Reheat is not recommended; serve chilled or at cool room temperature to preserve texture and flavor.
For a gluten-free option, substitute gluten-free chocolate graham crumbs or use finely crushed gluten-free chocolate sandwich cookies. If peanut allergies are a concern, swap peanut butter with sunflower seed butter using the same volume—flavor will be slightly different but texture remains consistent. Replace coconut oil with vegetable oil if unavailable, though the glossy finish may be marginally less shiny. For a dairy-free approach, use dairy-free cream cheese alternatives and dairy-free chocolate chips; note that taste and mouthfeel will change noticeably.
Serve these as a plated dessert with a dollop of whipped cream and a sprinkle of crushed peanuts for crunch. They pair well with strong coffee, espresso, or a glass of cold milk. For a party tray, arrange on a decorative platter with small forks or napkins—guests will appreciate the single-bite convenience. Seasonal touches like a salted caramel drizzle or a dusting of cocoa can make them holiday-ready.
The idea draws on classic American flavor pairings that trace back to chocolate and peanut butter combinations popularized in candy bars and baked goods. Miniature cheesecakes themselves are a modern adaptation of traditional New York-style cheesecake, scaled down for portion control and presentation. By combining a chocolate graham base and peanut butter-infused filling, the recipe bridges nostalgic candy flavors with refined dessert technique.
In summer, swap the chocolate topping for a chilled peanut butter mousse and top with fresh berries. For winter holidays, add a pinch of cinnamon to the filling and use dark chocolate for a warmer profile. For spring gatherings, top with a thin layer of salted caramel and a sprinkle of toasted nuts for contrast. Small changes in garnish and topping allow these to adapt to any occasion.
Make the crust and filling a day ahead: prepare crusts and par-bake briefly, then refrigerate. Assemble filling the next day and bake, finishing with the topping just before guests arrive. This staged approach saves time on the event day and reduces last-minute stress. Transport chilled cheesecakes in a shallow cooler with ice packs to keep them firm until serving.
These mini treats are a reliable crowd-pleaser—easy to make, easy to transport, and delicious enough to make any gathering feel special. Try them once and they’ll likely become a requested classic in your repertoire.
Use room-temperature cream cheese and eggs to ensure a lump-free, silky filling and to prevent overworking the batter.
Press the crust firmly with the back of a measuring cup so the base holds together when served.
Avoid over-mixing after adding eggs to reduce air bubbles and prevent sinking during cooling.
Chill cheesecakes fully before adding topping to keep the glaze from bleeding into the filling.
This nourishing mini peanut butter cup cheesecakes recipe is sure to be a staple in your kitchen. Enjoy every moist, high protein slice — it is perfect for breakfast or as a wholesome snack any time.
This Mini Peanut Butter Cup Cheesecakes recipe makes perfectly juicy, tender, and flavorful steak every time! Serve with potatoes and a side salad for an unforgettable dinner in under 30 minutes.
Preheat oven to 350℉ and line a standard cupcake pan with 18 paper liners. Mix 1 1/2 cups chocolate graham crumbs with 2 tablespoons sugar and stir in 4 tablespoons melted unsalted butter until the mixture binds when pressed. Divide evenly and press firmly into liners with the back of a measuring cup.
Beat 16 ounces room-temperature cream cheese on medium until smooth. Add 1/2 cup sugar and mix until dissolved. Add eggs one at a time, mixing just until incorporated. Mix in 1/2 cup creamy peanut butter and 1 teaspoon vanilla, keeping speed low to avoid aeration.
Spoon batter evenly into liners and tap the pan to release air. Bake 17 to 19 minutes until edges are set and centers jiggle slightly. Turn oven off and crack door; let sit 2 to 3 minutes, then remove and cool on a wire rack for 30 minutes.
In a microwave-safe bowl, combine 1/2 cup chocolate chips, 3 tablespoons peanut butter, and 2 tablespoons coconut oil. Microwave in 30-second bursts, stirring until smooth. Alternatively, melt over a double boiler.
Spoon a small amount of topping onto each cheesecake, tilting to spread evenly. Refrigerate for at least 2 hours so the topping sets and flavors meld. Store in an airtight container in the refrigerator for up to 3 days or freeze for longer storage.
Last Step: Please leave a rating and comment letting us know how you liked this recipe! This helps our business to thrive and continue providing free, high-quality recipes for you.
Leave a comment & rating below or tag
@gusteen on social media!

Ultra-fudgy brownies crowned with melty marshmallows and a glossy cocoa icing. A nostalgic crowd-pleaser that slices cleanly and disappears fast.

Buttery shortbread crust meets gooey brown-sugar pecan filling in these quick, crowd-pleasing bars, prepped in just 10 minutes.

Ultra-smooth pumpkin cheesecake with warm spice, sturdy graham crust, and a foolproof, crack-free bake. Perfect with caramel and whipped cream.
Leave a comment & rating below or tag @gusteen on social media!
Enjoyed this recipe? Share it with friends and family, and don't forget to leave a review!
This recipe looks amazing! Can't wait to try it.
Comments are stored locally in your browser. Server comments are displayed alongside your local comments.

Join to receive our email series which contains a round-up of some of our quick and easy family favorite recipes.
