
>>

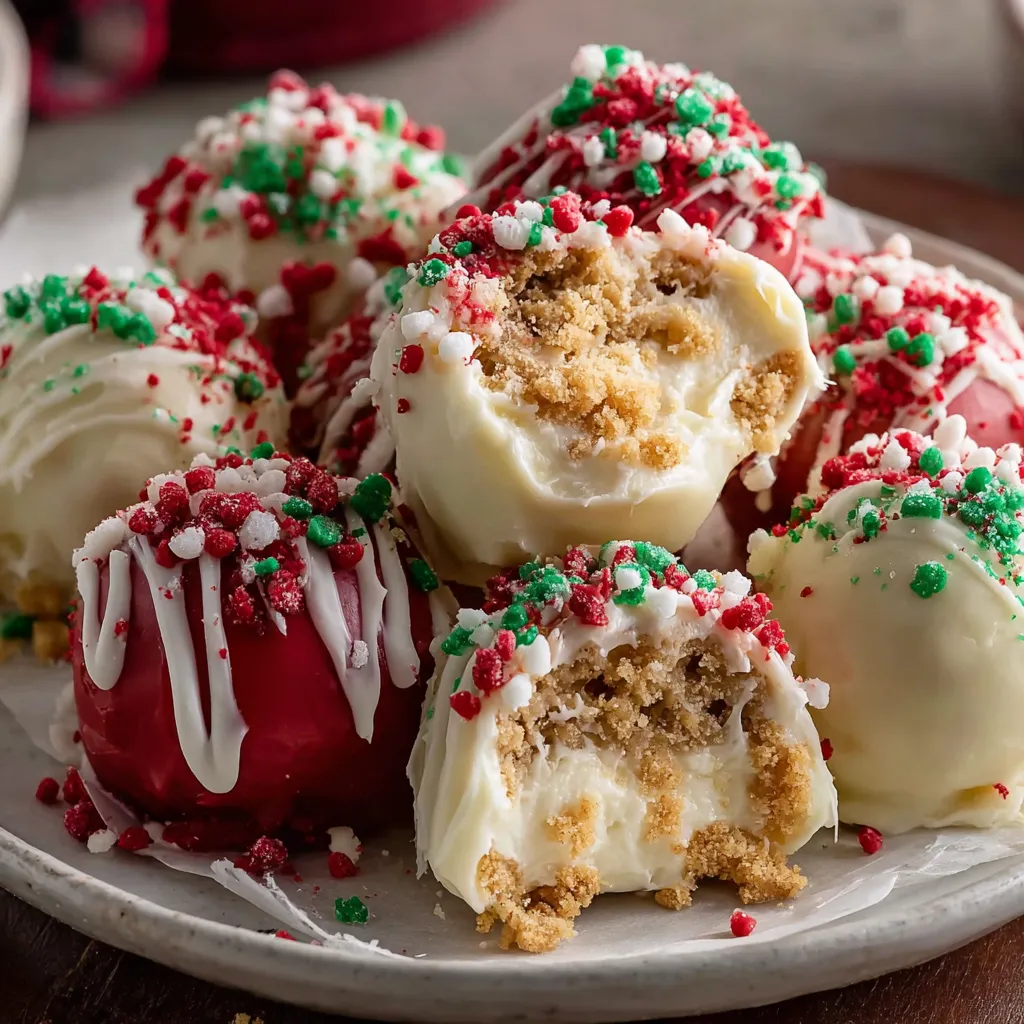
Tiny, festive no-bake cheesecake bites coated in colorful melts and sprinkles — an easy holiday treat that comes together in under an hour.
This little holiday treat started as a way to bring cheer to a busy December evening when I wanted something sweet that felt special but didn’t require turning on the oven. These no-bake cheesecake bites are creamy, lightly sweet, and perfectly poppable — ideal for cookie exchanges, classroom parties, or a cozy night in with hot cocoa. I discovered the combination of tangy cream cheese, white chocolate, and graham crumbs one December when I had leftover holiday candy melts; the results were so addictive that these bite-sized rounds became the centerpiece of my family’s dessert plate.
The texture is the magic here: a velvety, slightly tangy interior that gives way to a crisp outer shell when dipped in melted candy, and that little crunch from graham crumbs tucked into the mix. They look festive and professional but are forgiving to make — even the kids enjoy rolling and decorating. Because they’re assembled, chilled, and decorated, they’re one of those recipes that let you spread the work across a few minutes over a couple of sittings, which is why I reach for them every holiday season.
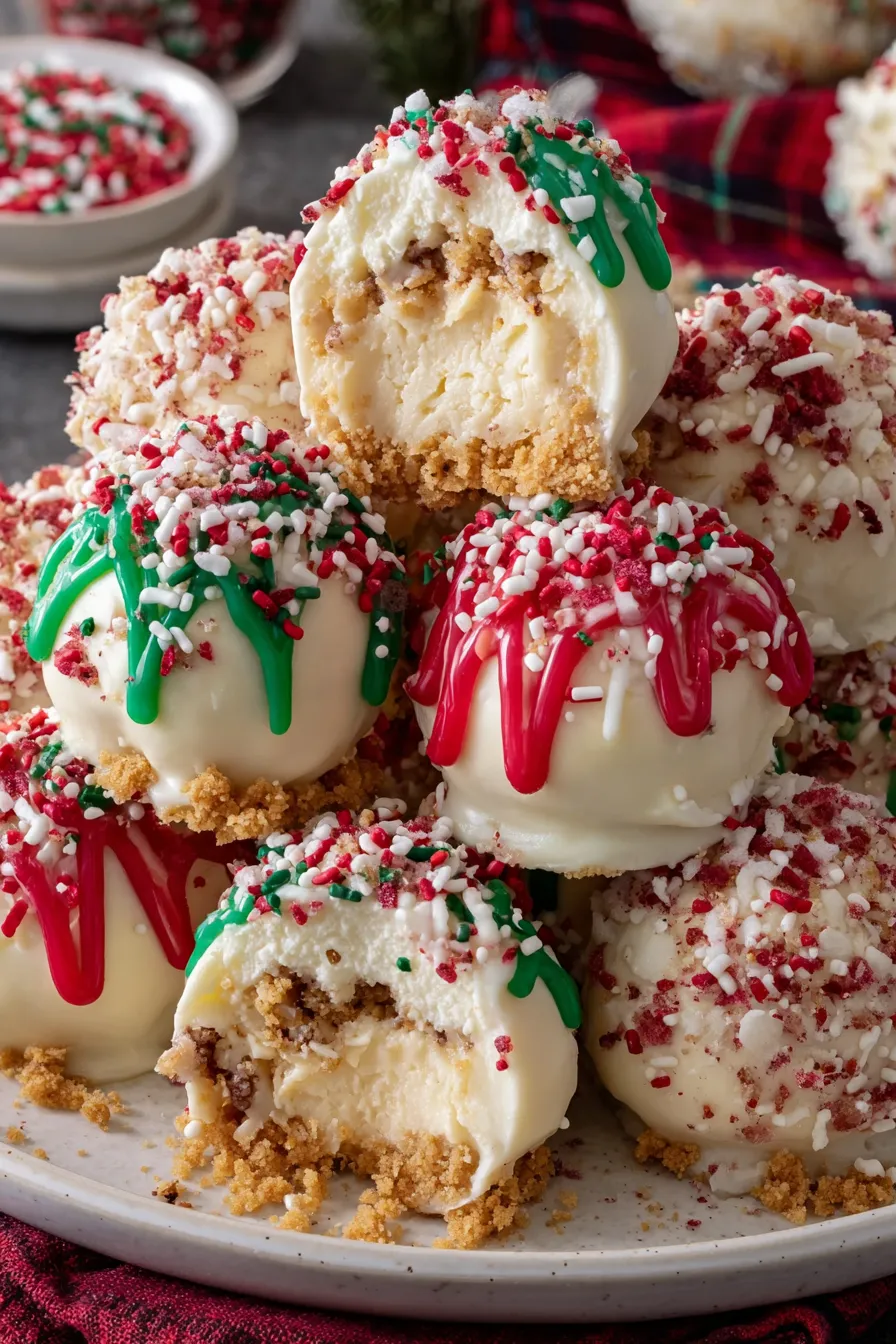
My family’s reaction the first time I brought these to a holiday potluck was priceless: people kept asking for the recipe and then for more bites. Because they’re small, guests try one, then another — they disappear fast. I love how they look on a platter, especially when alternated red and green, and I often let the kids do the decorating, which turns an afternoon into a fun holiday ritual.
One of my favorite aspects is how the family gets involved: decorating becomes a social project, and every tray looks unique. Years ago I brought these to a large holiday supper and labeled each color — people traded and compared decorations like tiny edible ornaments. The simplicity lets you focus on creative presentation and pairing with seasonal beverages like mulled cider or espresso.
Store the coated bites in a single layer or with parchment between layers inside an airtight container in the refrigerator; they will keep for up to 5 days and remain fresh-tasting. For longer storage, freeze on a tray until solid, then transfer to a freezer-safe container for up to 3 months. When freezing, separate layers with parchment and avoid stacking heavy items on top. To thaw, place frozen bites in the refrigerator for 1 to 2 hours; bring to chilled temperature before serving so the coating doesn’t sweat.
If you’re avoiding dairy, use a plant-based cream cheese alternative and dairy-free whipped topping; choose dairy-free white chocolate or candy melts made from vegetable fats. For a gluten-free version, swap graham crumbs for gluten-free cookie crumbs or finely crushed gluten-free oats. You can also replace white chocolate with melted dark or milk chocolate if you prefer a less sweet coating — note that the flavor and color will shift, and you may want to thin the chocolate slightly with vegetable oil for a smoother dip.
Arrange the bites on a festive platter, alternating red and green shells and scattering sprinkles or edible glitter for sparkle. They pair beautifully with hot beverages like coffee, espresso, or mulled cider, and make a charming addition to dessert charcuteries with nuts, dried fruit, and chocolate bark. For party service, display them at table level on tiered trays so guests can pick up with tongs — because they’re small, they’re perfect finger-food style treats at cocktail parties and family gatherings.
Miniature creamy confections like these draw from American cheesecake traditions, where rich cream cheese bases meet crumbly graham crusts. The no-bake approach became popular as a simpler way to enjoy cheesecake textures without lengthy baking and water baths; bite-sized, coated versions evolved as party food in the mid-20th century when candy melts and decorative sprinkles became widely available, enabling easy, colorful presentation for holidays and special occasions.
For winter holidays, use red and green candy melts and seasonal sprinkles. In spring, swap to pastel melts and floral sprinkles; for autumn, use orange and brown melts with crushed pecan topping. You can also infuse the base with citrus zest — orange or lemon — for a bright variation that pairs well with white chocolate or light ganache coatings during warmer months.
Prepare the centers a day ahead and store them chilled in a covered container; then spend 20 to 30 minutes on the day of serving to melt the coatings and dip. For parties, create a dip-and-decorate station where guests personalize their bites. Use a 1-inch scoop to standardize size so they set evenly, and label containers for flavors or dietary notes to keep service smooth during large gatherings.
These no-bake bites are a holiday staple in my kitchen — small, celebratory, and easy enough to make with help. Whether you’re making them for a crowd or for a quiet dessert, they bring a little extra cheer to the season.
Chill the mixture thoroughly before rolling so the centers hold their shape and don’t stick to your hands.
Thin candy melts with a small amount of vegetable oil (start with 1/2 teaspoon) if the coating is too thick for dipping.
Use a 1-inch scoop to keep uniform bite sizes, which helps the coating set evenly and makes for consistent serving portions.
Flash-freeze on a tray before transferring to containers to prevent the bites from sticking together.
This nourishing no-bake christmas cheesecake bites recipe is sure to be a staple in your kitchen. Enjoy every moist, high protein slice — it is perfect for breakfast or as a wholesome snack any time.
This No-Bake Christmas Cheesecake Bites recipe makes perfectly juicy, tender, and flavorful steak every time! Serve with potatoes and a side salad for an unforgettable dinner in under 30 minutes.
Beat softened 8 oz cream cheese in a large bowl until smooth. Add 1/2 cup powdered sugar and 1 tsp vanilla extract and beat until fully combined and silky.
Melt 1 cup white chocolate chips in 20-second microwave intervals, stirring between each. Allow to cool slightly so it is warm but not hot before adding to the cream cheese base.
Slowly mix the cooled melted white chocolate into the cream cheese. Stir in 1 cup crushed graham crackers and gently fold in 1/2 cup thawed whipped topping until evenly incorporated.
Refrigerate mixture for 30–40 minutes to firm up. Use a 1-inch scoop to portion and roll into balls, placing them on a parchment-lined baking sheet.
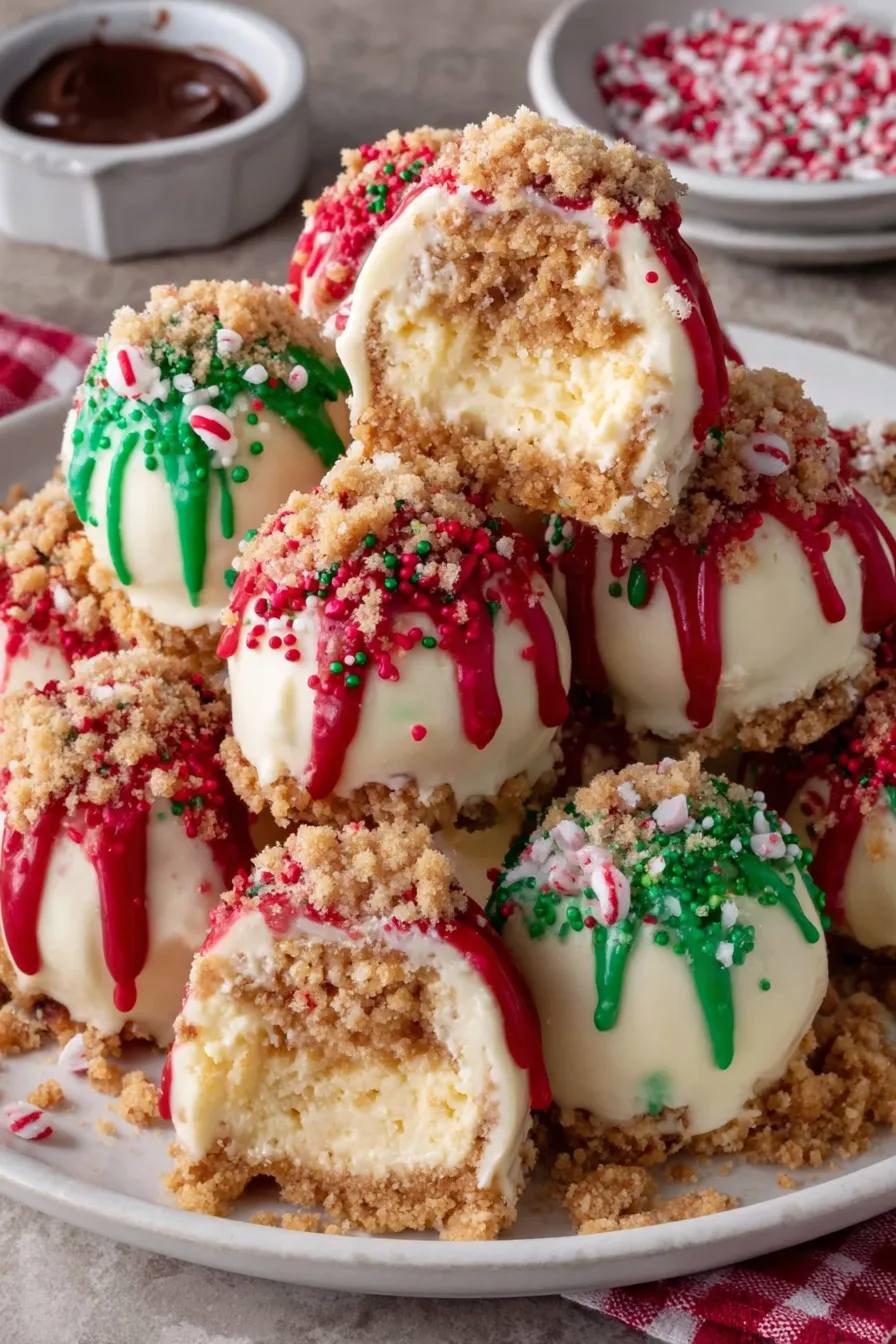
Melt red and green candy melts in separate bowls per package directions. Dip chilled balls into coatings using a fork or skewer, tap off excess, then add sprinkles before the coating sets.
Refrigerate the coated bites for at least 15 minutes to let shells harden. Store in an airtight container in the fridge for up to 5 days or freeze for up to 3 months.
Last Step: Please leave a rating and comment letting us know how you liked this recipe! This helps our business to thrive and continue providing free, high-quality recipes for you.
Leave a comment & rating below or tag
@gusteen on social media!

Ultra-fudgy brownies crowned with melty marshmallows and a glossy cocoa icing. A nostalgic crowd-pleaser that slices cleanly and disappears fast.

Buttery shortbread crust meets gooey brown-sugar pecan filling in these quick, crowd-pleasing bars, prepped in just 10 minutes.

Ultra-smooth pumpkin cheesecake with warm spice, sturdy graham crust, and a foolproof, crack-free bake. Perfect with caramel and whipped cream.
Leave a comment & rating below or tag @gusteen on social media!
Enjoyed this recipe? Share it with friends and family, and don't forget to leave a review!
This recipe looks amazing! Can't wait to try it.
Comments are stored locally in your browser. Server comments are displayed alongside your local comments.

Join to receive our email series which contains a round-up of some of our quick and easy family favorite recipes.
