
Oven-Baked Bacon (Crispy, Evenly Cooked Every Time)

A foolproof oven method for perfectly crispy, evenly cooked bacon with minimal mess — ideal for breakfast, sandwiches, and make-ahead entertaining.

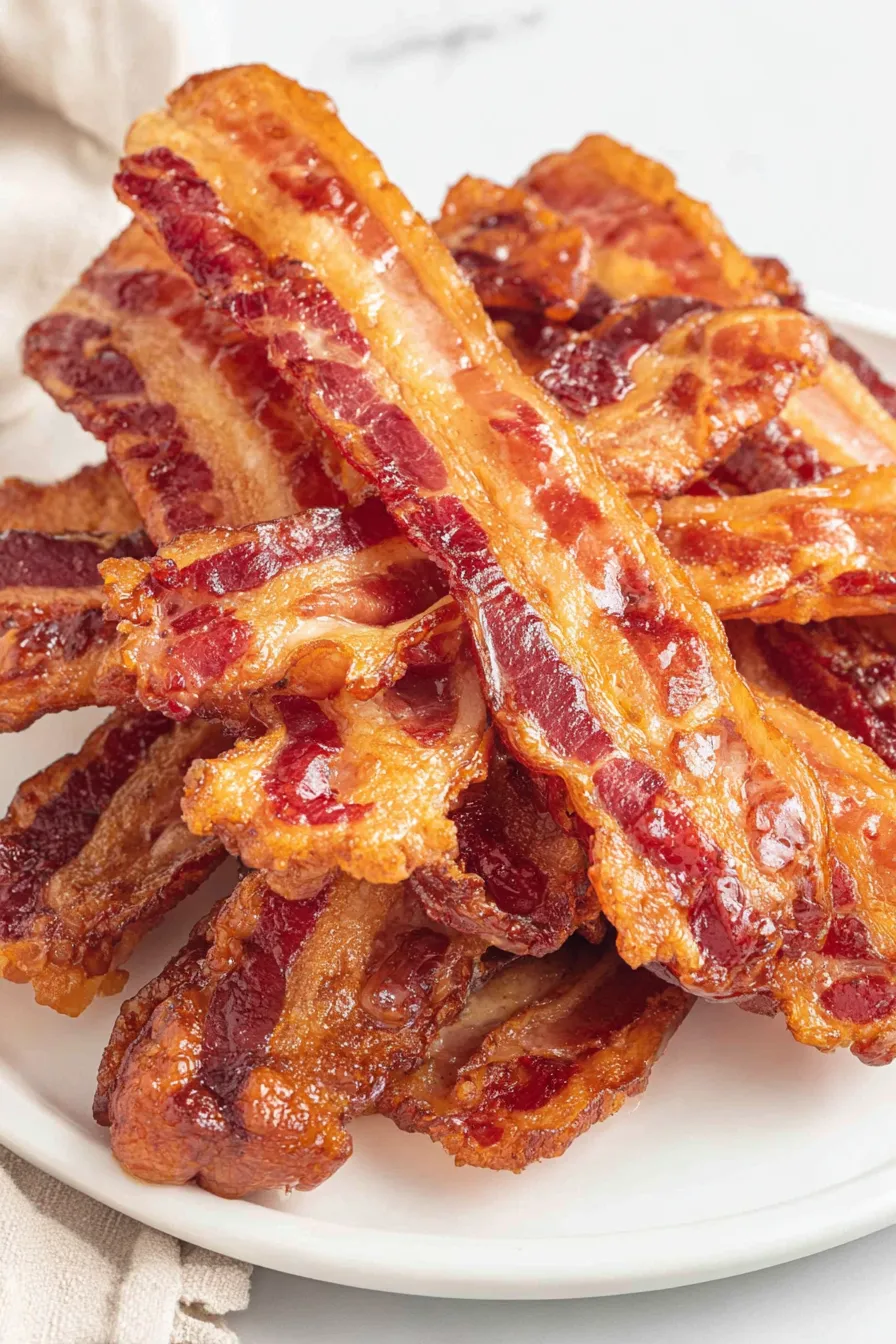
This oven-baked bacon has been my shortcut to perfectly cooked bacon for years—crispy edges, evenly rendered fat, and none of the splattering that comes with frying in a skillet. I first tried this method on a hectic Sunday when I needed a large tray of bacon for a family brunch. After several attempts at pan-frying that yielded burned edges and undercooked middles, I slid strips onto a parchment-lined sheet and into the oven. The result was consistent, easy to scale, and freed me up to make pancakes and coffee without babysitting a pan.
What I love most is the texture: each slice cooks uniformly from edge to center, with a balance of chew and crisp depending on how long you leave it. This technique works equally well for thin-cut and thick-cut slices—just adjust the time. It’s also a clean, predictable way to cook bacon for sandwiches, salads, or party platters and it’s especially handy when feeding a crowd because you can bake multiple sheet pans at once. Over time I learned small adjustments—how long to rest, how to drain excess grease, and how to layer sheet pans for maximum output—and I’ll share all of them below.
Why You'll Love This Recipe
- Consistent results: every strip cooks evenly without hot spots or burned ends, so you end up with uniformly crispy bacon every time.
- Hands-off cooking: once the pan is in the oven you’re free to prep other breakfast items—no constant flipping or splatter to watch.
- Scales easily: bake two or three pans at once for brunch or batch cook and freeze slices for the week.
- Minimal cleanup: parchment paper soaks up grease and keeps sheets nearly spotless; no greasy stovetop to scrub.
- Flexible texture: quick bake for chewier bacon or a bit longer for very crisp slices; works with thin and thick cuts.
- Uses pantry staple: one-pack solution—no special ingredients needed, just your favorite brand of bacon.
In my household this method became the default when we hosted holiday mornings; relatives started arriving early because they loved the smell and knew plates would be piled high with good bacon. Over time I've tweaked timing and resting techniques so the bacon stays crisp even after sitting out for a short period—perfect for buffet service.
Ingredients
- Bacon (1 package): Choose a standard 12-ounce package (about 12–16 slices). Thick-cut brands like Wright or Smithfield give meatier slices that stand up well to sandwiches; thin-cut cooks faster and crisps more completely. Look for slabs without added sugar if you prefer less caramelization.
- Parchment paper: Lining the pan with high-quality, oven-safe parchment prevents sticking and absorbs some grease—Reynolds or similar brands work well. Avoid waxed paper.
- Paper towels: For draining excess grease after baking. Use several layers to get bacon dry and crisp.
- Optional finishing: A light sprinkle of black pepper, a drizzle of pure maple syrup, or a pinch of smoked paprika after baking can add interest. These are optional and added after baking to avoid burning.
Instructions
Preheat the oven: Set the oven temperature to 350°F. Using a moderate temperature allows fat to render slowly and prevents curling or burning at the edges. If you need very quick results, you can raise to 400°F but watch closely. Prepare baking sheets: Line two full-size baking sheets with parchment paper. I prefer using two pans rather than overlapping bacon on a single crowded sheet—air circulation around each slice encourages even crisping. If your oven has a single rack, bake in batches. Arrange bacon: Lay each slice in a single layer on the parchment with small gaps between slices. Overlapping causes uneven cooking. It’s okay if slices touch slightly; they will shrink as they render. Bake first side: Place pans on the center rack and bake for 15 minutes for thin-to-medium slices. For thick-cut bacon, bake 20 minutes for the first side. Look for the fat to be mostly translucent and the edges starting to brown—this is your visual cue to flip. Flip and finish: Carefully remove the sheets (use oven mitts) and flip each slice with tongs. Return to oven and bake another 15 minutes for standard slices, or 20 minutes per side for thick-cut. Total time is typically 30 minutes for regular slices and 40 minutes for thick slices; adjust for desired crispness. Drain and rest: Transfer cooked slices to a plate lined with paper towels and top with another layer to blot excess grease. Resting for 1–2 minutes lets the fat set and creates a crisp finish. If you’re serving right away, keep slices in a warm oven (turned off) on a wire rack so they stay crisp.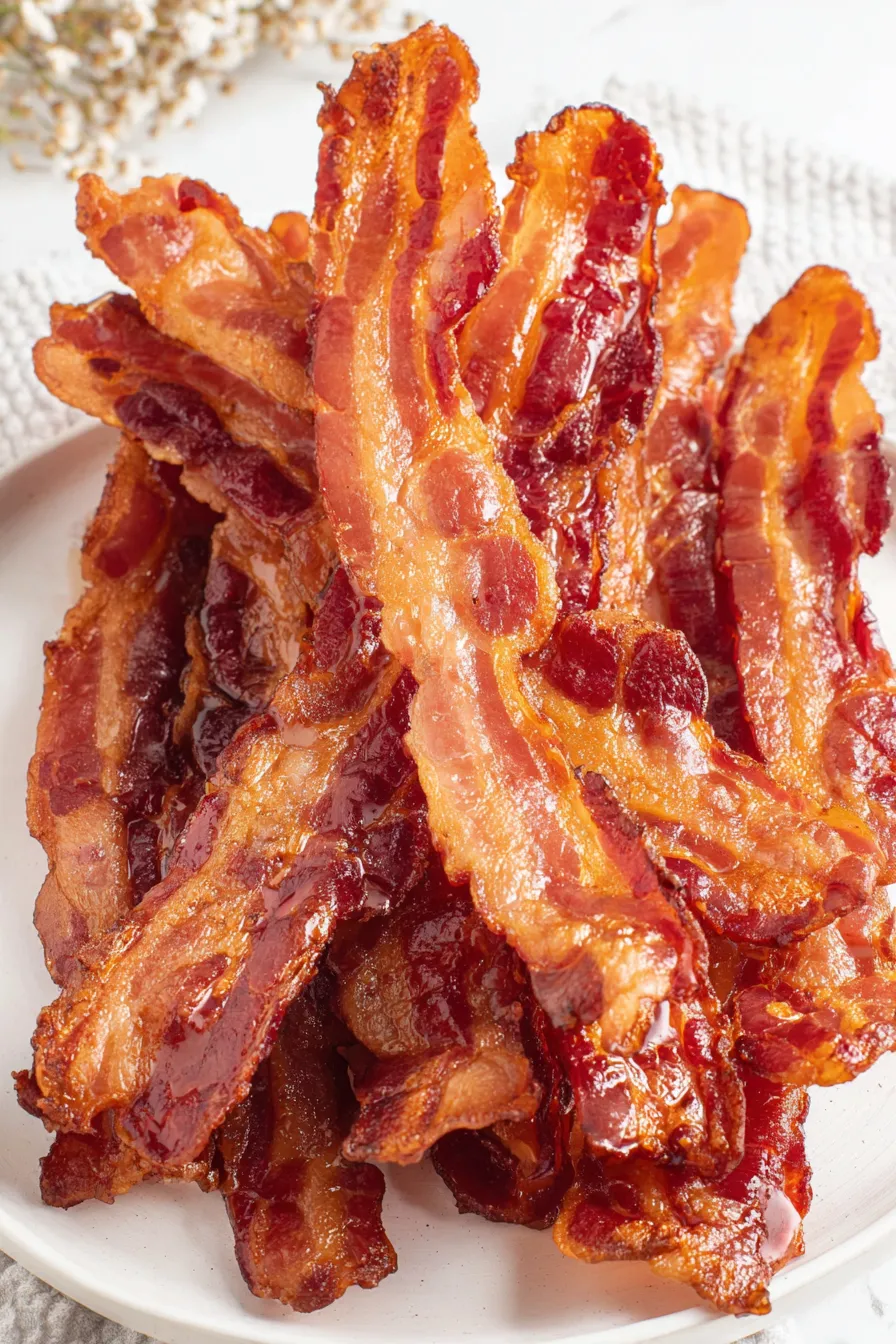
You Must Know
- This method freezes very well: cooked slices keep in the freezer for up to 3 months in an airtight container or freezer bag.
- Oven temperature matters: 350°F renders fat slowly for even crisping; 400°F works faster but requires close attention.
- Drain properly: blotting on paper towels removes excess grease and prevents sogginess—don’t skip this step.
- Thick vs thin: thin bacon crisps quicker (about 30 minutes total), thick cut needs about 40 minutes total and yields a meatier bite.
My favorite aspect of this approach is its predictability. After years of pan experiments, this technique gives me the exact texture I want without fuss. Family members often request trays for weekend breakfasts because I can cook multiple pans at once and keep a steady flow of warm, crisp slices for everyone to enjoy. It’s also safer for kids in the kitchen—no hot splatter to worry about.
Storage Tips
Cool leftover slices completely before storing. In the refrigerator, place in a shallow airtight container layered with paper towels to soak up residual grease; bacon will keep 4–5 days. For longer storage, flash-freeze slices flat on a tray for about 30 minutes, then transfer to a freezer bag with parchment between layers—frozen bacon keeps up to 3 months. To reheat, bake at 350°F for 5–8 minutes from refrigerated, or 8–10 minutes from frozen, or crisp briefly in a skillet or toaster oven until heated through.
Ingredient Substitutions
If you’re avoiding pork, turkey bacon works in this method but requires shorter cook times and tends to crisp differently—watch closely. For a lower-salt option, look for reduced-sodium brands or rinse slices briefly after cooking and pat dry, though this may reduce crispness. Maple or peppered bacon add flavor; add sweet finishes like a light maple brush after cooking (not before) to avoid burning. For cured, sugar-free options seek out artisan or nitrate-free varieties that behave similarly in the oven.
Serving Suggestions
Serve directly with eggs and pancakes, layer on breakfast sandwiches with cheddar and a smear of aioli, or chop and sprinkle on salads for smoky crunch. Bacon pairs deliciously with avocado toast, tossed into baked potatoes, or wrapped around asparagus for appetizers. For a party platter, arrange strips on a cedar board with small bowls of dipping sauces—maple mustard or chipotle mayo complement the savory-salty flavors.
Cultural Background
Bacon has deep roots across many cuisines as a preserved pork product prized for its fat and flavor. In American breakfasts it became iconic in the 20th century, popularized by diners and mass-market brands. Oven-baking slices is a more modern technique—home cooks adopted it for convenience and consistency. Regional variations include peameal bacon in Canada and pancetta in Italy, each offering different curing styles and textures, but the simple pleasure of crisped pork remains universal.
Seasonal Adaptations
For winter breakfasts, pair bacon with maple-glazed sweet potatoes or use it to add depth to root-vegetable hash. In summer, chop crisped bacon into salads with fresh tomatoes and corn. Holiday brunches benefit from peppered or brown-sugar-coated bacon—brush briefly with a little maple syrup after baking for glossy finish. For grilling season, precook bacon and use in burgers or as a smoky garnish for grilled vegetables.
Meal Prep Tips
Batch-cook multiple pans and cool slices completely before portioning into single-serving stacks separated by parchment. Freeze flat in labeled bags for grab-and-go breakfasts: one stack heats quickly in a skillet or microwave. If prepping for sandwiches, keep bacon in a warm oven (turned off) on a wire rack for up to 20 minutes to avoid losing crispness before assembly. Use a splatter screen while reheating in a skillet to keep things tidy.
Oven-baked bacon is simple yet transformative—little technique, big reward. Try it once and you’ll likely wonder why you didn’t switch years ago. Enjoy the extra time, consistent texture, and the happy faces that follow a tray of perfectly cooked bacon.
Pro Tips
Use parchment paper to prevent sticking and make cleanup easy.
Flip the slices halfway through to encourage even browning.
Drain on paper towels immediately to remove excess grease and keep bacon crisp.
If cooking multiple sheets, rotate their positions in the oven halfway through for uniform heat.
This nourishing oven-baked bacon (crispy, evenly cooked every time) recipe is sure to be a staple in your kitchen. Enjoy every moist, high protein slice — it is perfect for breakfast or as a wholesome snack any time.
FAQs about Recipes
How long should I bake bacon in the oven?
Yes—thin-cut bacon typically finishes in about 15 minutes per side at 350°F; thick-cut requires about 20 minutes per side.
How do I store cooked bacon?
Line the pan with parchment and blot cooked slices on paper towels. For long-term storage, freeze flat then transfer to a labeled freezer bag.
Tags
Oven-Baked Bacon (Crispy, Evenly Cooked Every Time)
This Oven-Baked Bacon (Crispy, Evenly Cooked Every Time) recipe makes perfectly juicy, tender, and flavorful steak every time! Serve with potatoes and a side salad for an unforgettable dinner in under 30 minutes.
Instructions
Preheat the oven
Preheat the oven to 350°F. A moderate temperature renders fat slowly and prevents burning for an even result.
Prepare baking sheets
Line two baking sheets with parchment paper and arrange bacon slices in a single layer with slight gaps to allow for shrinkage.
Bake first side
Place pans on the center rack and bake for 15 minutes for thin-to-medium slices or 20 minutes for thick-cut. Look for mostly translucent fat and lightly browned edges.
Flip and finish baking
Remove pans, flip each slice with tongs, and return to oven for an additional 15 minutes (thin/medium) or 20 minutes (thick). Cook until desired crispiness is reached.
Drain and rest
Transfer slices to paper towels and top with another towel to blot excess grease. Let rest 1–2 minutes so fat sets and bacon crisps.
Last Step: Please leave a rating and comment letting us know how you liked this recipe! This helps our business to thrive and continue providing free, high-quality recipes for you.
Nutrition
Did You Make This?
Leave a comment & rating below or tag
@gusteen on social media!
Categories:
You might also like...

Fudgy Mississippi Mud Brownies
Ultra-fudgy brownies crowned with melty marshmallows and a glossy cocoa icing. A nostalgic crowd-pleaser that slices cleanly and disappears fast.

Buttery Pecan Pie Bars
Buttery shortbread crust meets gooey brown-sugar pecan filling in these quick, crowd-pleasing bars, prepped in just 10 minutes.

No-Crack Pumpkin Cheesecake
Ultra-smooth pumpkin cheesecake with warm spice, sturdy graham crust, and a foolproof, crack-free bake. Perfect with caramel and whipped cream.
Did You Make This?
Leave a comment & rating below or tag @gusteen on social media!
Rate This Recipe
Share This Recipe
Enjoyed this recipe? Share it with friends and family, and don't forget to leave a review!
Comments (1)
This recipe looks amazing! Can't wait to try it.
Comments are stored locally in your browser. Server comments are displayed alongside your local comments.

Hi, I'm Charlotte!
What's Popular

30-Minute Meals!
Join to receive our email series which contains a round-up of some of our quick and easy family favorite recipes.