
>>

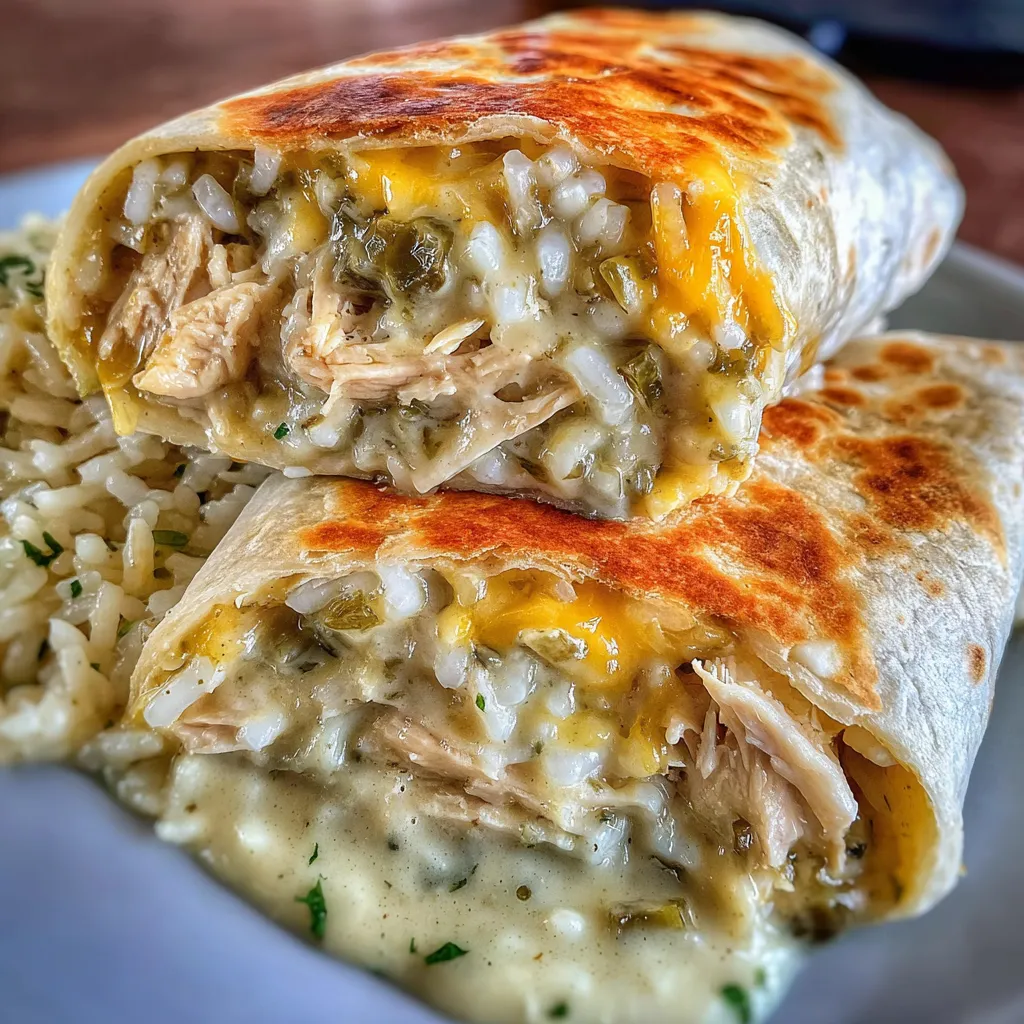
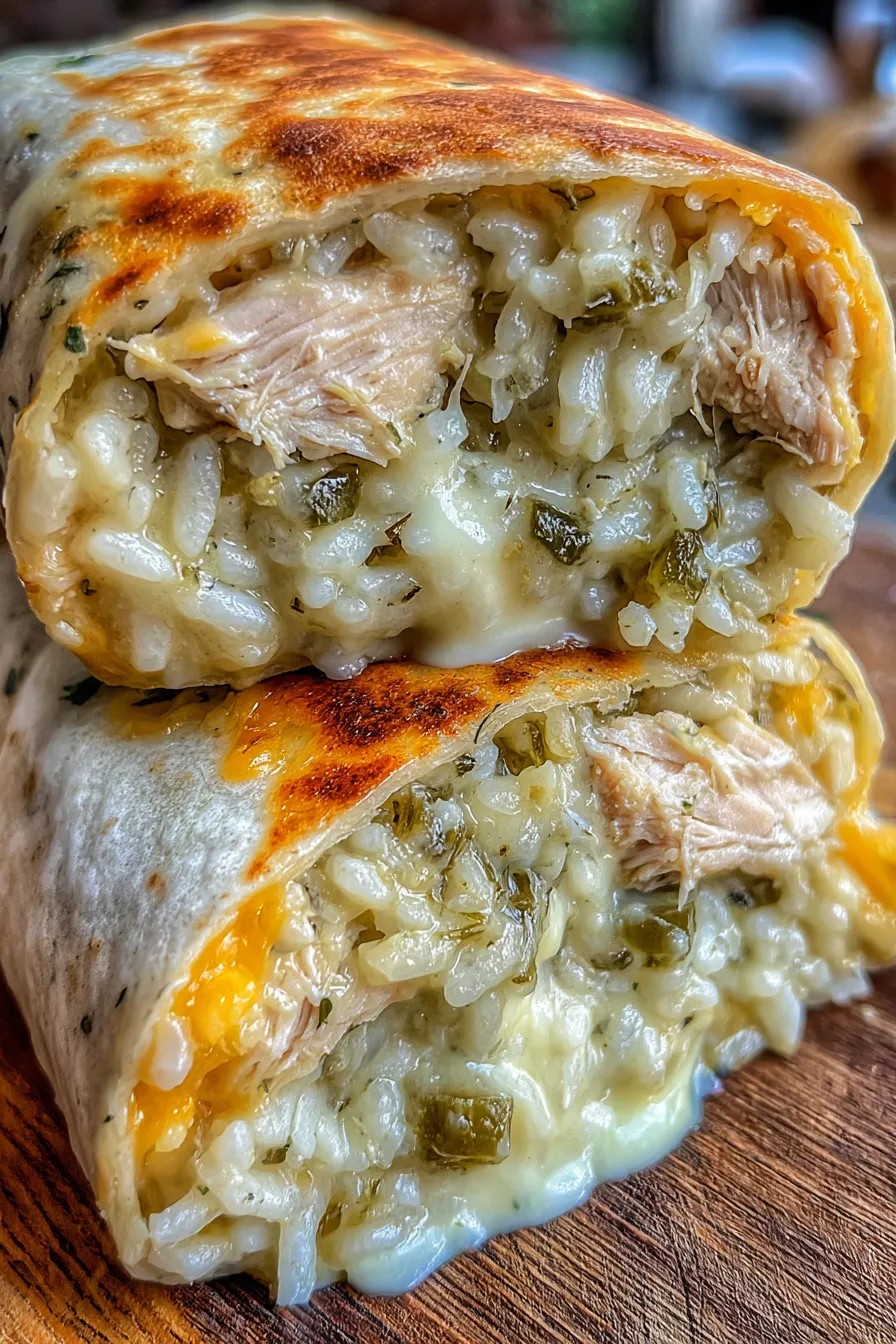
A smoky, creamy, and mildly spicy burrito filled with shredded smoked chicken, green chiles, rice, and cheddar — pan-seared until crisp for a satisfying handheld meal.
I remember the first time I served these to a crowd of friends after a backyard barbecue. Someone compared them to the best taqueria-style burrito they had tasted, which is high praise coming from a group that eats out often. My partner requested them repeatedly for game nights because they stay warm and remain portable. Over time I learned small tricks like the brief microwave warm-up for tortillas and the exact ratio of rice to sour cream to keep the filling creamy but not wet. Those details make all the difference when you want consistent results.
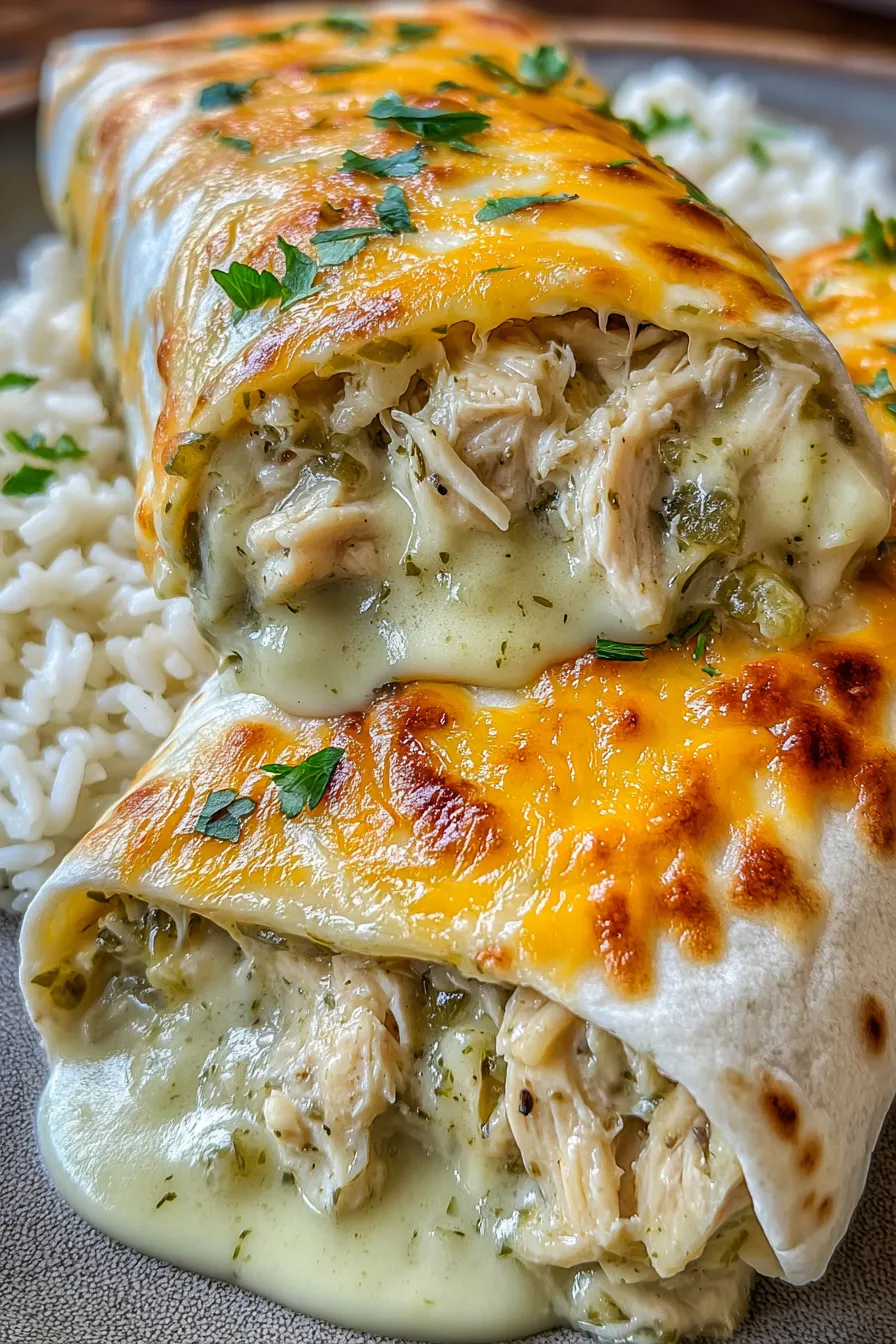
My favorite part is the contrast between the warm, melty interior and the crisp exterior. Family members often debate whether to add extra salsa on the side or inside the burrito. I tend to drizzle a bit of salsa and a dollop of sour cream on the plate for dipping. Over the years I have learned to keep the filling slightly under-seasoned before adding cheese, because the cheddar finishes the seasoning beautifully when it melts.
To store leftover burritos, cool them completely at room temperature for no more than two hours, then wrap each burrito individually in plastic wrap followed by aluminum foil before placing them in an airtight container. Refrigerated burritos keep well for 3 to 4 days. For longer storage freeze them flat on a tray until firm, then transfer to a freezer bag to prevent freezer burn. Reheat refrigerated burritos in a 350 F oven for 12 to 15 minutes or pan-fry over medium heat until heated through. From frozen, unwrap and reheat at 375 F for 20 to 25 minutes or until center reaches 165 F.
If you do not have smoked chicken, substitute shredded rotisserie chicken and add 1/2 teaspoon of liquid smoke or smoked paprika for depth. For a lower-dairy version use a dairy-free sour cream and dairy-free shredded cheese, though the texture will be slightly different. Swap white rice for brown rice or cooked quinoa for more fiber; reduce the sour cream slightly when using quinoa to avoid a grainy texture. For spice, replace canned green chiles with chopped roasted poblano or a spoonful of pickled jalapeño. To make this vegetarian, use roasted sweet potato or seasoned pinto beans in place of chicken.
Serve with a crisp cabbage slaw or a simple salad of chopped romaine and citrus vinaigrette to cut through the richness. Fresh lime wedges and chopped cilantro provide brightness. For a heartier spread, add refried beans and Mexican street corn on the side. Garnish with sliced avocado or guacamole for creaminess and color. These burritos are perfect for casual dinners, packed lunches, tailgates, and they travel well for picnics when kept warm in an insulated bag.
This handheld favorite draws from Southwestern and Tex-Mex traditions that blend Native American, Mexican, and American flavors. The use of canned diced green chiles is a hallmark of Southwestern cooking, particularly popular in New Mexico where green chile is a regional staple. Combining smoked meat with chiles and cheese reflects the pragmatic approach of using preserved and pantry ingredients to create a filling meal. While not a traditional specialty from a single region, this style of filling and pan-searing tortillas is a practical, home-cooking adaptation that celebrates the layered flavors of the borderlands.
In summer swap canned chiles for freshly roasted poblano or hatch chiles when they are in season for a sweeter, fresher flavor. In colder months use richer garnishes like pickled red onion and roasted winter squash in the filling for earthier notes. For holiday gatherings, prepare filling ahead and assemble burritos on the day; pan-sear and keep warm in a low oven so guests can serve themselves. The recipe is flexible enough to incorporate seasonal produce without changing the technique.
Prepare the filling in a large batch at the beginning of the week and store in an airtight container. When ready to eat, warm tortillas and assemble only the burritos you will consume within a day to prevent sogginess. For grab-and-go breakfasts, make smaller burritos using flour tortillas or even a tortilla press to flatten the filling for quicker reheating. Label and portion frozen burritos so you can grab a single serving and reheat from frozen for a convenient meal any night.
These burritos have become a staple because they are forgiving and delicious. Whether you are feeding hungry teenagers, entertaining friends, or packing lunches for the week, they deliver consistent results. Make them your own by adjusting chiles, cheese, and texture to match what you have on hand. Enjoy the smoky warmth and the little ritual of searing the tortilla to golden perfection.
Warm tortillas briefly before rolling to prevent tearing and ensure an easy fold.
Use slightly undercooked rice if making from scratch so the grain is not mushy in the filling.
Press the burrito seam-side down in the skillet first to seal and prevent unrolling while cooking.
If freezing, flash-freeze burritos on a tray before bagging to keep shape and prevent sticking.
Adjust sour cream and salsa amounts to control the moisture level so the filling is creamy but not soggy.
This nourishing smoked chicken green chile burrito recipe is sure to be a staple in your kitchen. Enjoy every moist, high protein slice — it is perfect for breakfast or as a wholesome snack any time.
Yes. Keep tightly wrapped in foil and reheat in a 350 F oven for 12 to 15 minutes until warmed through.
Use rotisserie chicken and 1/2 teaspoon smoked paprika or liquid smoke to mimic the smoked flavor.
This Smoked Chicken Green Chile Burrito recipe makes perfectly juicy, tender, and flavorful steak every time! Serve with potatoes and a side salad for an unforgettable dinner in under 30 minutes.
In a large bowl combine shredded smoked chicken, drained diced green chiles, shredded cheddar, cooked rice, sour cream, and salsa. Add garlic powder, onion powder, salt, and pepper. Fold gently until evenly mixed and adjust seasoning.
Place tortillas on a microwave-safe plate and heat for about 20 seconds to increase pliability. Alternatively warm briefly in a dry skillet 10 to 15 seconds per side.
Divide the filling among tortillas, fold the short sides in, then roll tightly from the bottom to the top to enclose the filling. Tuck ends to prevent spillage.
Heat a skillet over medium, coat with cooking spray or oil, place burritos seam-side down and cook 2 to 3 minutes per side until golden brown and cheese is melted. Press gently to seal.
Let rest one minute, slice in half if desired, and serve with extra salsa, sour cream, lime wedges, and cilantro.
Last Step: Please leave a rating and comment letting us know how you liked this recipe! This helps our business to thrive and continue providing free, high-quality recipes for you.
Leave a comment & rating below or tag
@gusteen on social media!

Ultra-fudgy brownies crowned with melty marshmallows and a glossy cocoa icing. A nostalgic crowd-pleaser that slices cleanly and disappears fast.

Buttery shortbread crust meets gooey brown-sugar pecan filling in these quick, crowd-pleasing bars, prepped in just 10 minutes.

Ultra-smooth pumpkin cheesecake with warm spice, sturdy graham crust, and a foolproof, crack-free bake. Perfect with caramel and whipped cream.
Leave a comment & rating below or tag @gusteen on social media!
Enjoyed this recipe? Share it with friends and family, and don't forget to leave a review!
This recipe looks amazing! Can't wait to try it.
Comments are stored locally in your browser. Server comments are displayed alongside your local comments.

Join to receive our email series which contains a round-up of some of our quick and easy family favorite recipes.
