
>>

Buttery shortbread thumbprints filled with gooey caramel and finished with a milk chocolate drizzle — a Twix-inspired treat that's perfect for gifting and gatherings.
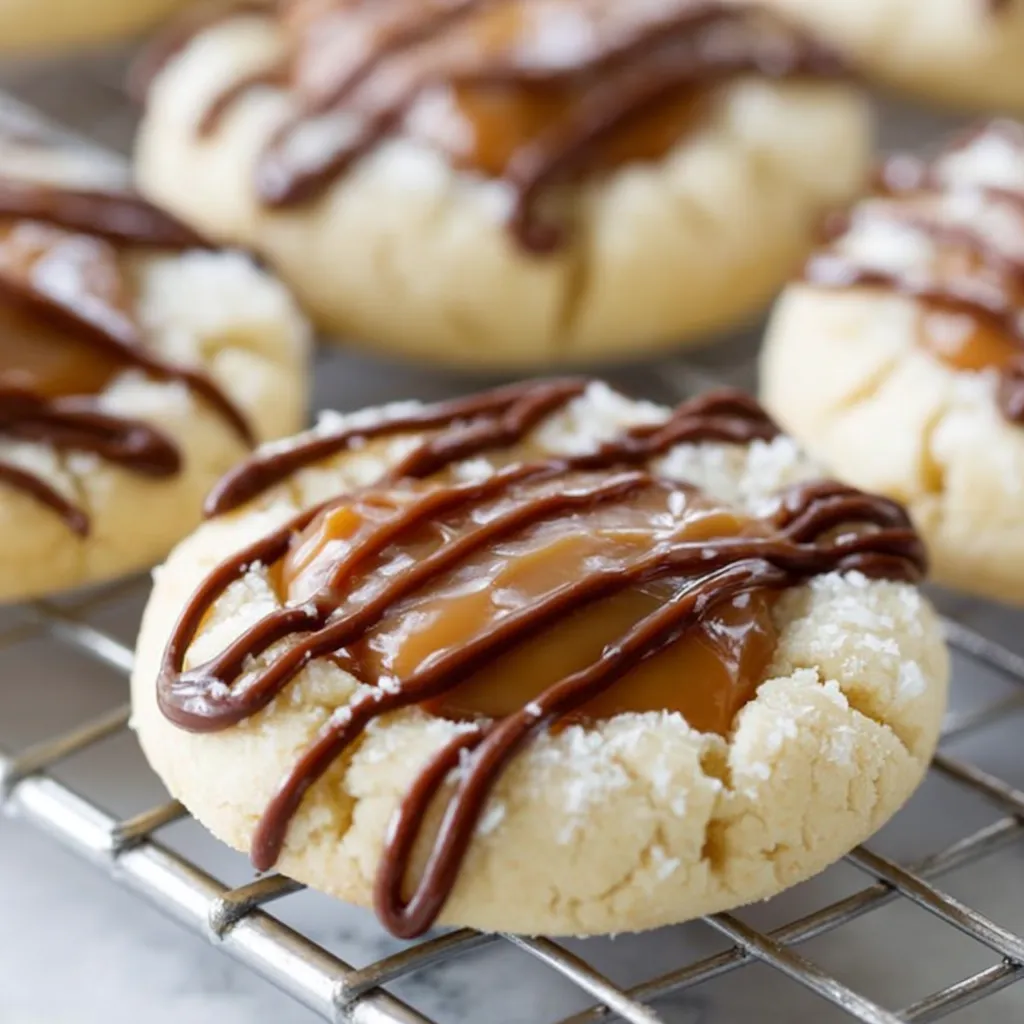
This recipe started as a way to capture the exact balance I love in a Twix bar — crisp, buttery cookie, a ribbon of soft caramel and a milk chocolate finish — but scaled to a bite-sized thumbprint. I first made these during a holiday cookie swap when I wanted something familiar yet a little elevated. The first tray disappeared in minutes; my neighbor asked for the recipe and my husband declared them 'better than the store-bought bars.' The texture is what keeps people coming back: a tender, shortbread-like cookie that holds a shallow well for caramel without collapsing, a satin-smooth caramel center, and a clean milk chocolate finish that snaps when you bite into it.
Over the years I've tweaked the dough to rely on cake flour for the most delicate crumb and used soft caramel bits that melt reliably without running. These are family-friendly, travel well for potlucks and cookie swaps, and are simple enough for bakers of any level. If you're a fan of mixing nostalgic candy flavors into homemade treats, these thumbprints are an excellent next step — they feel special but use straightforward techniques and pantry-friendly ingredients.
When I bring a tin of these to family gatherings, they vanish first. The combination of textures — crumbly shortbread, chewy caramel and glossy chocolate — always gets compliments. I love that the recipe is forgiving; a little extra flour or a slightly longer chill won't ruin the final result.
My favorite part is how well these travel. I've packaged them in a single layer with parchment between each stack for cookie swaps, and the recipients always comment on the chew of the caramel and the buttery shortbread base — tiny luxuries that feel homemade and nostalgic at once.
Store the cookies in an airtight container at room temperature for up to 4 days. If you prefer a firmer caramel, place the container in the refrigerator; allow cookies to sit at room temperature for 10–15 minutes before serving so the caramel softens slightly. For longer storage, freeze baked, cooled cookies (without chocolate drizzle) in a single layer on a tray until solid, then transfer to a freezer-safe container with parchment paper between layers for up to 3 months. Thaw in the refrigerator overnight and bring to room temperature before adding chocolate.
If you don't have cake flour, make a substitute by removing 2 tablespoons of all-purpose flour per cup and replacing with 2 tablespoons cornstarch; sift to combine before measuring. For a deeper caramel flavor, substitute half the soft caramels with a high-quality caramel sauce (reduce milk to thin). Use dark chocolate melting wafers for a more intense finish or white chocolate for a sweeter contrast; remember white chocolate can be finicky when melting, so add a small splash of vegetable oil to smooth it if needed.
Serve these cookies on a festive platter with sprigs of fresh mint or a dusting of powdered sugar for contrast. They pair beautifully with coffee, salted caramel lattes, or a glass of cold milk. For a party, arrange them alongside brownies and shortbread to create a textural dessert spread. They make excellent gifts in tins with layers separated by parchment, and a simple bow transforms them into a thoughtful hostess present.
Thumbprint cookies are a classic across many Western baking traditions — typically a shortbread-like base filled with jam or chocolate. This version is a modern, candy-inspired take that borrows the flavor profile of a Twix bar (shortbread + caramel + chocolate). Adapting candy bar flavors into cookies is a longstanding trend in American home baking, combining nostalgia with homemade quality.
For winter holidays, sprinkle the warm chocolate drizzle with flaky sea salt or crushed peppermint after drizzling. In summer, swap milk chocolate for salted dulce de leche and top with chopped toasted pecans. For Valentine's Day, pipe a thin ring of dark chocolate over the caramel and finish with pink sanding sugar for a festive look.
For make-ahead convenience, roll the cookie dough into tablespoon-sized balls and freeze on a tray. Once frozen, transfer balls to a zip-top bag. Bake straight from frozen — add 1–2 minutes to the bake time and press the thumbprints immediately after baking as directed. Caramel filling and chocolate drizzle can be done the day of serving for the freshest look.
These Twix-inspired thumbprints are a small, joyful take on a beloved candy bar: buttery, chewy and chocolatey in every bite. Try making a double batch and freezing half of the dough — you'll be glad you did when you want fresh-baked cookies in minutes.
Dip the measuring spoon in flour before pressing each thumbprint to prevent sticking and ensure a clean crater.
Warm the caramel gently and stir frequently; overheating will make it grainy or too runny.
Press the thumbprint while the cookie is hot right out of the oven and again with a slightly larger spoon to ensure a deep well that holds the caramel.
This nourishing twix thumbprint cookies recipe is sure to be a staple in your kitchen. Enjoy every moist, high protein slice — it is perfect for breakfast or as a wholesome snack any time.
Yes — you can freeze the raw dough balls on a tray until solid, then transfer to a bag. Bake from frozen, adding 1–2 minutes to the bake time and press thumbprints immediately after baking.
Store in an airtight container at room temperature for up to 4 days or refrigerate for firmer caramel. For longer storage, freeze up to 3 months (without chocolate drizzle).
This Twix Thumbprint Cookies recipe makes perfectly juicy, tender, and flavorful steak every time! Serve with potatoes and a side salad for an unforgettable dinner in under 30 minutes.
Preheat oven to 350° F (180° C). Line baking sheets with parchment paper or silicone mats and set aside.
In a stand mixer, beat 1 cup softened salted butter with 1 1/4 cups powdered sugar until light and fluffy. Add 1 egg and 3 teaspoons vanilla, mixing until combined.
Sift together 2 1/2 cups cake flour, 1 teaspoon baking powder and 1/2 teaspoon salt. Add to wet mixture on low speed until a soft dough forms.
Let dough rest 5 minutes. Portion into 1 tablespoon balls, place 1 inch apart, press center with a floured 1/2 teaspoon to create a crater, bake 8–10 minutes.
Right after baking, press centers again using a 1-tablespoon spoon to deepen the well; allow cookies to cool completely on the sheet.
Melt 30 soft caramels with 1 tablespoon milk in 30-second microwave bursts until smooth. Spoon caramel into cooled cookie centers and chill to set if desired.
Melt 1/2 cup milk chocolate wafers and drizzle or pipe over the caramel. Let chocolate set before serving.
Last Step: Please leave a rating and comment letting us know how you liked this recipe! This helps our business to thrive and continue providing free, high-quality recipes for you.
Leave a comment & rating below or tag
@gusteen on social media!

Ultra-fudgy brownies crowned with melty marshmallows and a glossy cocoa icing. A nostalgic crowd-pleaser that slices cleanly and disappears fast.

Buttery shortbread crust meets gooey brown-sugar pecan filling in these quick, crowd-pleasing bars, prepped in just 10 minutes.

Ultra-smooth pumpkin cheesecake with warm spice, sturdy graham crust, and a foolproof, crack-free bake. Perfect with caramel and whipped cream.
Leave a comment & rating below or tag @gusteen on social media!
Enjoyed this recipe? Share it with friends and family, and don't forget to leave a review!
This recipe looks amazing! Can't wait to try it.
Comments are stored locally in your browser. Server comments are displayed alongside your local comments.

Join to receive our email series which contains a round-up of some of our quick and easy family favorite recipes.
